> ## Documentation Index
> Fetch the complete documentation index at: https://docs.xano.com/llms.txt
> Use this file to discover all available pages before exploring further.

# Building Visually with the Canvas View

> Build a workflow without code using the Canvas View

## What is the Canvas View?

The Canvas View is designed to show you your workflow at a high level, in more of a story-based view. It's fully featured for any editing or iteration, but also easier to understand for non-technical members of your team.

## What does the Canvas View look like?

The Canvas displays your entire workflow as a series of nodes, each representing a step in your logic. Some nodes represent major sections, like Inputs or Response, while others represent specific functions, such as fetching a database record or manipulating data. This view makes it easy to understand and modify your logic visually.

## Navigating the Canvas

Canvas View navigation is fully mouse driven and was designed to feel intuitive and natural.

<Frame caption="Click and drag anywhere to pan around the canvas">
  <video id="visualcanvas-navigating" autoPlay muted loop playsInline preload="auto" className="w-full aspect-video rounded-xl" src="https://mintcdn.com/xano-997cb9ee/4xy0p5vdU3hAE_8U/images/visualcanvas-navigating.webm?fit=max&auto=format&n=4xy0p5vdU3hAE_8U&q=85&s=0264d0c9a36227c8d72a79c7b2b6d321" data-path="images/visualcanvas-navigating.webm" />
</Frame>

<br />

<Frame caption="Scroll with your mouse wheel to zoom in and out">
  <video id="visualcanvas-zooming" autoPlay muted loop playsInline preload="auto" className="w-full aspect-video rounded-xl" src="https://mintcdn.com/xano-997cb9ee/4xy0p5vdU3hAE_8U/images/visualcanvas-zooming.webm?fit=max&auto=format&n=4xy0p5vdU3hAE_8U&q=85&s=1e307073e0c9d9baf74393f2ce179a80" data-path="images/visualcanvas-zooming.webm" />
</Frame>

<br />

<Frame caption="Use the mini navigation window to quickly move around or jump to different sections">
  <video id="visualcanvas-mininav" autoPlay muted loop playsInline preload="auto" className="w-full aspect-video rounded-xl" src="https://mintcdn.com/xano-997cb9ee/4xy0p5vdU3hAE_8U/images/visualcanvas-mininav.webm?fit=max&auto=format&n=4xy0p5vdU3hAE_8U&q=85&s=caf19a59e86166d1326b097763b194b4" data-path="images/visualcanvas-mininav.webm" />
</Frame>

You can reposition nodes by clicking and dragging them. The connecting lines between nodes will automatically adjust, so you never lose sight of your overall flow.

<Frame caption="Reposition nodes by clicking and dragging them">
  <video id="visualcanvas-nodes" autoPlay muted loop playsInline preload="auto" className="w-full aspect-video rounded-xl" src="https://mintcdn.com/xano-997cb9ee/4xy0p5vdU3hAE_8U/images/visualcanvas-nodes.webm?fit=max&auto=format&n=4xy0p5vdU3hAE_8U&q=85&s=3e18bd2a83c1f6c57e14c6abf41fb3ad" data-path="images/visualcanvas-nodes.webm" />
</Frame>

<br />

If your layout gets messy, click <span class="ui-bubble"><Icon icon="diagram-project" /></span>  Auto Layout in the bottom-right corner to reorganize everything into a clean, standard structure. That same panel also includes zoom controls, letting you quickly fit the entire workflow into view.

<Frame caption="Use Auto Layout to reorganize your workflow">
  <iframe src="https://demo.arcade.software/4pDkM4R0bLaSQyFH0Y8C?embed" title="https://demo.arcade.software/4pDkM4R0bLaSQyFH0Y8C?embed" allowFullScreen allow="clipboard-write" class="contentkit-webframe" width="1000" height="500" />
</Frame>

For additional clarity, you can use the AI description generation feature to automatically create plain-language explanations of each function in your workflow. This is especially useful when sharing complex logic with non-technical team members.

<Frame caption="Use Enhance Descriptions to create plain-language explanations of each function in your workflow">
  <iframe src="https://demo.arcade.software/O6aLR8X2TdEgvf3g7FCD?embed" title="https://demo.arcade.software/O6aLR8X2TdEgvf3g7FCD?embed" allowFullScreen allow="clipboard-write" class="contentkit-webframe" width="1000" height="500" />
</Frame>

## Building with the Canvas View

To edit an existing node, simply click on it.

For function nodes, a side panel will appear where you can configure its options.
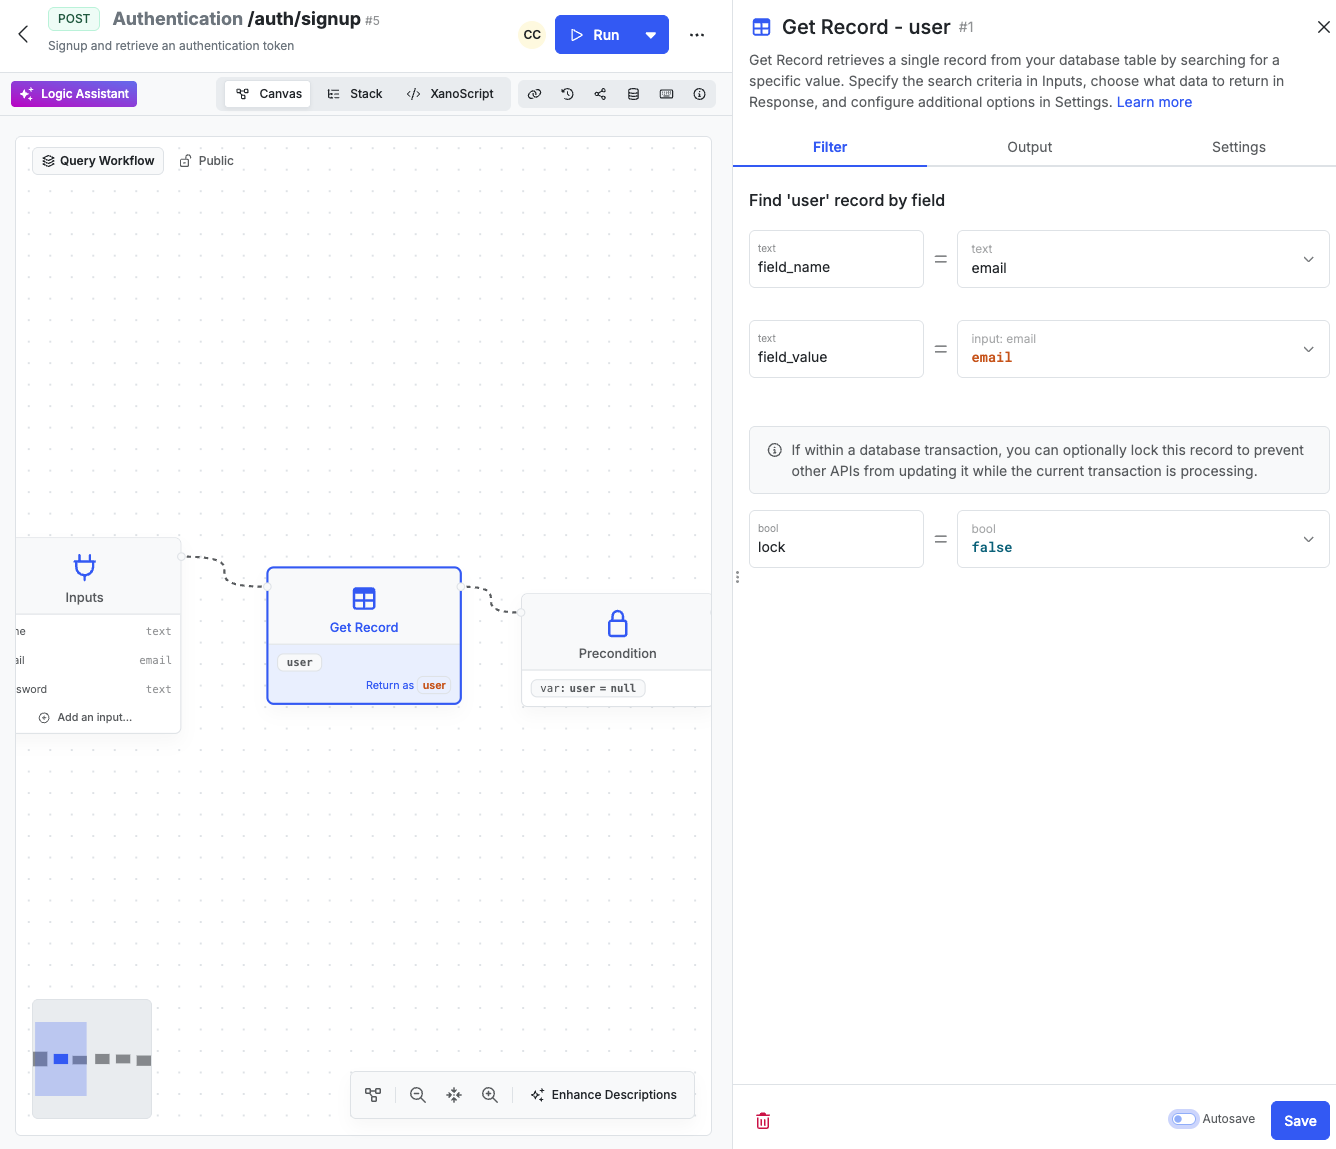
<Frame caption="Editing a function node by clicking on it and accessing the function panel">
  <img src="https://mintcdn.com/xano-997cb9ee/4xy0p5vdU3hAE_8U/images/visual-canvas-20251010-142142.png?fit=max&auto=format&n=4xy0p5vdU3hAE_8U&q=85&s=1eb5a040a271734401f62b48eec07986" alt="visual-canvas-20251010-142142" width="1336" height="1149" data-path="images/visual-canvas-20251010-142142.png" />
</Frame>

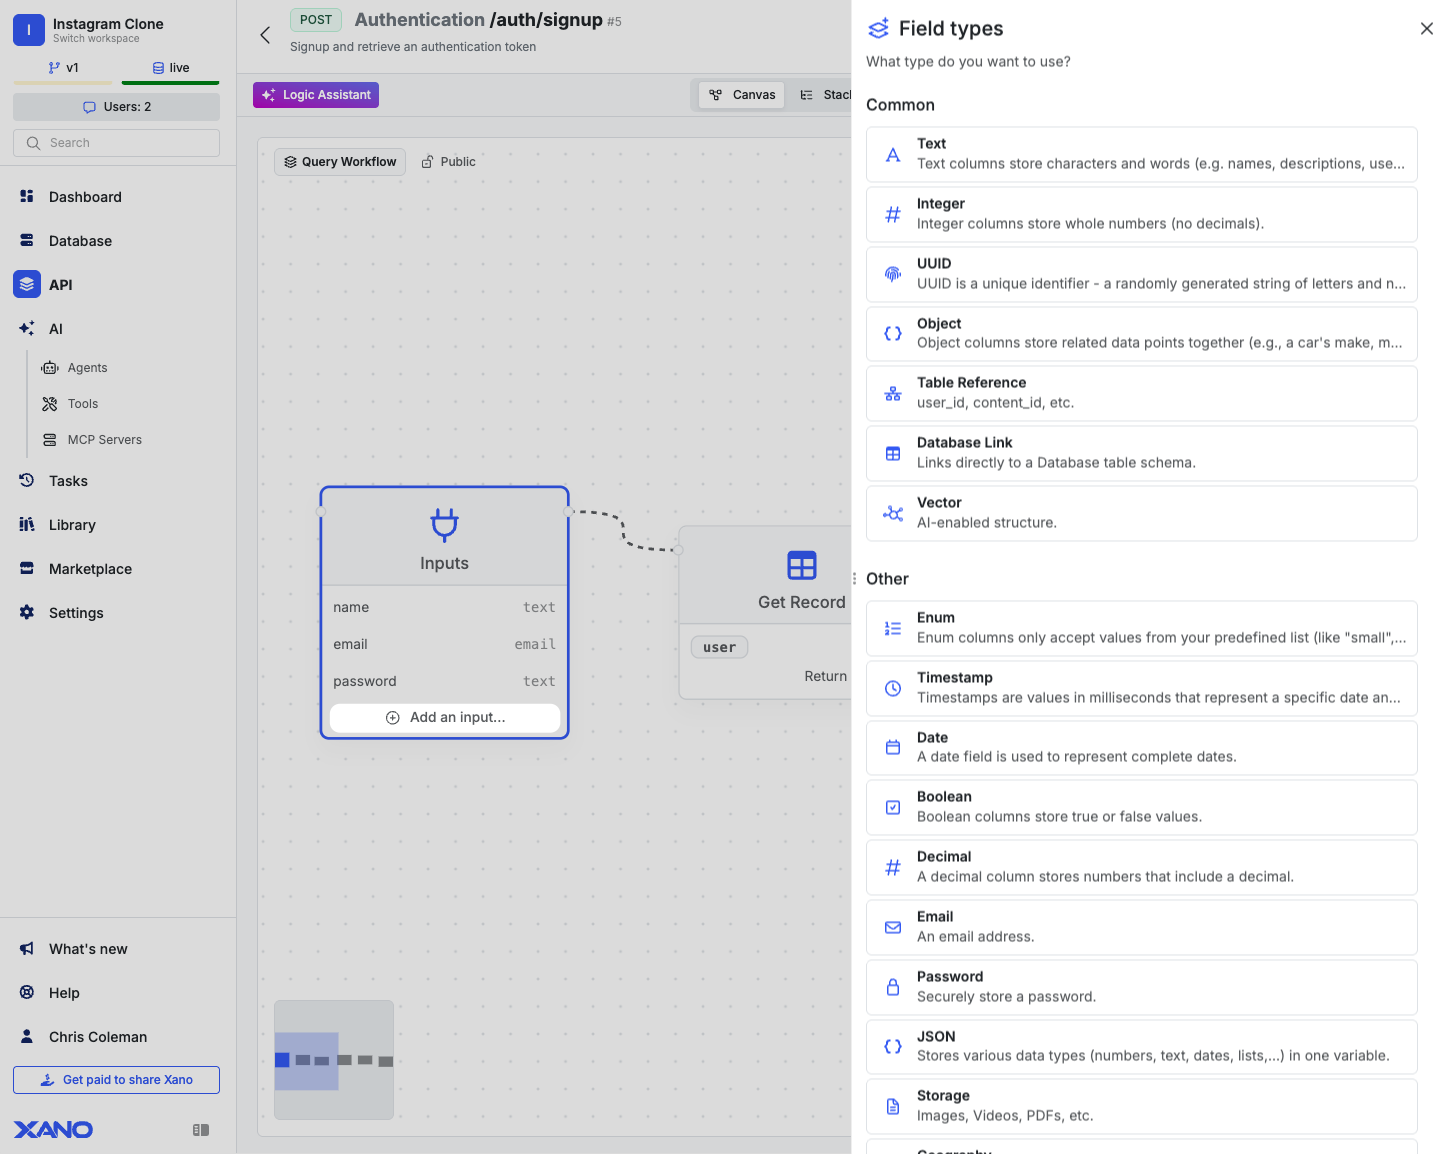
For Inputs and Response, you can edit them directly inside the node by clicking the <span class="ui-bubble"><Icon icon="circle-plus" /> Add an Input</span> or <span class="ui-bubble"><Icon icon="circle-plus" /> Add a Response</span> buttons.

<Frame caption="Adding to inputs or responses">
  <img src="https://mintcdn.com/xano-997cb9ee/4xy0p5vdU3hAE_8U/images/visual-canvas-20251010-142356.png?fit=max&auto=format&n=4xy0p5vdU3hAE_8U&q=85&s=91bc36b14795d9fdeaaa789d8ea8b76b" alt="visual-canvas-20251010-142356" width="1434" height="1154" data-path="images/visual-canvas-20251010-142356.png" />
</Frame>

To add new steps, hover over a node and click the <span class="ui-bubble"><Icon icon="circle-plus" /></span> icon to insert a new function after it. You can also hover over the connecting lines to insert a function at that point in the flow.
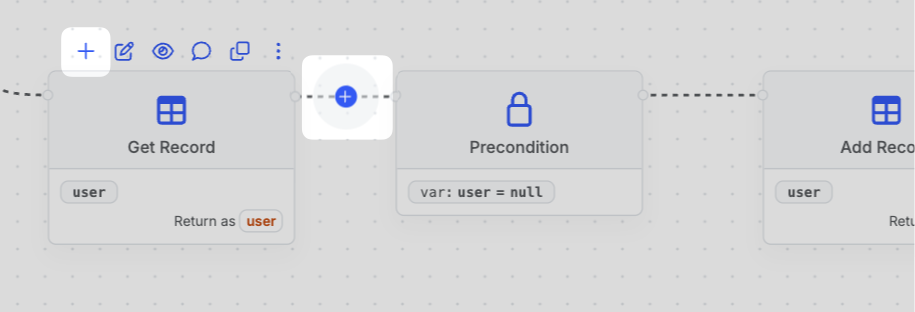
<Frame caption="Adding new functions">
  <img src="https://mintcdn.com/xano-997cb9ee/4xy0p5vdU3hAE_8U/images/visual-canvas-20251010-142619.png?fit=max&auto=format&n=4xy0p5vdU3hAE_8U&q=85&s=b10128d1ee5892681f4293652261ace3" alt="visual-canvas-20251010-142619" width="915" height="312" data-path="images/visual-canvas-20251010-142619.png" />
</Frame>

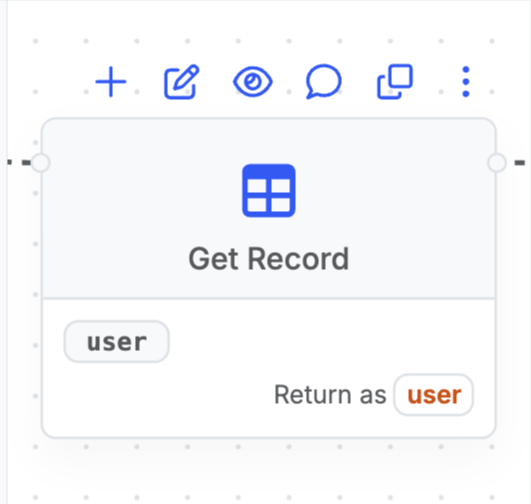
Hovering over any node reveals additional actions such as <Icon icon="eye" /> disabling, <Icon icon="copy" /> cloning, and <Icon icon="x" /> deleting that step.

<Frame caption="Node controls">
  <img src="https://mintcdn.com/xano-997cb9ee/4xy0p5vdU3hAE_8U/images/visual-canvas-20251010-142714.png?fit=max&auto=format&n=4xy0p5vdU3hAE_8U&q=85&s=38b66d12af2613bd70c654b963f4a419" alt="visual-canvas-20251010-142714" width="531" height="504" data-path="images/visual-canvas-20251010-142714.png" />
</Frame>

## What's next?

<Card title="Deployment" icon="rocket" href="/deployment" horizontal>
  Learn how deploying your changes to production works
</Card>

<Card title="Building Logic - Core Components" icon="cube" href="/building/logic/core-components" horizontal>
  Learn about the core components of building logic
</Card>

<Card title="Check out another way to build visually" icon="share-nodes" href="/build-visually/function-stack" horizontal>
  Learn about the Function Stack, a visual first but more code-like building experience
</Card>