> ## Documentation Index
> Fetch the complete documentation index at: https://docs.xano.com/llms.txt
> Use this file to discover all available pages before exploring further.
# VS Code + AI
> Install the Xano Developer MCP in VS Code with GitHub Copilot or any AI CLI agent
export const YouTube = props => {
const {id, url, title = "YouTube video player", maxWidth = 820, start, className = ""} = props || ({});
const extractId = value => {
if (!value) return "";
if ((/^[A-Za-z0-9_-]{6,}$/).test(value) && !value.includes("/")) {
return value;
}
try {
const u = new URL(value);
if (u.hostname.includes("youtu.be")) {
return u.pathname.split("/").filter(Boolean)[0] || "";
}
const v = u.searchParams.get("v");
if (v) return v;
const parts = u.pathname.split("/").filter(Boolean);
const idx = parts.findIndex(p => ["embed", "shorts", "live", "v"].includes(p));
if (idx !== -1 && parts[idx + 1]) return parts[idx + 1];
return parts[parts.length - 1] || "";
} catch {
const m = value.match(/[A-Za-z0-9_-]{11}/);
return m ? m[0] : "";
}
};
const videoId = extractId(id || url);
if (!videoId) return null;
const params = new URLSearchParams();
if (start) params.set("start", String(start));
const query = params.toString();
const src = `https://www.youtube.com/embed/${videoId}${query ? `?${query}` : ""}`;
const style = typeof maxWidth === "number" ? {
maxWidth: `${maxWidth}px`,
margin: "16px 0"
} : {
maxWidth,
margin: "16px 0"
};
return
;
};
export const InstallButton = props => {
const {href, src, alt = "", height = 32, newTab = false} = props || ({});
const target = newTab ? "_blank" : undefined;
const rel = newTab ? "noopener noreferrer" : undefined;
return
 ;
};
export const BrowserFrame = props => {
const {url = "xano.run", maxWidth = 820, className = "", lightSrc, darkSrc, alt = "", children} = props || ({});
const style = typeof maxWidth === "number" ? {
maxWidth: `${maxWidth}px`,
margin: "16px 0"
} : {
maxWidth,
margin: "16px 0"
};
const hasSwapImages = Boolean(lightSrc && darkSrc);
return
;
};
export const BrowserFrame = props => {
const {url = "xano.run", maxWidth = 820, className = "", lightSrc, darkSrc, alt = "", children} = props || ({});
const style = typeof maxWidth === "number" ? {
maxWidth: `${maxWidth}px`,
margin: "16px 0"
} : {
maxWidth,
margin: "16px 0"
};
const hasSwapImages = Boolean(lightSrc && darkSrc);
return
{hasSwapImages ? <>


: children}
;
};
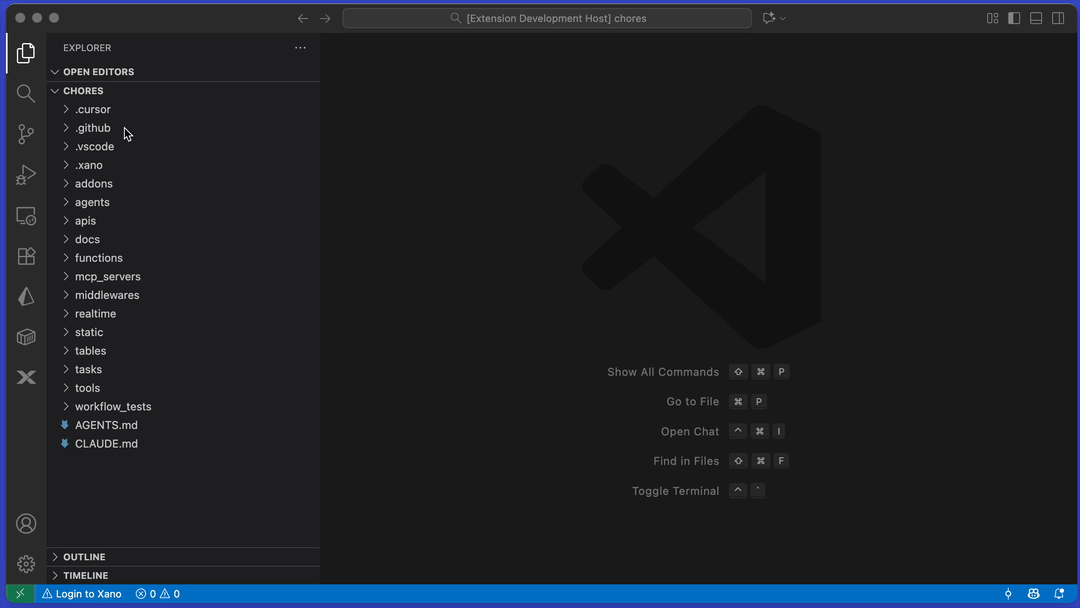
This page covers using the Xano Developer MCP inside VS Code. The primary path is **GitHub Copilot**, since it's the AI assistant built into VS Code itself. Other AI CLI agents (Claude Code, Codex, Gemini CLI) work just as well from VS Code's integrated terminal — quick-setup instructions for each are at the bottom of the page.
## Prerequisites
* [Node.js](https://nodejs.org/) 18 or later
* [VS Code](https://code.visualstudio.com/) with the [GitHub Copilot](https://marketplace.visualstudio.com/items?itemName=GitHub.copilot) and [GitHub Copilot Chat](https://marketplace.visualstudio.com/items?itemName=GitHub.copilot-chat) extensions installed
* An active GitHub Copilot subscription
## Installation
### 1. Install the MCP Server
**Method 1: Click to install**
**Method 2: Manual install**
1. Open the Command Palette by pressing ⌘ / Ctrl + P and type MCP. Click **MCP: Add Server**
2. Choose **Command (stdio)** and provide the command `npx -y @xano/developer-mcp`
3. Give the server a name, such as *Xano Developer MCP*
4. Choose whether to enable the MCP in the open workspace only, or for the entire profile
### 2. Install the XanoScript Language Server extension
The Language Server extension is required for the best AI-assisted XanoScript experience — it provides code completion, syntax highlighting, and inline diagnostics that every AI tool on this page (Copilot, Claude Code, Codex, Gemini CLI) reads from.
Install it from the [VS Code Marketplace](https://marketplace.visualstudio.com/items?itemName=xano.xanoscript-language-server).
### 3. Verify Setup
In Copilot Chat, ask:
> "What version of the Xano Developer MCP is installed?"
Copilot should call `mcp_version` and return the current version number.
 ## Using Copilot
The Developer MCP lets Copilot write and validate XanoScript using your local Xano workspace as context.
Before asking Copilot to make changes, pull a workspace locally with the Xano CLI. If you haven't installed and authenticated with the CLI yet, [do that now](/xano-cli/get-started) before continuing. Then select or create a workspace and run:
```bash theme={null}
xano workspace pull
```
Once your workspace is available locally, you can ask Copilot to help with XanoScript tasks, from building a complete workspace:
```bash theme={null}
Create a small backend for advisor client intake. It should include a `clients` table with fields for name, email, phone, risk tolerance, investment objective, and advisor notes. Add API endpoints to create a client, list clients, get a single client by ID, and update client details. Include validation for required fields and valid risk tolerance values.
```
Copilot creates a small advisor client intake backend for storing and managing client profile details.
The generated backend includes a `clients` table with fields for the client's name, email, phone number, risk tolerance, investment objective, advisor notes, and timestamps. The email field is stored as a unique value, so duplicate client records cannot be created with the same email address.
It also adds a `clients` API group with endpoints to:
* Create a new client
* List clients with pagination and sorting
* Get a single client by ID
* Update an existing client
The generated XanoScript includes validation for required fields, supported risk tolerance values, duplicate email addresses, and missing client records. Before pushing the changes, Copilot validates the generated XanoScript with the Developer MCP and the XanoScript Language Server, and fixes any issues it finds.
You can also ask it to expand or iterate on existing backends.
```bash theme={null}
Add a follow-up task feature to the advisor client intake backend. Create a `client_tasks` table linked to clients, with fields for task title, due date, status, and notes. Add API endpoints to create a task for a client, list all tasks for a client, and mark a task as complete.
```
Copilot extends the advisor client intake backend with a follow-up task feature for managing next steps after a client profile is created.
The updated backend keeps the existing `clients` table and API endpoints for creating, listing, retrieving, and updating client records. It also adds a new `client_tasks` table linked to the `clients` table, so each task belongs to a specific client.
The `client_tasks` table includes fields for the related client, task title, due date, status, notes, and timestamps. Task status supports values like `pending`, `in_progress`, and `completed`, making it possible to track where each follow-up task stands.
The backend also adds new API endpoints to:
* Create a follow-up task for a client
* List all follow-up tasks for a client
* Mark a follow-up task as complete
The generated XanoScript includes checks for missing clients, missing task titles, valid task statuses, and missing task records. Before pushing the changes, Copilot validates the updated XanoScript with the Developer MCP and fixes any issues it finds.
Check out the [full example backend](https://github.com/xano-community/client-intake) on Github.
Once you're ready, push the changes to your sandbox so you can review them in the browser before promoting to your live workspace:
```bash theme={null}
xano sandbox push -d ./my-workspace
xano sandbox review
```
`xano sandbox review` opens your sandbox in the browser — verify everything looks right, then promote the changes to production from there.
***
## Using Claude Code, Gemini, Codex, or another CLI
Prefer a CLI agent over Copilot? Each of these runs in VS Code's integrated terminal (`View → Terminal`). Setup is identical to the standalone install — the sections below cover the quick install plus VS Code-specific quirks. Full guides for each agent are linked at the end of every section.
Install the [XanoScript Language Server extension](#2-install-the-xanoscript-language-server-extension) (Step 2 above) before continuing. Every CLI agent on this page depends on it for inline syntax help and diagnostics — don't skip it.
### Claude Code
In the integrated terminal:
```bash theme={null}
claude mcp add xano -- npx -y @xano/developer-mcp
```
Add `--scope user` to make the server available across every project rather than just the open workspace.
→ Full guide: [Claude Code](/developer-mcp/clients/claude-code)
### Codex
Install Codex if you don't already have it, then add the MCP — both run in the integrated terminal:
```bash theme={null}
npm install -g @openai/codex
codex mcp add xano -- npx -y @xano/developer-mcp
```
→ Full guide: [Codex](/developer-mcp/clients/codex)
### Gemini CLI
Edit `~/.gemini/settings.json` (user-wide) or `.gemini/settings.json` at the workspace root (project-only) and add:
```json theme={null}
{
"mcpServers": {
"xano": {
"command": "npx",
"args": ["-y", "@xano/developer-mcp"]
}
}
}
```
Then start `gemini` from the integrated terminal.
→ Full guide: [Gemini CLI](/developer-mcp/clients/gemini-cli)
***
## FAQ & Troubleshooting
Make sure you installed the [XanoScript Language Server](https://marketplace.visualstudio.com/items?itemName=xano.xanoscript-language-server) extension. It applies to every AI tool on this page.
Confirm the `xano` MCP server is registered and connected:
* **Copilot:** check the MCP servers list in VS Code's settings.
* **Claude Code:** run `/mcp` inside a session, or `claude mcp list` in the terminal.
* **Codex:** run `codex mcp list`.
* **Gemini CLI:** run `/mcp` inside a session.
If the server isn't registered, re-run the install step. If it is registered but disconnected, restart the session — newly added servers don't take effect until a fresh start.
1. Did you install the Language Server extension?
2. Did you authenticate with the CLI and pull a workspace (even a new, blank workspace)?
Each tool scopes differently:
* **Copilot:** during MCP install, choose the profile-wide option instead of workspace-only.
* **Claude Code:** add `--scope user` to the install command.
* **Codex:** the `codex mcp add` command registers the server user-wide by default.
* **Gemini CLI:** put the `mcpServers` block in `~/.gemini/settings.json` rather than `.gemini/settings.json` at the project root.
***
## What's Next
Explore all 6 tools available in the Developer MCP
Access MCP resources and use the package as an npm library
## Using Copilot
The Developer MCP lets Copilot write and validate XanoScript using your local Xano workspace as context.
Before asking Copilot to make changes, pull a workspace locally with the Xano CLI. If you haven't installed and authenticated with the CLI yet, [do that now](/xano-cli/get-started) before continuing. Then select or create a workspace and run:
```bash theme={null}
xano workspace pull
```
Once your workspace is available locally, you can ask Copilot to help with XanoScript tasks, from building a complete workspace:
```bash theme={null}
Create a small backend for advisor client intake. It should include a `clients` table with fields for name, email, phone, risk tolerance, investment objective, and advisor notes. Add API endpoints to create a client, list clients, get a single client by ID, and update client details. Include validation for required fields and valid risk tolerance values.
```
Copilot creates a small advisor client intake backend for storing and managing client profile details.
The generated backend includes a `clients` table with fields for the client's name, email, phone number, risk tolerance, investment objective, advisor notes, and timestamps. The email field is stored as a unique value, so duplicate client records cannot be created with the same email address.
It also adds a `clients` API group with endpoints to:
* Create a new client
* List clients with pagination and sorting
* Get a single client by ID
* Update an existing client
The generated XanoScript includes validation for required fields, supported risk tolerance values, duplicate email addresses, and missing client records. Before pushing the changes, Copilot validates the generated XanoScript with the Developer MCP and the XanoScript Language Server, and fixes any issues it finds.
You can also ask it to expand or iterate on existing backends.
```bash theme={null}
Add a follow-up task feature to the advisor client intake backend. Create a `client_tasks` table linked to clients, with fields for task title, due date, status, and notes. Add API endpoints to create a task for a client, list all tasks for a client, and mark a task as complete.
```
Copilot extends the advisor client intake backend with a follow-up task feature for managing next steps after a client profile is created.
The updated backend keeps the existing `clients` table and API endpoints for creating, listing, retrieving, and updating client records. It also adds a new `client_tasks` table linked to the `clients` table, so each task belongs to a specific client.
The `client_tasks` table includes fields for the related client, task title, due date, status, notes, and timestamps. Task status supports values like `pending`, `in_progress`, and `completed`, making it possible to track where each follow-up task stands.
The backend also adds new API endpoints to:
* Create a follow-up task for a client
* List all follow-up tasks for a client
* Mark a follow-up task as complete
The generated XanoScript includes checks for missing clients, missing task titles, valid task statuses, and missing task records. Before pushing the changes, Copilot validates the updated XanoScript with the Developer MCP and fixes any issues it finds.
Check out the [full example backend](https://github.com/xano-community/client-intake) on Github.
Once you're ready, push the changes to your sandbox so you can review them in the browser before promoting to your live workspace:
```bash theme={null}
xano sandbox push -d ./my-workspace
xano sandbox review
```
`xano sandbox review` opens your sandbox in the browser — verify everything looks right, then promote the changes to production from there.
***
## Using Claude Code, Gemini, Codex, or another CLI
Prefer a CLI agent over Copilot? Each of these runs in VS Code's integrated terminal (`View → Terminal`). Setup is identical to the standalone install — the sections below cover the quick install plus VS Code-specific quirks. Full guides for each agent are linked at the end of every section.
Install the [XanoScript Language Server extension](#2-install-the-xanoscript-language-server-extension) (Step 2 above) before continuing. Every CLI agent on this page depends on it for inline syntax help and diagnostics — don't skip it.
### Claude Code
In the integrated terminal:
```bash theme={null}
claude mcp add xano -- npx -y @xano/developer-mcp
```
Add `--scope user` to make the server available across every project rather than just the open workspace.
→ Full guide: [Claude Code](/developer-mcp/clients/claude-code)
### Codex
Install Codex if you don't already have it, then add the MCP — both run in the integrated terminal:
```bash theme={null}
npm install -g @openai/codex
codex mcp add xano -- npx -y @xano/developer-mcp
```
→ Full guide: [Codex](/developer-mcp/clients/codex)
### Gemini CLI
Edit `~/.gemini/settings.json` (user-wide) or `.gemini/settings.json` at the workspace root (project-only) and add:
```json theme={null}
{
"mcpServers": {
"xano": {
"command": "npx",
"args": ["-y", "@xano/developer-mcp"]
}
}
}
```
Then start `gemini` from the integrated terminal.
→ Full guide: [Gemini CLI](/developer-mcp/clients/gemini-cli)
***
## FAQ & Troubleshooting
Make sure you installed the [XanoScript Language Server](https://marketplace.visualstudio.com/items?itemName=xano.xanoscript-language-server) extension. It applies to every AI tool on this page.
Confirm the `xano` MCP server is registered and connected:
* **Copilot:** check the MCP servers list in VS Code's settings.
* **Claude Code:** run `/mcp` inside a session, or `claude mcp list` in the terminal.
* **Codex:** run `codex mcp list`.
* **Gemini CLI:** run `/mcp` inside a session.
If the server isn't registered, re-run the install step. If it is registered but disconnected, restart the session — newly added servers don't take effect until a fresh start.
1. Did you install the Language Server extension?
2. Did you authenticate with the CLI and pull a workspace (even a new, blank workspace)?
Each tool scopes differently:
* **Copilot:** during MCP install, choose the profile-wide option instead of workspace-only.
* **Claude Code:** add `--scope user` to the install command.
* **Codex:** the `codex mcp add` command registers the server user-wide by default.
* **Gemini CLI:** put the `mcpServers` block in `~/.gemini/settings.json` rather than `.gemini/settings.json` at the project root.
***
## What's Next
Explore all 6 tools available in the Developer MCP
Access MCP resources and use the package as an npm library