> ## Documentation Index
> Fetch the complete documentation index at: https://docs.xano.com/llms.txt
> Use this file to discover all available pages before exploring further.
# Building Visually
> A guide to using Xano's visual builder to inspect, validate, and iterate on your backend workflows.
This guide walks you through running a pre-built signup endpoint, inspecting the steps, and making a small modification to send a welcome email to new users. Xano gives you a `user` table and default `authentication` APIs out of the box, and we'll use those here.
Navigate to API in the sidebar, choose the Authentication group, and select your auth/signup endpoint.
Click Run in the top-right corner.
Enter a name, email, and a password to create a new user. You'll use this later on, so make sure to remember the credentials you enter here. Click Run in the lower-right corner to execute the request.
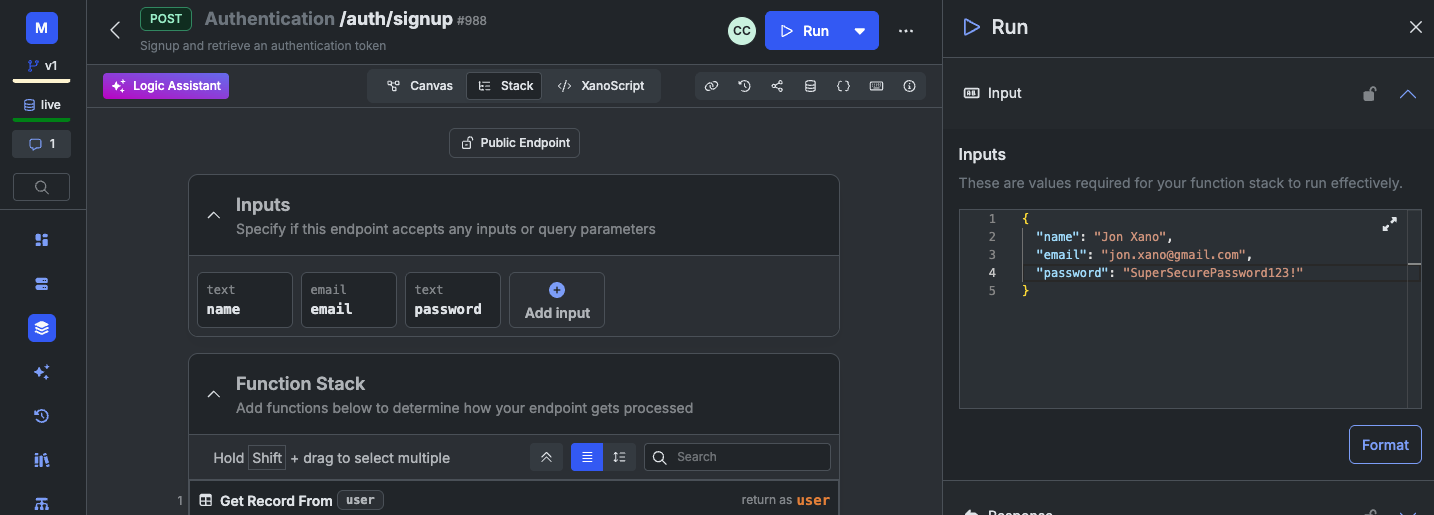 If all goes well, you should see a successful response with an
authentication token
returned.
If all goes well, you should see a successful response with an
authentication token
returned.
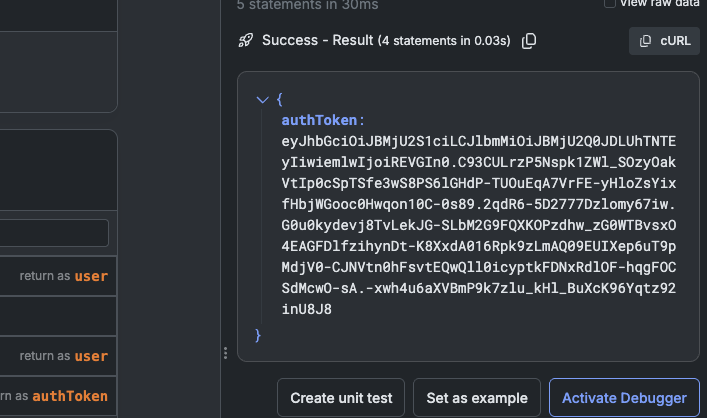 The visual builder has two different views: **Canvas** and **Stack**. Canvas presents a node-style view of the steps in your endpoint, while Stack presents a linear, step-by-step list of the same information, more similar to traditional code.
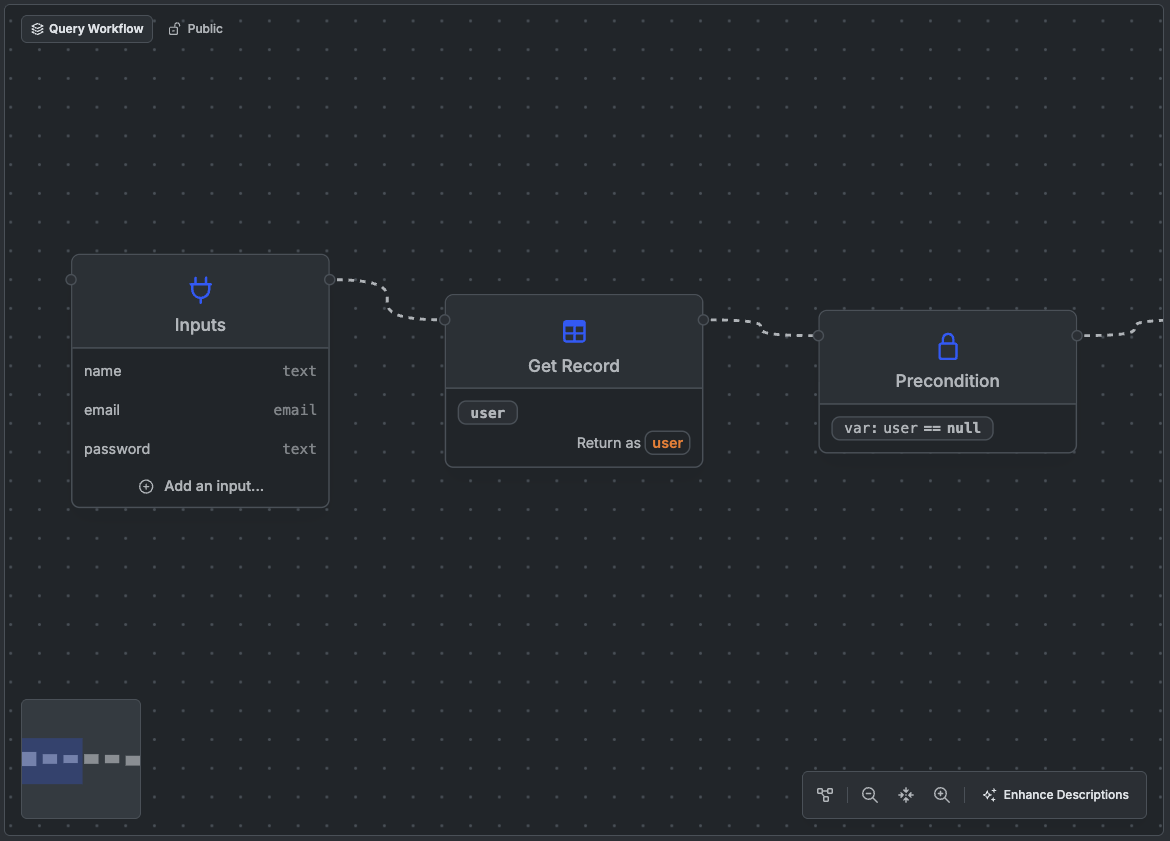
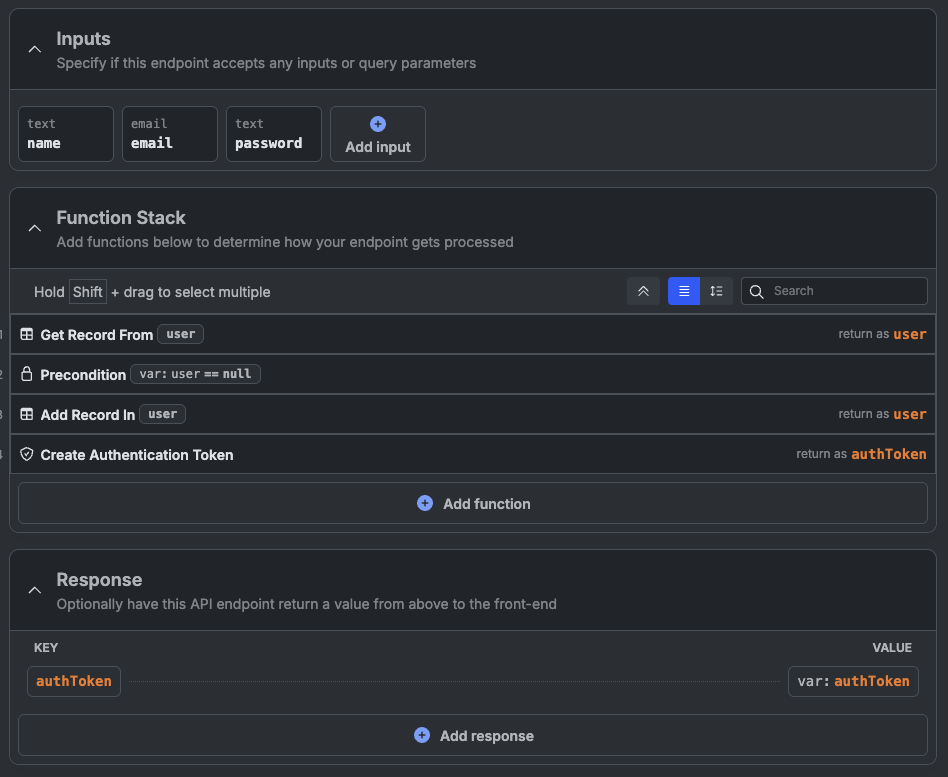 Click on a step to see more details about what it does and how it's configured.
Let's add a step to send a welcome email after signup. We'll use the **Send Email** function for this.
Click the + Add Step button at the bottom of the stack view, or in between the Create Authentication Token step and the Response in the canvas view.
Click on a step to see more details about what it does and how it's configured.
Let's add a step to send a welcome email after signup. We'll use the **Send Email** function for this.
Click the + Add Step button at the bottom of the stack view, or in between the Create Authentication Token step and the Response in the canvas view.
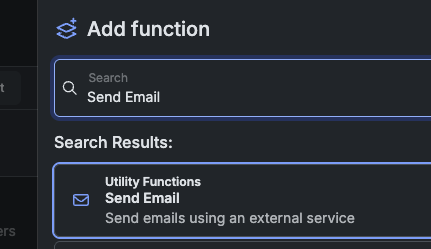
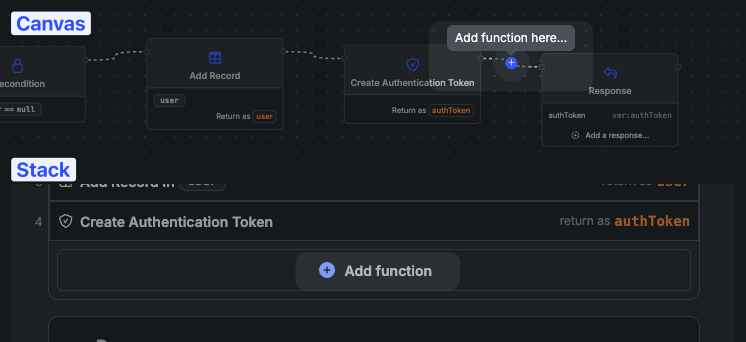 Select the **Send Email** function.
 Add a subject and a body for the email. Xano includes free access to Resend for development and testing (up to 100 emails), limited to the email address you signed up for Xano with.
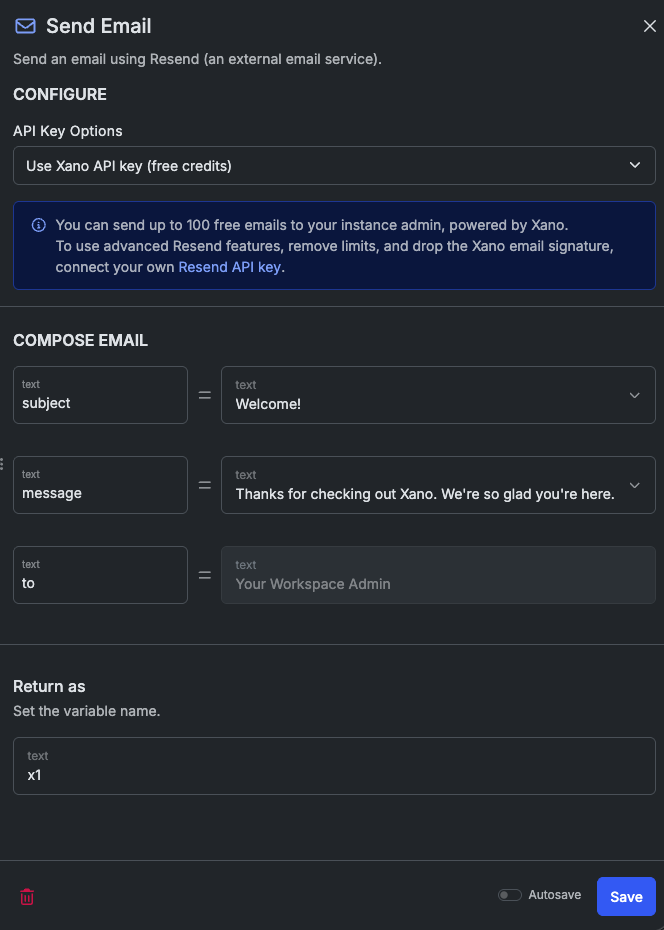 Click Save to save the step.
Run the signup endpoint again with a different email address. You should receive a welcome email shortly after the run completes.
After a run, open the Timing dropdown to view step timing, output, inputs, and variables.
Click the > next to the first Get Record step. We can see the first Get Record function returned `null`, meaning that the user didn't already exist.
Click Save to save the step.
Run the signup endpoint again with a different email address. You should receive a welcome email shortly after the run completes.
After a run, open the Timing dropdown to view step timing, output, inputs, and variables.
Click the > next to the first Get Record step. We can see the first Get Record function returned `null`, meaning that the user didn't already exist.
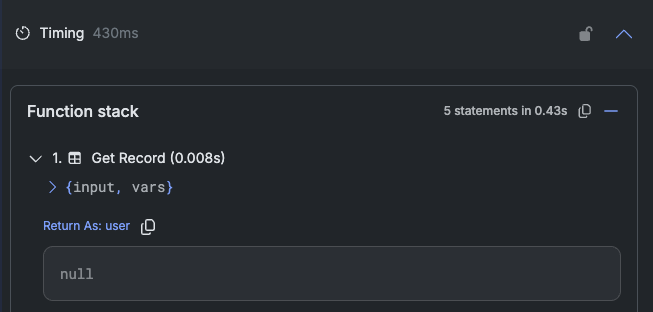 Try to register the same user again to see how the output changes.
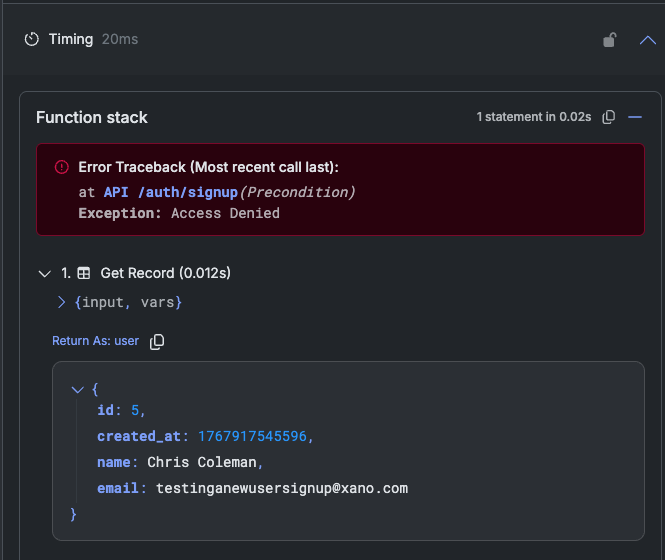 Expand the `input` and `vars` sections for each step to see how the data changes throughout execution.
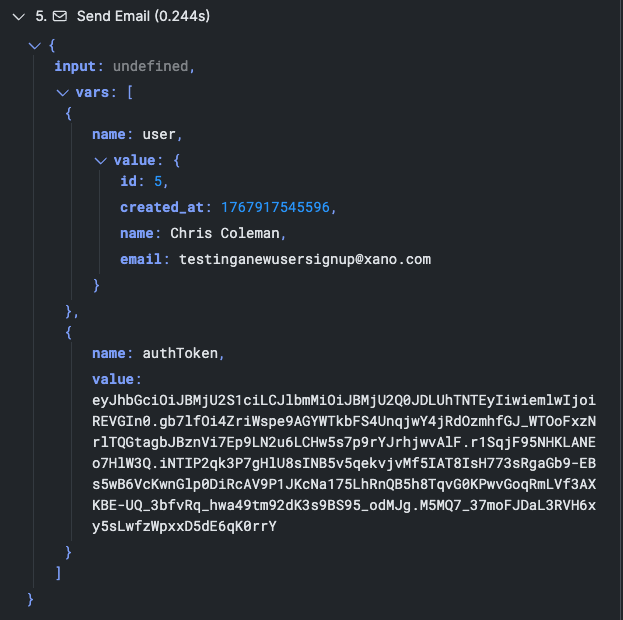 Xano will automatically hide information labeled as sensitive, such as password fields, in the run panel.
Click the dropdown in the upper-right corner and choose Publish Now. This immediately deploys your changes to the live API.
Click to copy the endpoint URL.
Take it over to your favorite API testing tool, like [Postman](https://www.postman.com/), [Insomnia](https://www.insomnia.rest), or [Bruno](https://www.usebruno.com). Send a `POST` request to the signup endpoint with the required parameters (name, email, password) in the body.
You should see a successful response, just like in Xano, and have received another welcome email.
## Troubleshooting
Click API in the sidebar.
Click the + Create API button in the top-right corner.
Select Authentication
Add the three default API endpoints offered: `/signup`, `/login`, and `/me`
**Error Traceback (Most recent call last):**
at `API /auth/signup(Get Record)`
Exception: Param: field\_value - Missing param: field\_value
> The required parameters were not provided when running the endpoint -- specifically the email. Make sure to enter a name, email, and a password.
**Error Traceback (Most recent call last):**
at `API /auth/signup(Precondition)`
Exception: Access Denied
> The account already exists. Try using a different email address to create a new user.
**Error Traceback (Most recent call last):**
at `API /auth/signup(Add Record)`
Exception: Param: password - Input does not meet minimum length requirement of 8 characters
> Password inputs have some default requirements: at least 8 characters, one uppercase letter, and one number. Make sure your password meets these requirements.
Xano will automatically hide information labeled as sensitive, such as password fields, in the run panel.
Click the dropdown in the upper-right corner and choose Publish Now. This immediately deploys your changes to the live API.
Click to copy the endpoint URL.
Take it over to your favorite API testing tool, like [Postman](https://www.postman.com/), [Insomnia](https://www.insomnia.rest), or [Bruno](https://www.usebruno.com). Send a `POST` request to the signup endpoint with the required parameters (name, email, password) in the body.
You should see a successful response, just like in Xano, and have received another welcome email.
## Troubleshooting
Click API in the sidebar.
Click the + Create API button in the top-right corner.
Select Authentication
Add the three default API endpoints offered: `/signup`, `/login`, and `/me`
**Error Traceback (Most recent call last):**
at `API /auth/signup(Get Record)`
Exception: Param: field\_value - Missing param: field\_value
> The required parameters were not provided when running the endpoint -- specifically the email. Make sure to enter a name, email, and a password.
**Error Traceback (Most recent call last):**
at `API /auth/signup(Precondition)`
Exception: Access Denied
> The account already exists. Try using a different email address to create a new user.
**Error Traceback (Most recent call last):**
at `API /auth/signup(Add Record)`
Exception: Param: password - Input does not meet minimum length requirement of 8 characters
> Password inputs have some default requirements: at least 8 characters, one uppercase letter, and one number. Make sure your password meets these requirements.