This guide walks you through setting up a local XanoScript development workflow using the **Xano CLI** and **Claude Code**. The CLI syncs your workspace to Xano; Claude Code writes the XanoScript.
**Prerequisites:** [Node.js](https://nodejs.org/) 18+, [VS Code](https://code.visualstudio.com/), and [Git](https://git-scm.com/downloads) installed.
1
### Install Claude Code
Install [Claude Code](https://docs.anthropic.com/en/docs/claude-code/overview) — the AI assistant you'll use to write and modify XanoScript locally.
```bash theme={null}
npm install -g @anthropic-ai/claude-code
```
2
### Install the Xano CLI
Install the [Xano CLI](/xano-cli/get-started) globally using npm:
```bash theme={null}
npm install -g @xano/cli
```
3
### Authenticate
Connect the CLI to your Xano account. This opens your browser to log in, then guides you through selecting your instance, workspace, and branch.
```bash theme={null}
xano auth
```
If you don't have a Xano account yet, you can create one for free during this step.
4
### Pull your workspace
Download your workspace as local XanoScript files — this is where Claude Code will read and write changes.
```bash theme={null}
xano workspace pull -d ./my-workspace
```
**Starting fresh?** Create a new workspace first with `xano workspace create "My App"`, then pull it.
We recommend initializing a Git repository in your workspace folder so you can track and review exactly what changed before each push.
5
### Open in VS Code
Open the workspace folder in VS Code, then install the [XanoScript Language Server](https://marketplace.visualstudio.com/items?itemName=xano.xanoscript-language-server) extension. This provides syntax highlighting, inline validation, and autocomplete for `.xs` files — without it, they appear as plain text with no error feedback.
**Already using the full XanoScript extension?** If you want to keep it for push/pull, that's fine — but delete any `agents.md` or other `.md` artifact files it created in your workspace root, as these can conflict with the Developer MCP and confuse AI assistants.
6
### Connect the Developer MCP
In the VS Code terminal, add the [Developer MCP](/developer-mcp/get-started) to your project. This gives Claude Code direct access to XanoScript documentation and real-time code validation — significantly improving the quality of AI-generated XanoScript.
```bash theme={null}
claude mcp add xano -- npx -y @xano/developer-mcp
```
**Install Xano Skills too.** Alongside the MCP, Xano ships two agent skills — `xano-init` for guided workspace setup and `xanoscript-docs-expert` for deep XanoScript reference. Install both into Claude Code globally:
```bash theme={null}
npx skills add xano-inc/xano-developer-mcp -a claude-code -g
```
Skills work with Codex, Cursor, Windsurf, and other agents too. See [Xano Skills](/developer-mcp/get-started#xano-skills) for more options.
7
### Build, review, and push
Launch Claude Code and describe what you want to build:
```bash theme={null}
claude
```
For example:
> Create a notes table with title, content, and is\_archived fields. Then create CRUD API endpoints for notes.
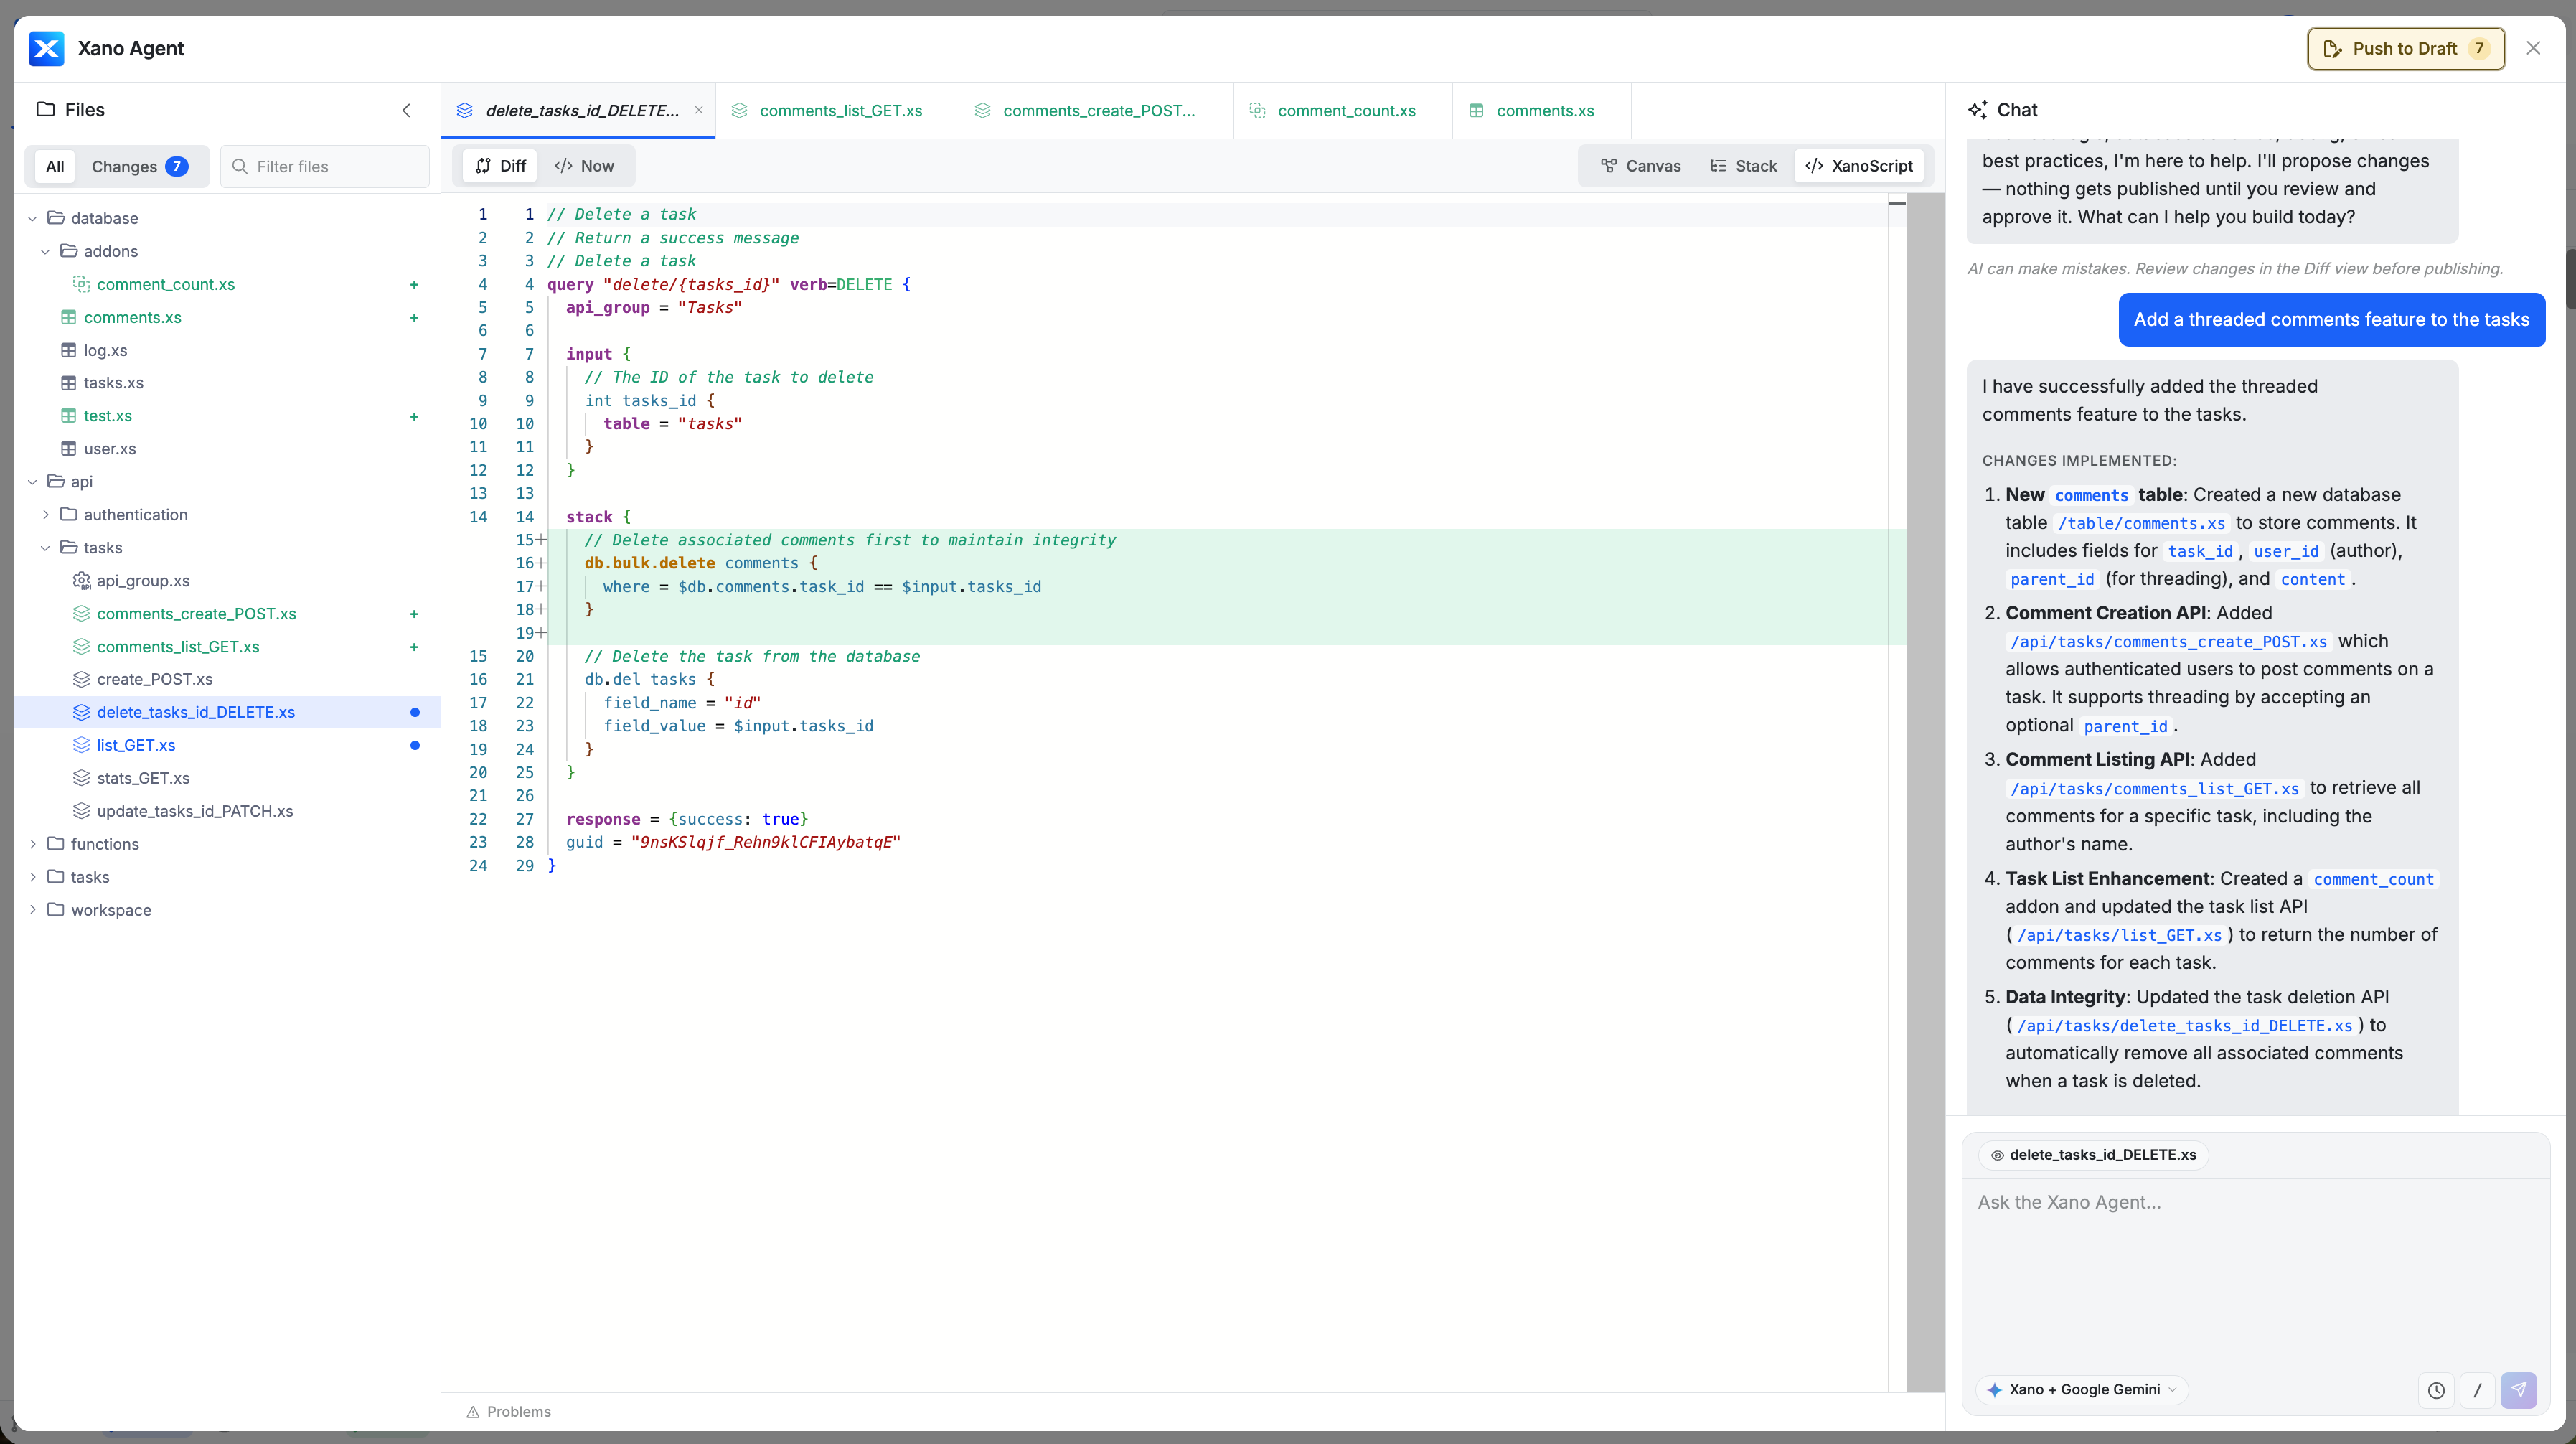
Claude Code will write the XanoScript files directly into your local workspace. When it's done, review what changed in your Git repository before pushing.
We recommend pushing yourself from the terminal rather than asking the AI agent to do it — see [Using the CLI with AI Agents](/xano-cli/get-started#using-the-cli-with-ai-agents) for guidance on keeping control of what gets applied.
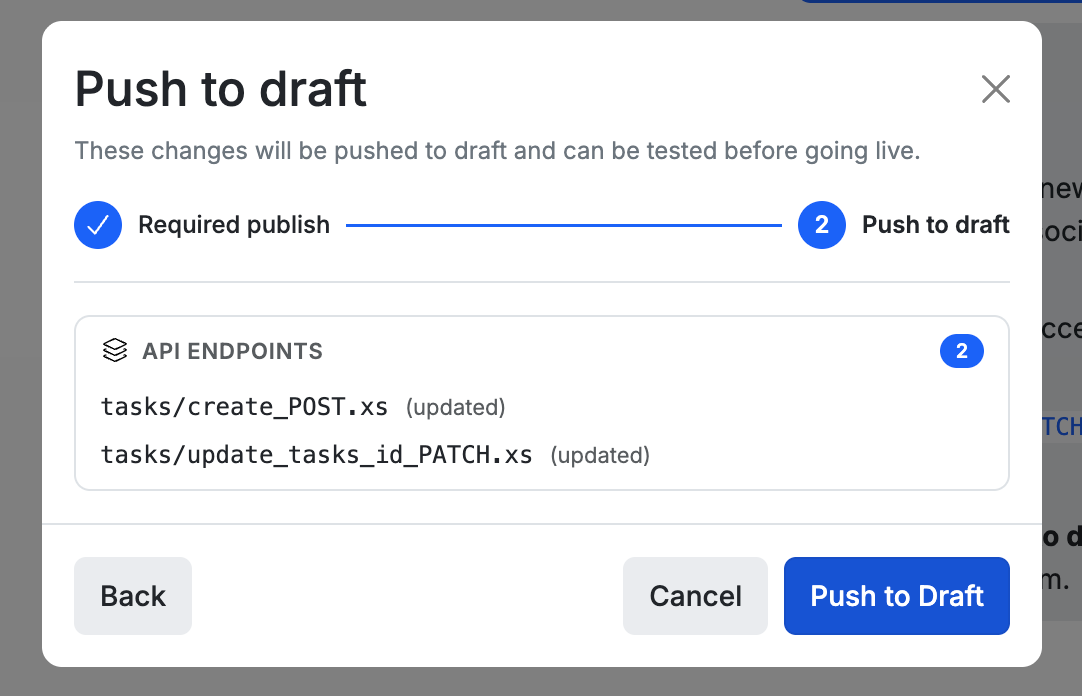
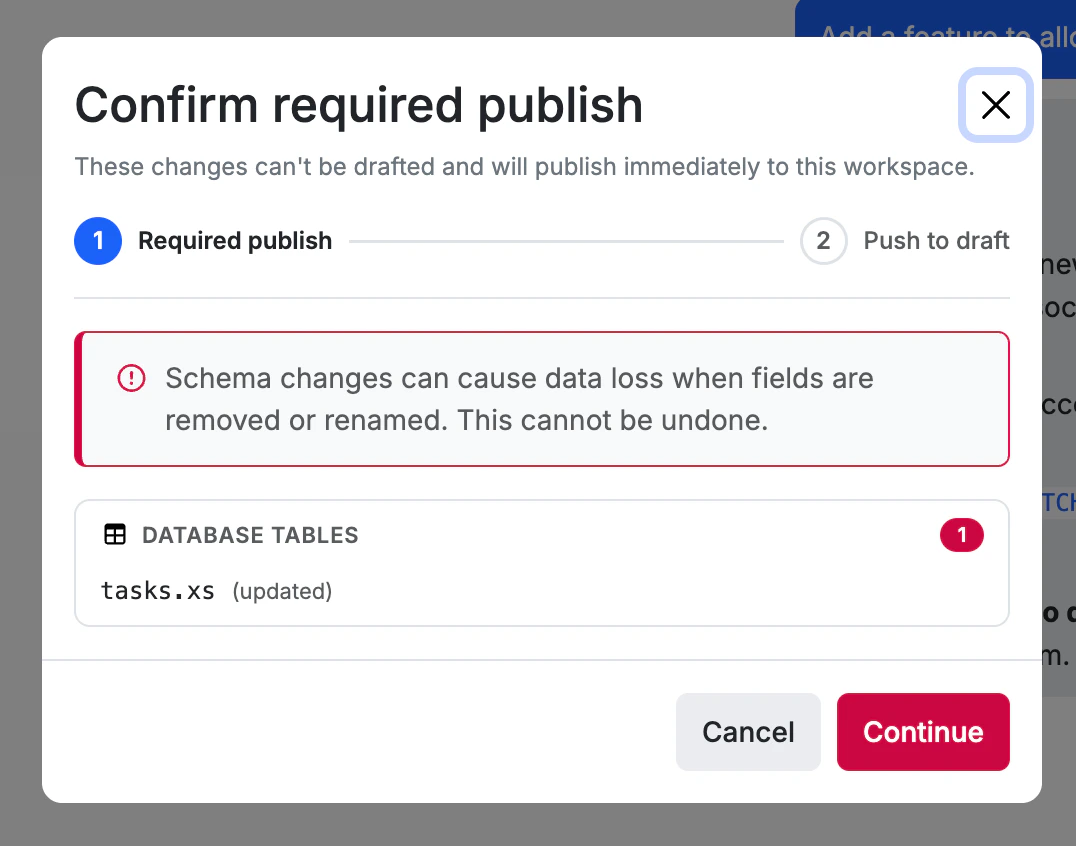
On paid plans, `xano workspace push` is blocked by default — you'll push to a [sandbox](/testing-debugging/sandbox) instead. The sandbox spins up an isolated ephemeral environment where you can inspect, test, and review a full diff before anything touches your workspace:
```bash theme={null}
xano sandbox push -d ./my-workspace # push changes to an isolated sandbox
xano sandbox preview # open the sandbox to review and test
```
From the sandbox preview, click **Review & Push** to see a diff of all changes, choose your target branch, and deploy when ready.
**On a free plan?** You can push directly with `xano workspace push -d ./my-workspace`. Use `--dry-run` to preview the impact without applying anything.
Work on a [development branch](/xano-cli/workspaces-and-branches#create-a-branch) to keep your changes separate from the live branch, or use a **secondary workspace** as your development environment to keep your data schema isolated before promoting to production.
## Git works like it always has
Your workspace is plain files on disk. `git init`, commit, branch, open PRs — everything you already do. Xano's CLI push/pull fits right into your existing Git workflow, not the other way around.
Not using Claude Code? The Developer MCP works with any AI tool that supports the Model Context Protocol — including Cursor, Windsurf, Codex, and VS Code Copilot. See the [Developer MCP guide](/developer-mcp/get-started) for setup instructions.

 : children}
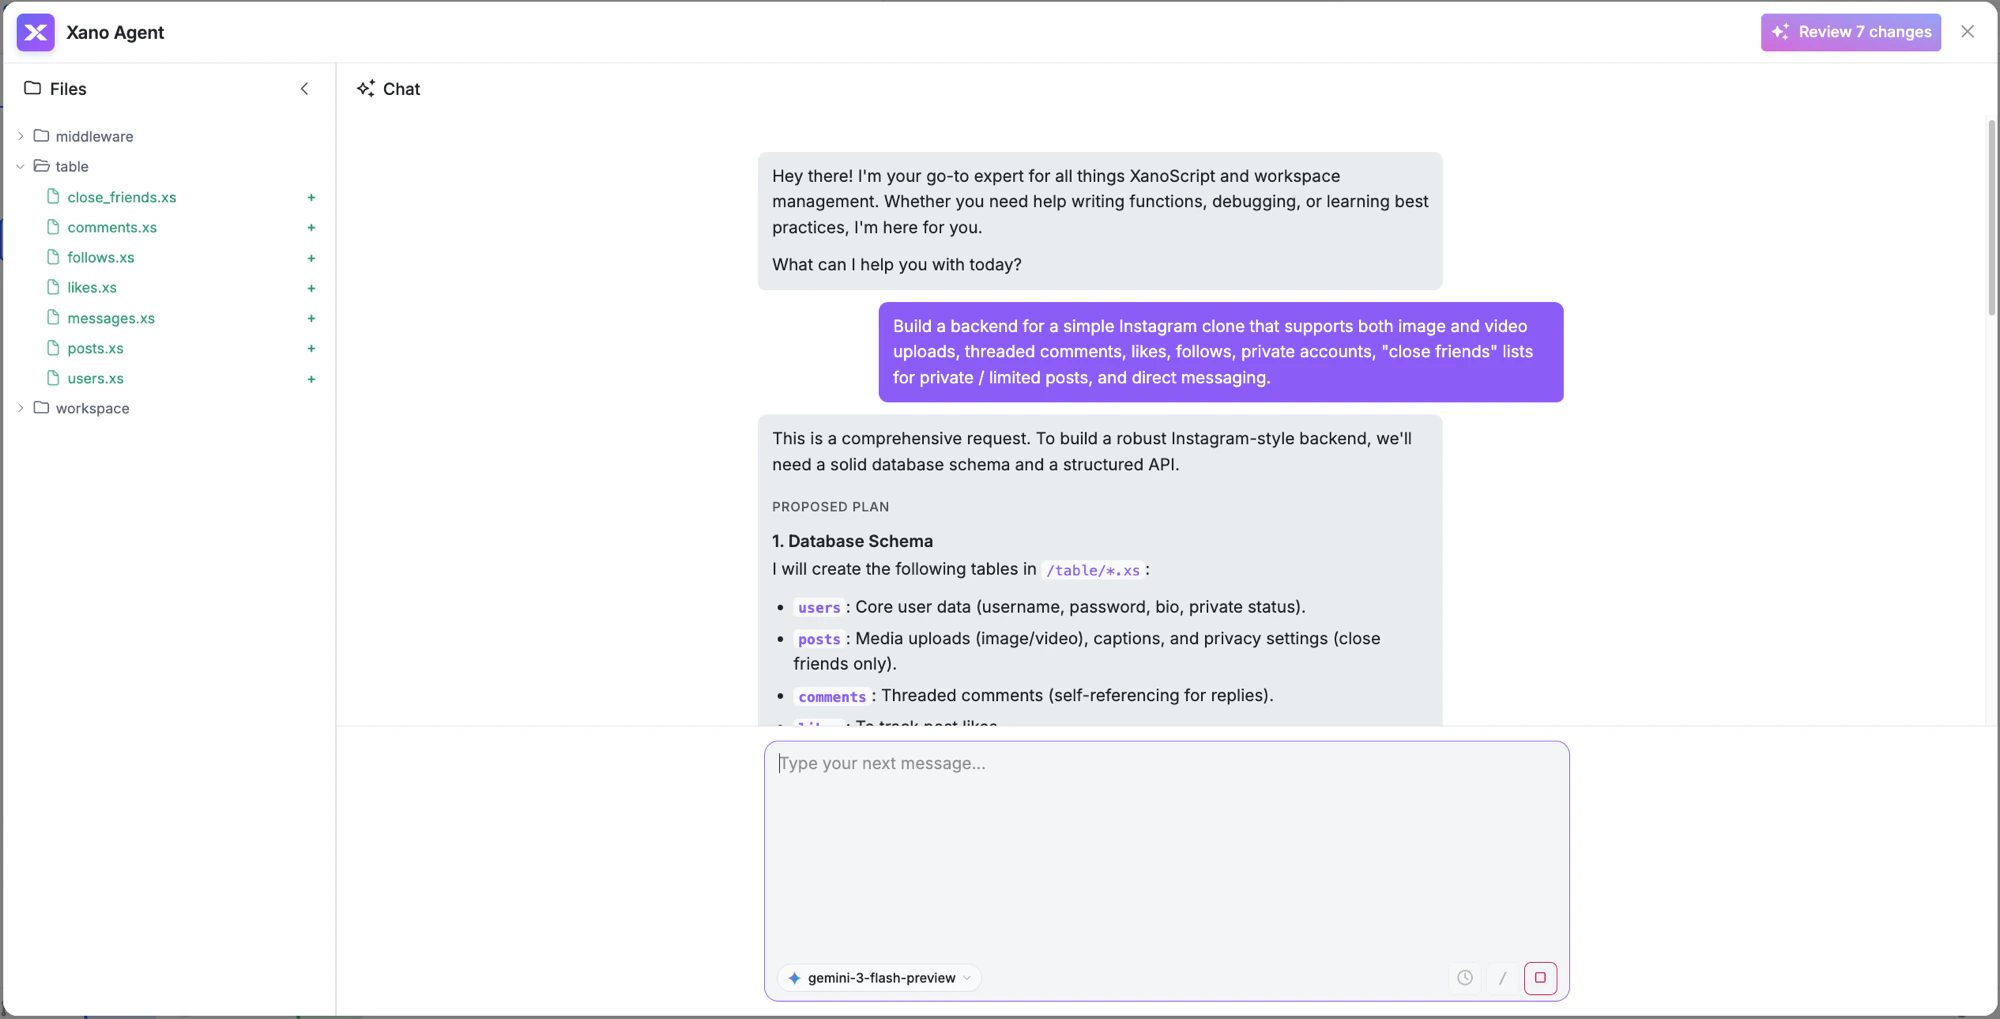
 Your backend is now live. Open it in the Xano dashboard to see everything the agent built — fully visible and editable in the visual builder.
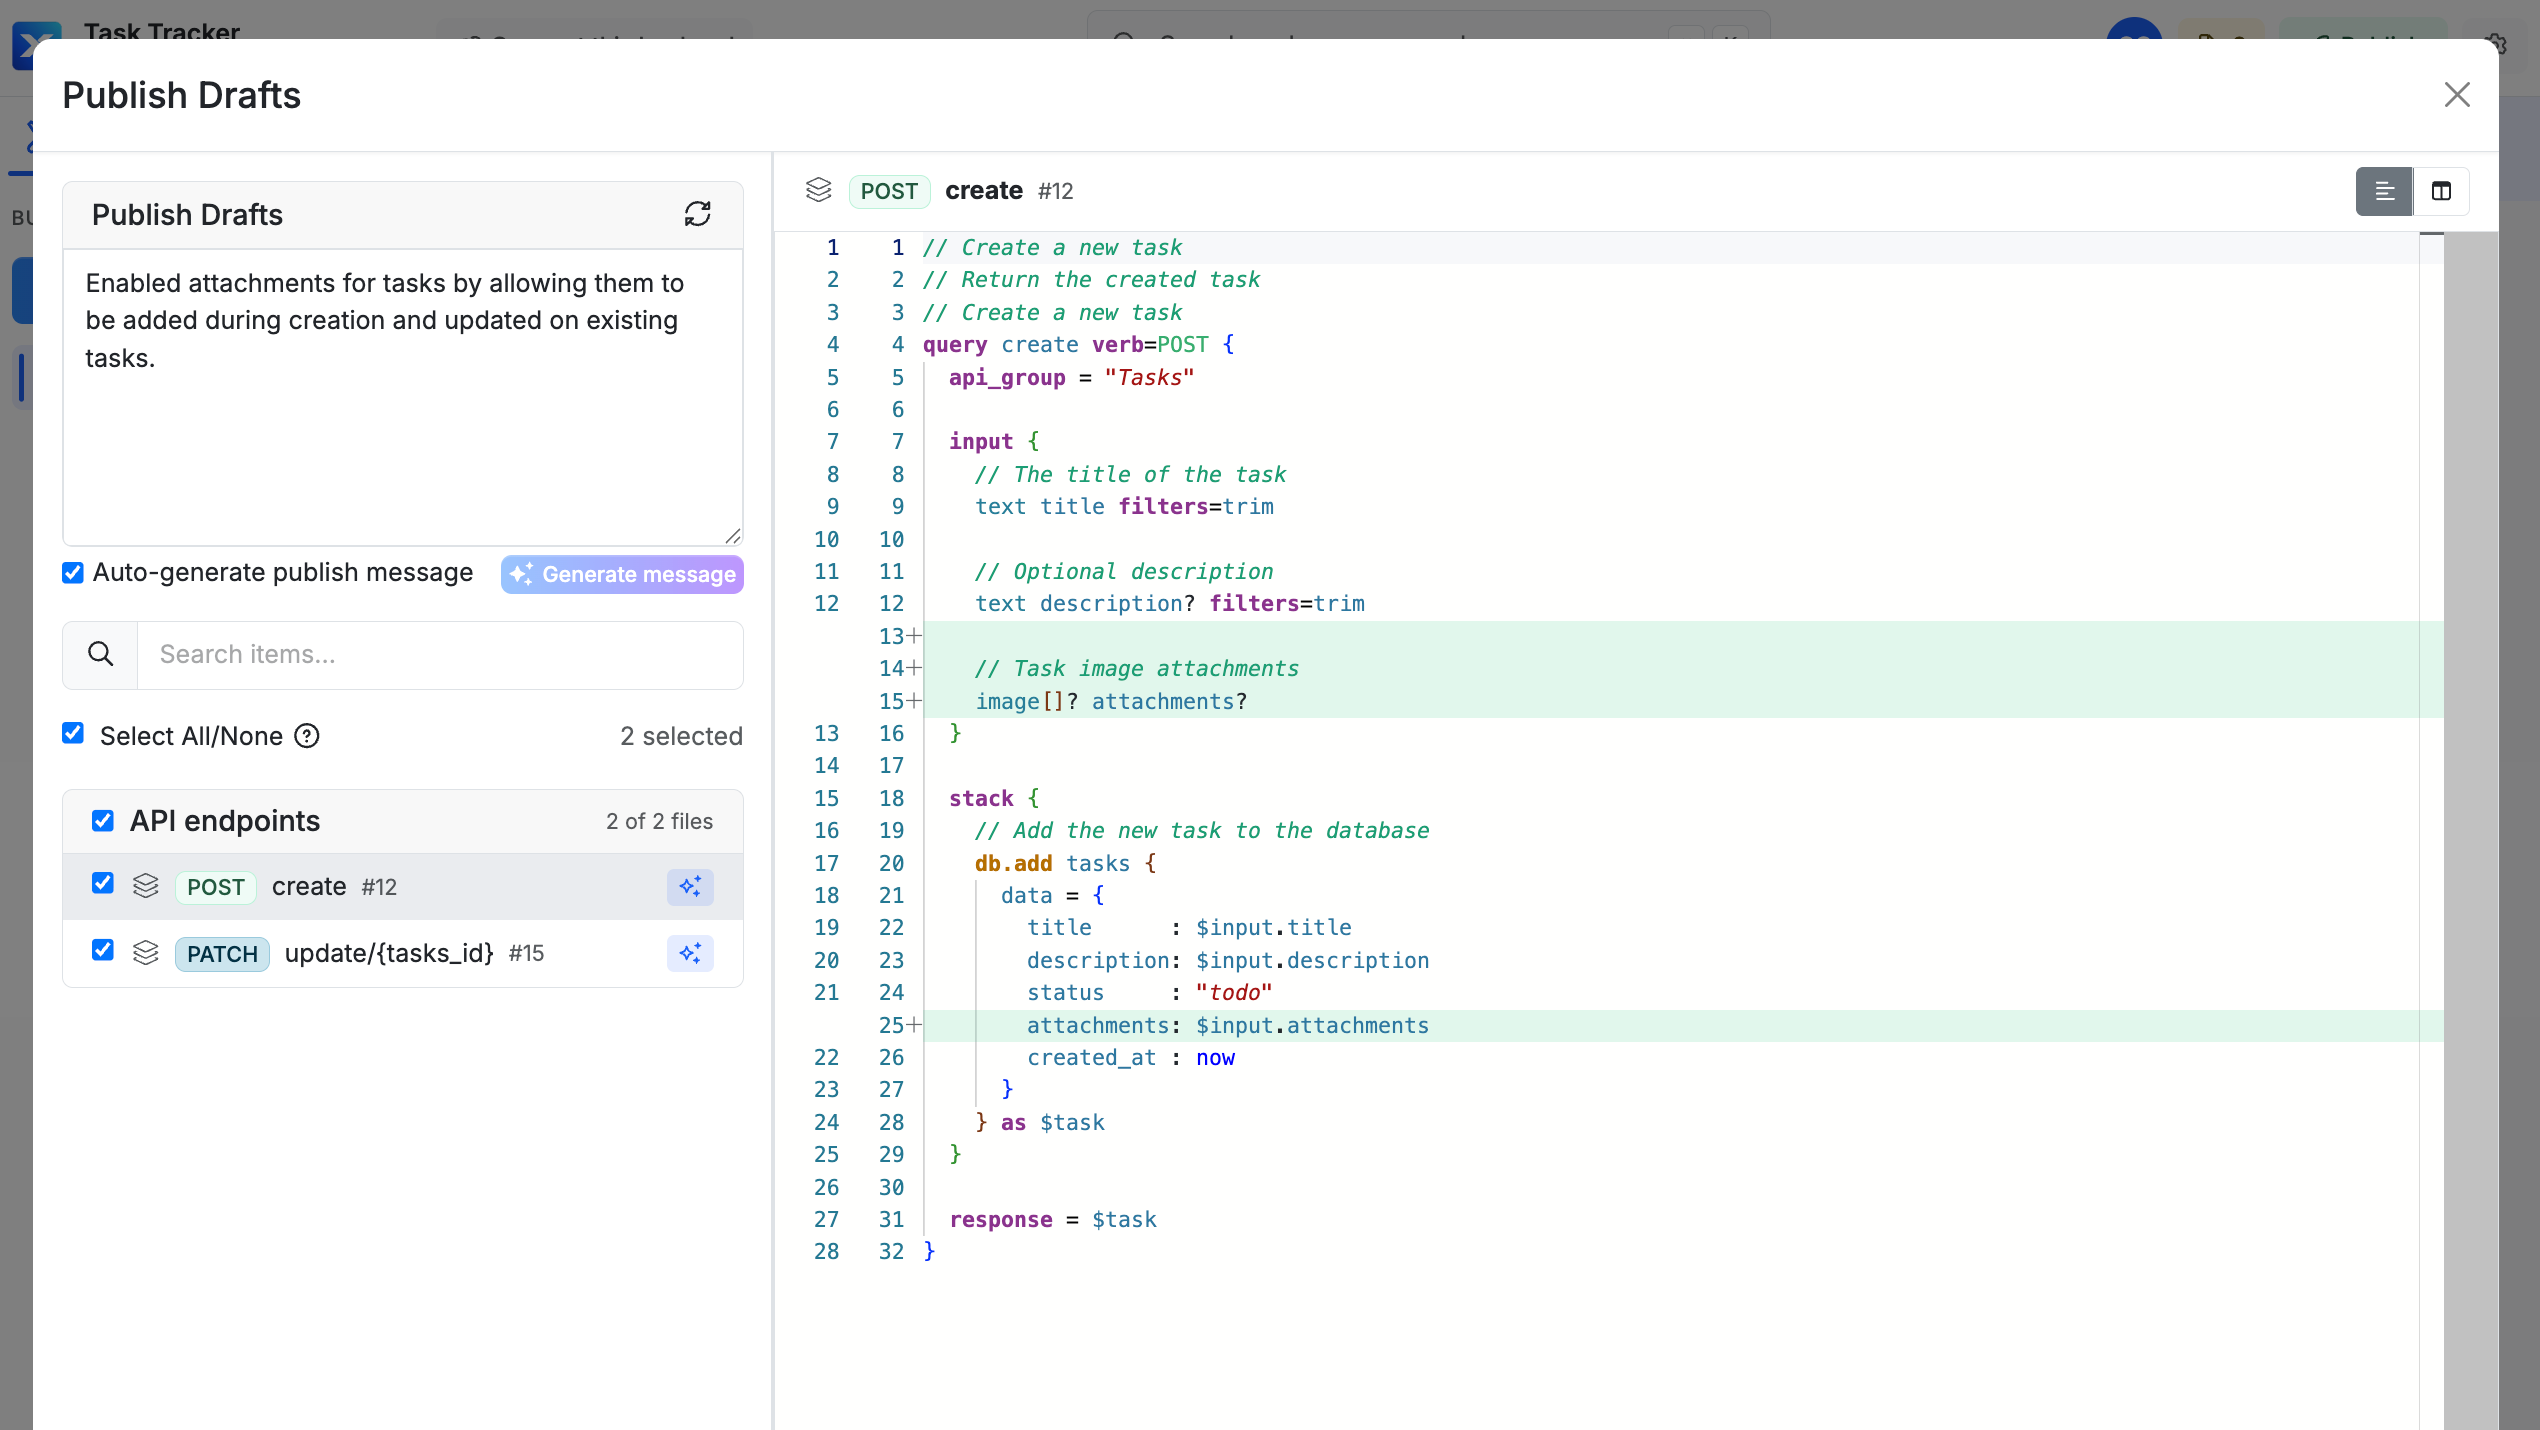 When you're ready, click **Publish** at the bottom of the screen to push these changes to live.
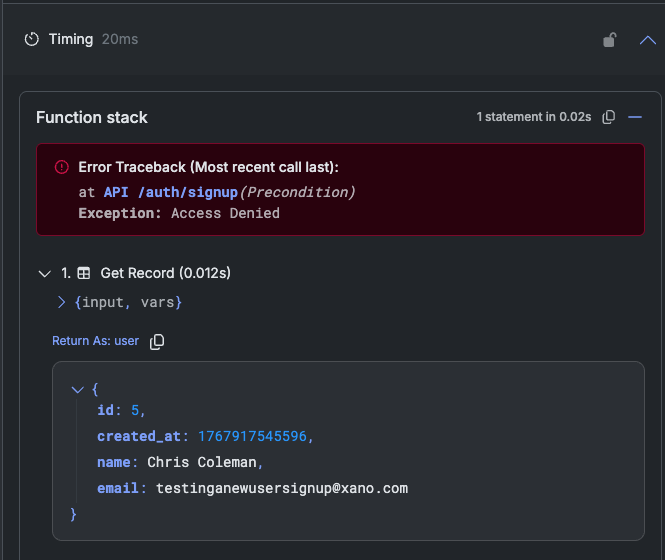
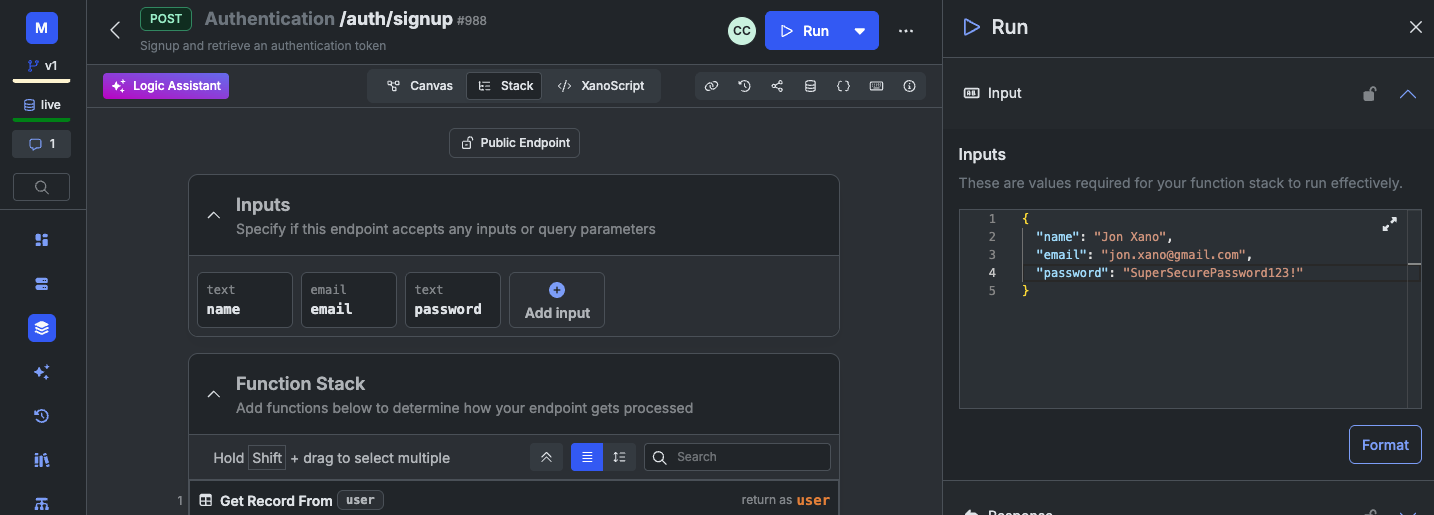 If all goes well, you should see a successful response with an
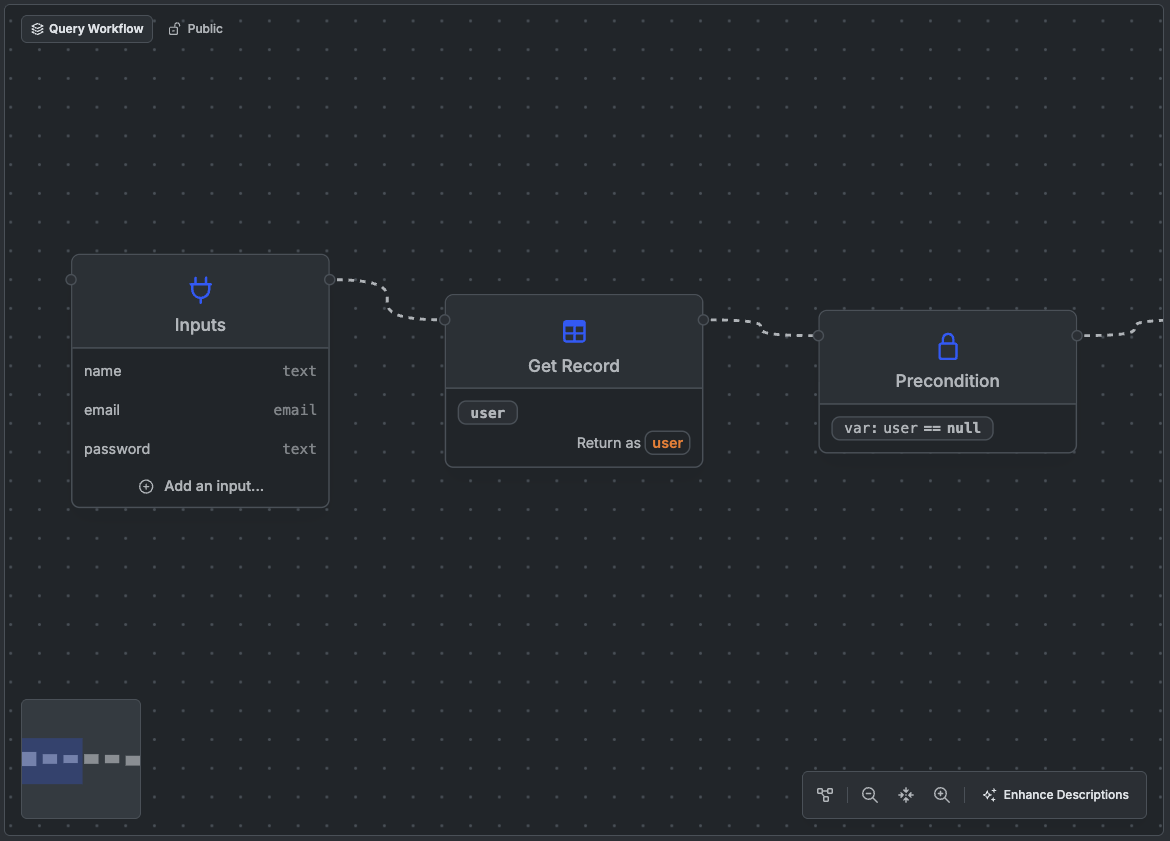
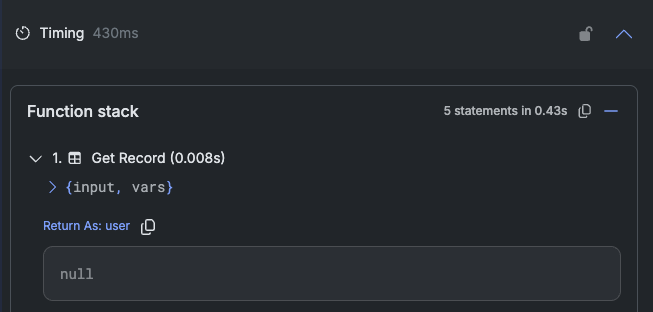
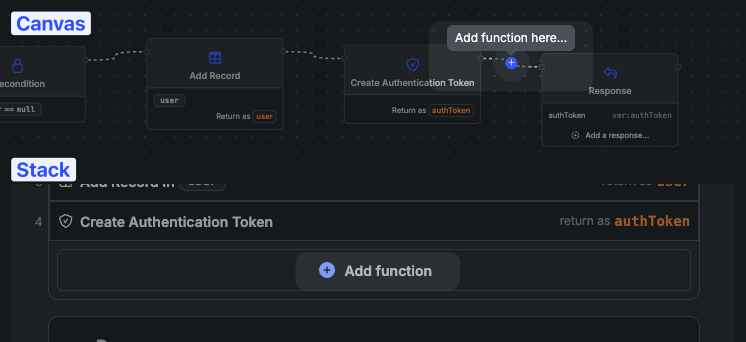
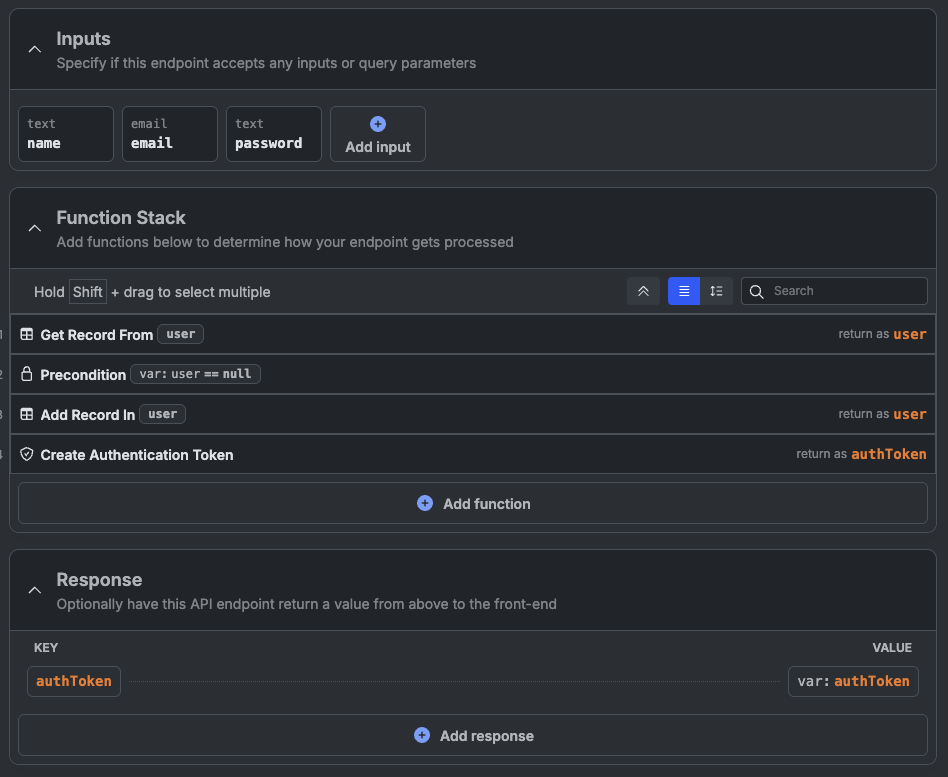 Click on a step to see more details about what it does and how it's configured.
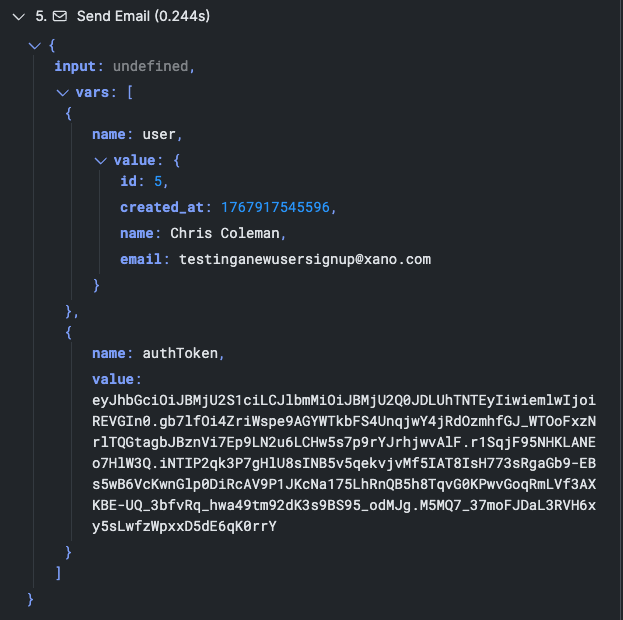
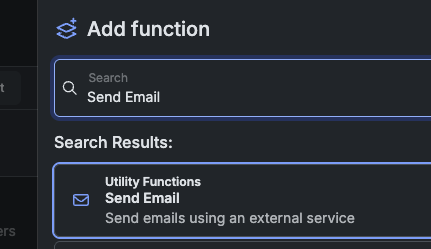
 Select the **Send Email** function.
 Add a subject and a body for the email. Xano includes free access to Resend for development and testing (up to 100 emails), limited to the email address you signed up for Xano with.
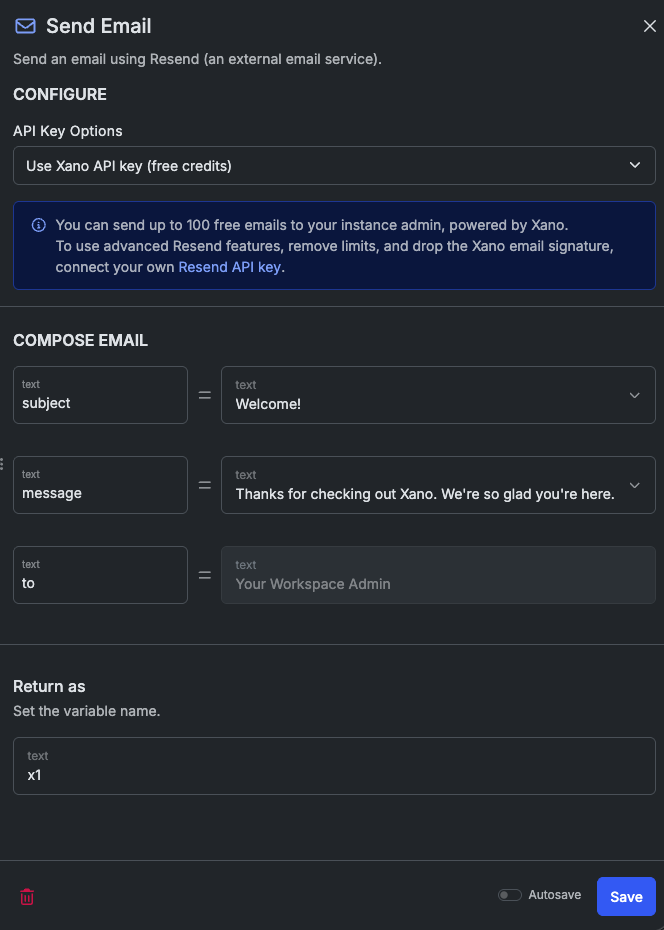 Click Save to save the step.