- APIs
- Custom Functions
- Background Tasks
- AI Tools
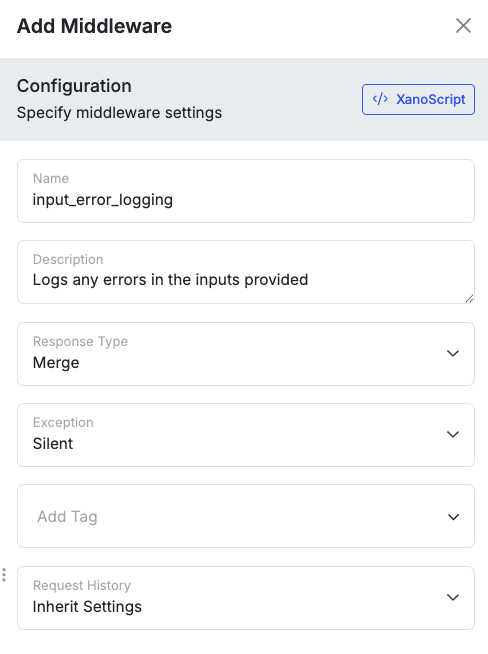
- Pre-middleware that runs before input validation
- Post-middleware that runs after the logic executes and a response is generated, but before it is delivered
| Response Type | Description |
|---|---|
merge | Merges the response of the middleware with the existing response. If the middleware response contains a key that already exists in the generated response, it will be overwritten. |
replace | Replaces the existing response entirely with the new response |
| Exception Method | Description |
|---|---|
critical | Stops execution completely and returns an error |
silent | Silently ignores errors |
rethrow | When paired with post-middleware, it allows the post-middleware to run even when an error occurs in the pre-middleware. Good for error logging or monitoring. |
vars- The variables from the parent object. This could be either the inputs sent to the workflow for a pre-middleware, or the response generated by the parent object for a post-middleware.type- The type of middleware (pre or post).
Building Middleware in Xano
- Visually
- XanoScript
Applying Middleware to Workflows
Middleware can be applied at the workspace level, workflow group level (like API groups), or onto individual workflows. If no customizations are set on a workflow, it will inherit middleware settings from their parent object, such as the group they reside in or the workspace. You can quickly disable middleware by clicking the toggle and remove it completely from the object by clicking the .Workspace level
Click Middleware in the left-hand navigation. On the middleware screen, click Manage Global Defaults. Alternatively, you can click the in the top right anywhere in Xano and choose Middleware Defaults from the modal that opens.Middleware Defaults will only be available once you have at least one middleware built. Until then, you’ll simply be redirected to the Middleware section.
- APIs
- AI Tools
- Functions
- Tasks
Applying middleware to a workflow group
From an API group, click and select Middleware.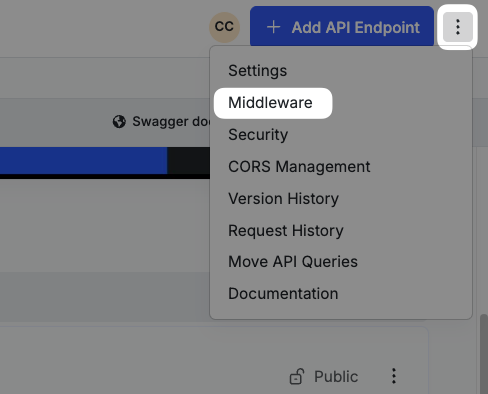

Applying middleware to an individual workflow
From the workflow, click and select Middleware.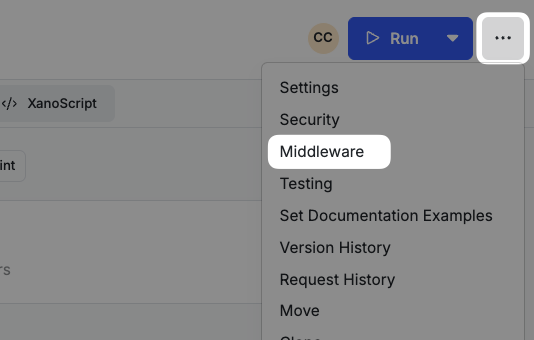
Handling public and authenticated requests
When you apply middleware globally — such as an audit log that runs on every API — it will execute on both authenticated and public endpoints. Public endpoints (and any endpoint reached without a valid token) don’t have an authenticated user, so you can’t assume$auth is populated.
If your middleware references $auth.id directly, an unauthenticated request can fail. The two things to watch for are:
-
Reading the user. On a request without a valid token, there is no authenticated user, so
$auth.idthrows an error when referencing normally, or a0in expressions, rather than a real record ID. Looking up$auth.idvia an expression is a quick and easy way to handle both cases. -
Writing the user. If you store the user ID on a record (like an audit log), the column must accept an empty value. Make the
auth_id(oruser_id) column nullable in your table so the Add Record step succeeds when no user is present.
null before logging, so the same middleware works on public and authenticated endpoints alike.
- Visually
- XanoScript
Capture the user ID in a new variable
Add a Create Variable step (for example,
user_id) and set its value to an expression, $auth.id — if auth.id is populated, this will contain the user ID. If it isn’t, it will contain 0.Use a conditional to check and confirm `user_id`
Add a Conditional step to check if
user_id = 0, and if it does, update it to null.