Write XanoScript in Xano
You can write XanoScript in Xano directly in the XanoScript view. This is a great way to get started with XanoScript and see how it works, especially if you’ve already used the visual builder.
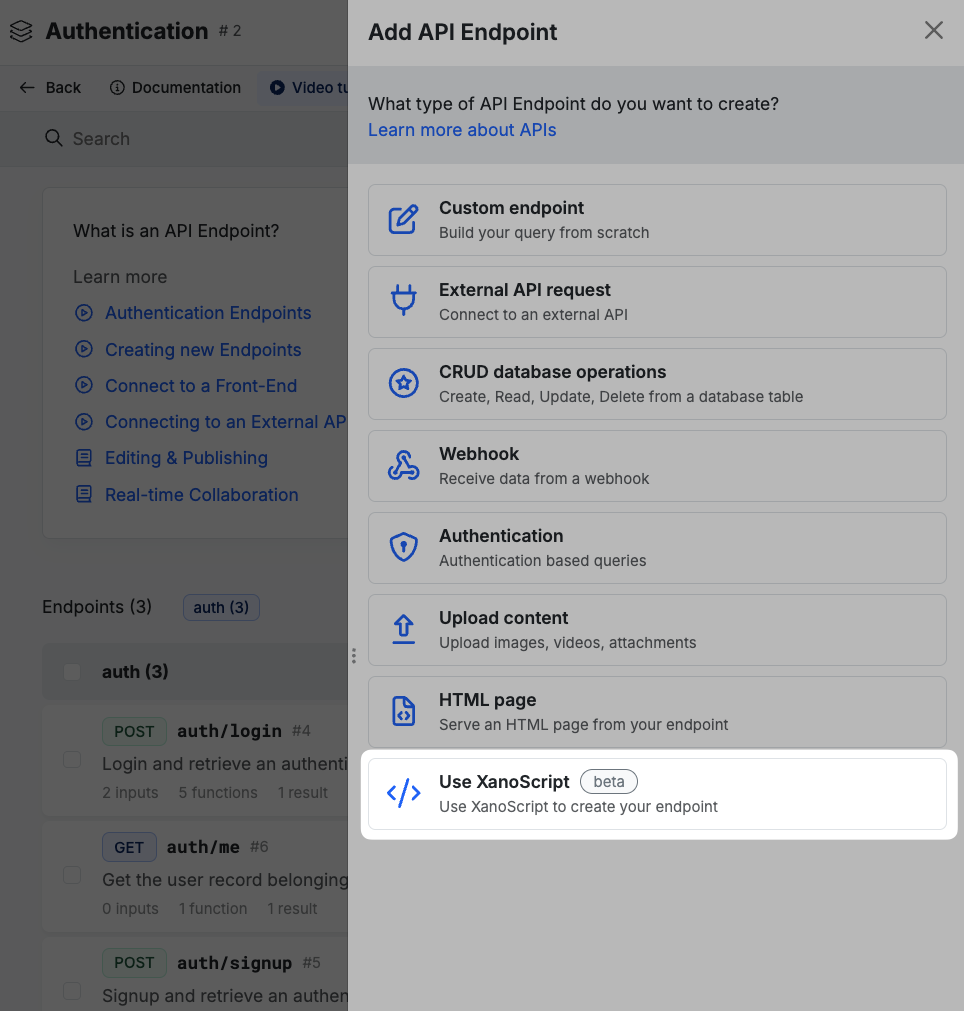
Look for the Use XanoScript option
This option will be available when creating most logic in Xano, such as APIs, Custom Functions, Background Tasks, and more.
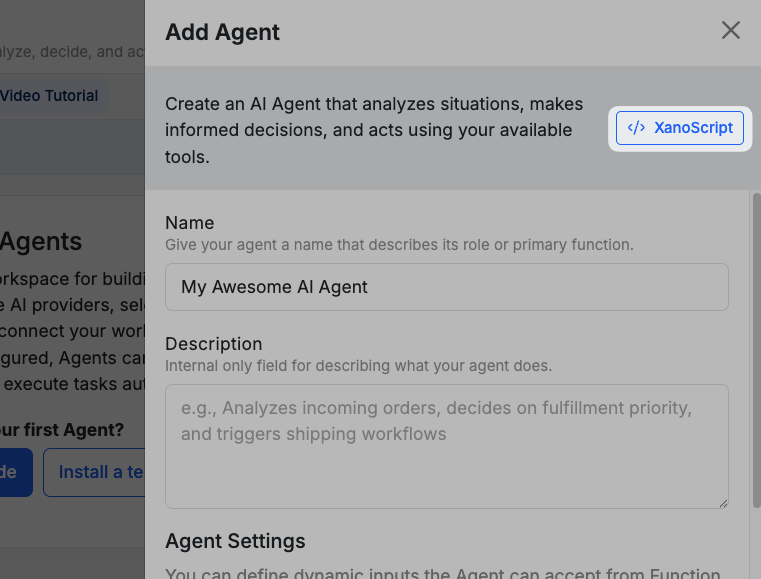
Look for the XanoScript option
In some areas, such as AI Agents that open with a settings panel immediately, you’ll see a XanoScript option at the top of the panel.
Use the VS Code Extension in your favorite IDE
You can also use the XanoScript Language Server extension to write XanoScript in an IDE of your choice. You should be able to use any IDE that supports VS Code extensions, such as Cursor or Windsurf, as well as VS Code itself.Get the VS Code extension from the Marketplace here
Get the OpenVSX version here
Deprecation note: The original XanoScript extension is deprecated. See the migration guide.
Get the OpenVSX version here
Deprecation note: The original XanoScript extension is deprecated. See the migration guide.
Use the Xano MCP Server with your favorite AI
Using the Xano MCP server, you’re able to connect an AI model to your Xano backend via an MCP client, like Claude or Cursor. The MCP server offers a number of tools to help you build your backend with AI.
Switching between build modes? Changes made in one build mode aren’t automatically synced to another. For example, if you make changes in the visual builder and then want to continue working in the CLI, you’ll need to pull your workspace first to get the latest changes. The same applies when switching from any other mode back to the CLI.