Agent History & Debugging Mode
Install this snippet to monitor, analyze, and debug your agent’s behavior.
Gain critical insight into every agent run.
Conversation History
Install this snippet to manage and persist user interactions. The perfect
starting point for any chatbot or conversational agent.
Agent History & Debugging Mode
Install this snippet to monitor, analyze, and debug your agent’s behavior. Gain critical insight into every agent run.- Logging Database Tables: Includes agents and agent_runs, agent_steps, agent_tool_calls tables to store detailed execution history.
- Automated Logging Function: A dedicated function to easily log the inputs, outputs, and steps of each agent run.
- Monitoring Dashboard: A utility API endpoint that provides a simple dashboard to review agent performance statistics and debug individual runs.
Install the Snippet
Agent History & Debugging Mode
Monitors, analyzes, and debugs your agent’s behavior by logging every run, step, and tool call. Includes a dashboard for performance stats and run details, plus automated logging to capture inputs, outputs, and execution history.
Get the Base URL from the Agent History API group
Navigate to your APIs from the sidebar. Find Agent History and click the copy button as shown below.
Replace the Base URL in the /dashboard API
Click on the Agent History API group to enter it.Click on the **/dashboard **API.Click on the first step inside of that function stack, and replace the value with the base URL you copied in the previous step.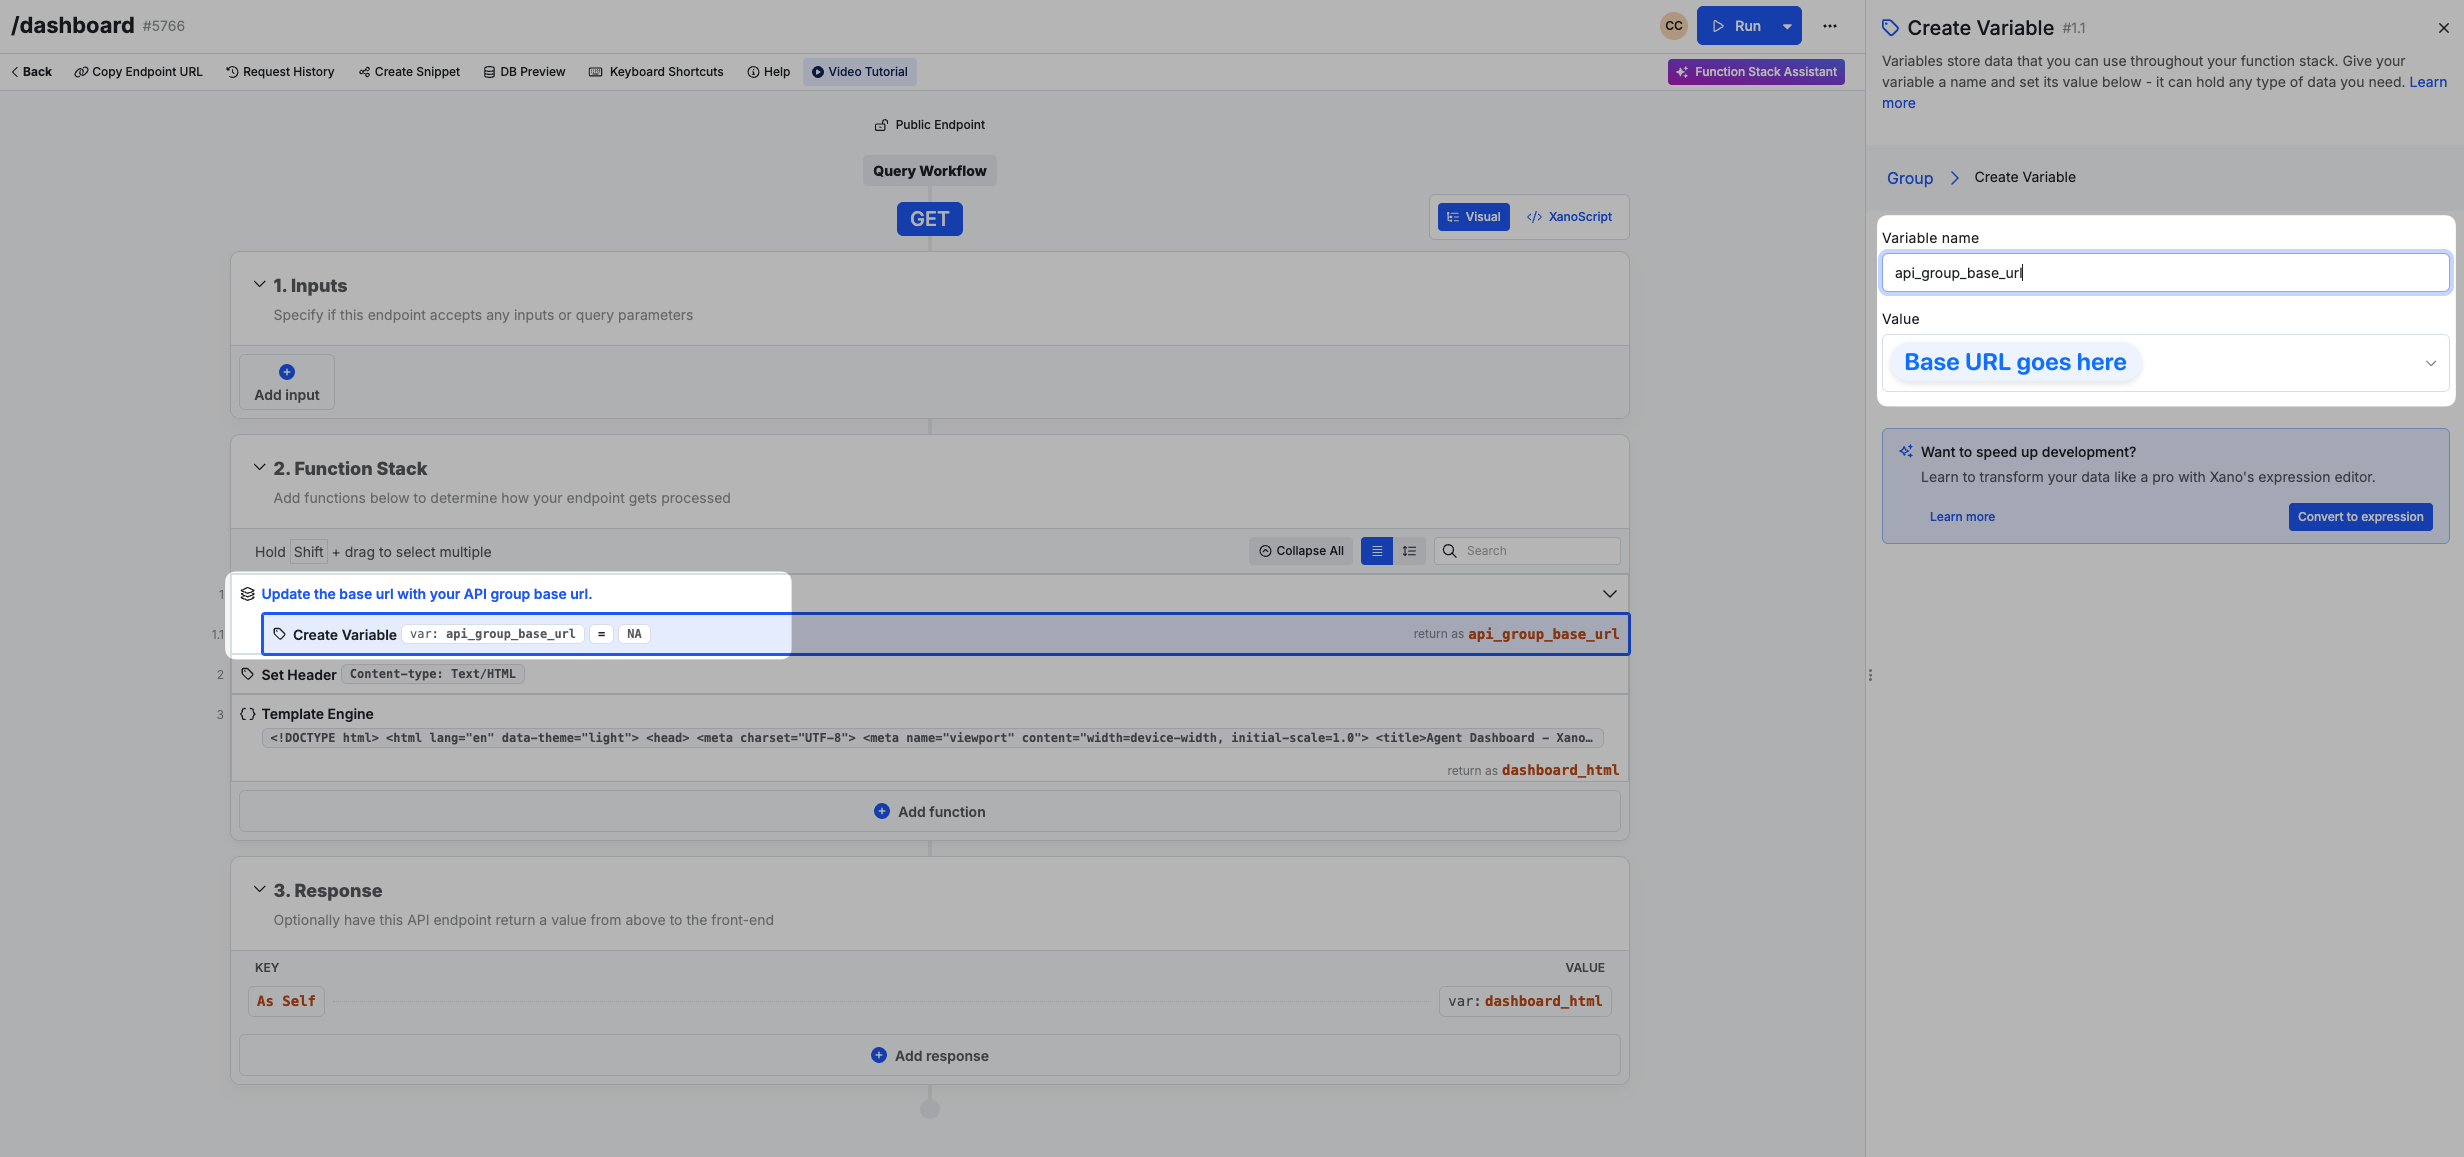
Add a new record to the Agents table
Navigate to your Database from the sidebar.Click on the Agents table.Add a new record with the details of the agent you’d like to monitor using the dashboard.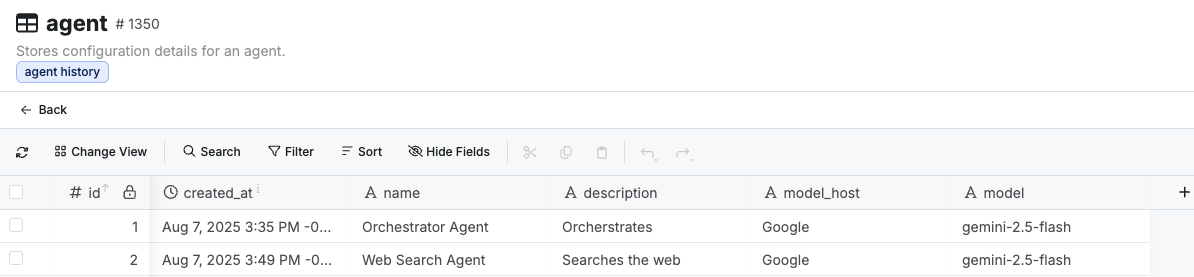
Add a new Agents user to the agent_user table
We use a separate table for authentication of the agent monitoring dashboard.Navigate back to your Database, and click on the agent_user table.Add a record. This is what you will use to access the Agent dashboard.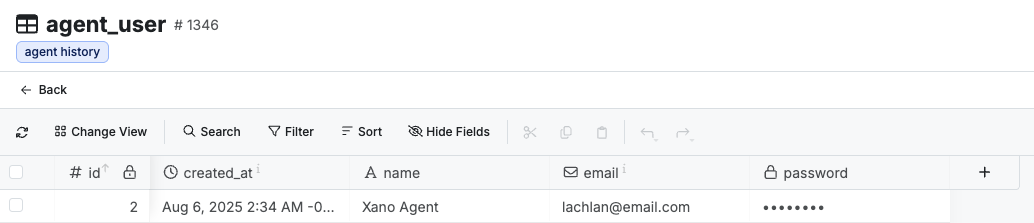
Add monitoring to your Agent usage
In any function stack where you’re calling your agent using the Call Agent function, add the new log_agent custom function to capture the agent’s response and other run information.
Access your Agent Monitoring dashboard
From the /dashboard API, copy the endpoint URL using the button at the top of the page.Paste that URL into a new tab.Log in using the credentials you stored in the agent_user table.
Conversation History
- Authentication endpoints (auth/login and auth/me)
- Database tables (conversations and messages, agent_user)
- Chatbot API group
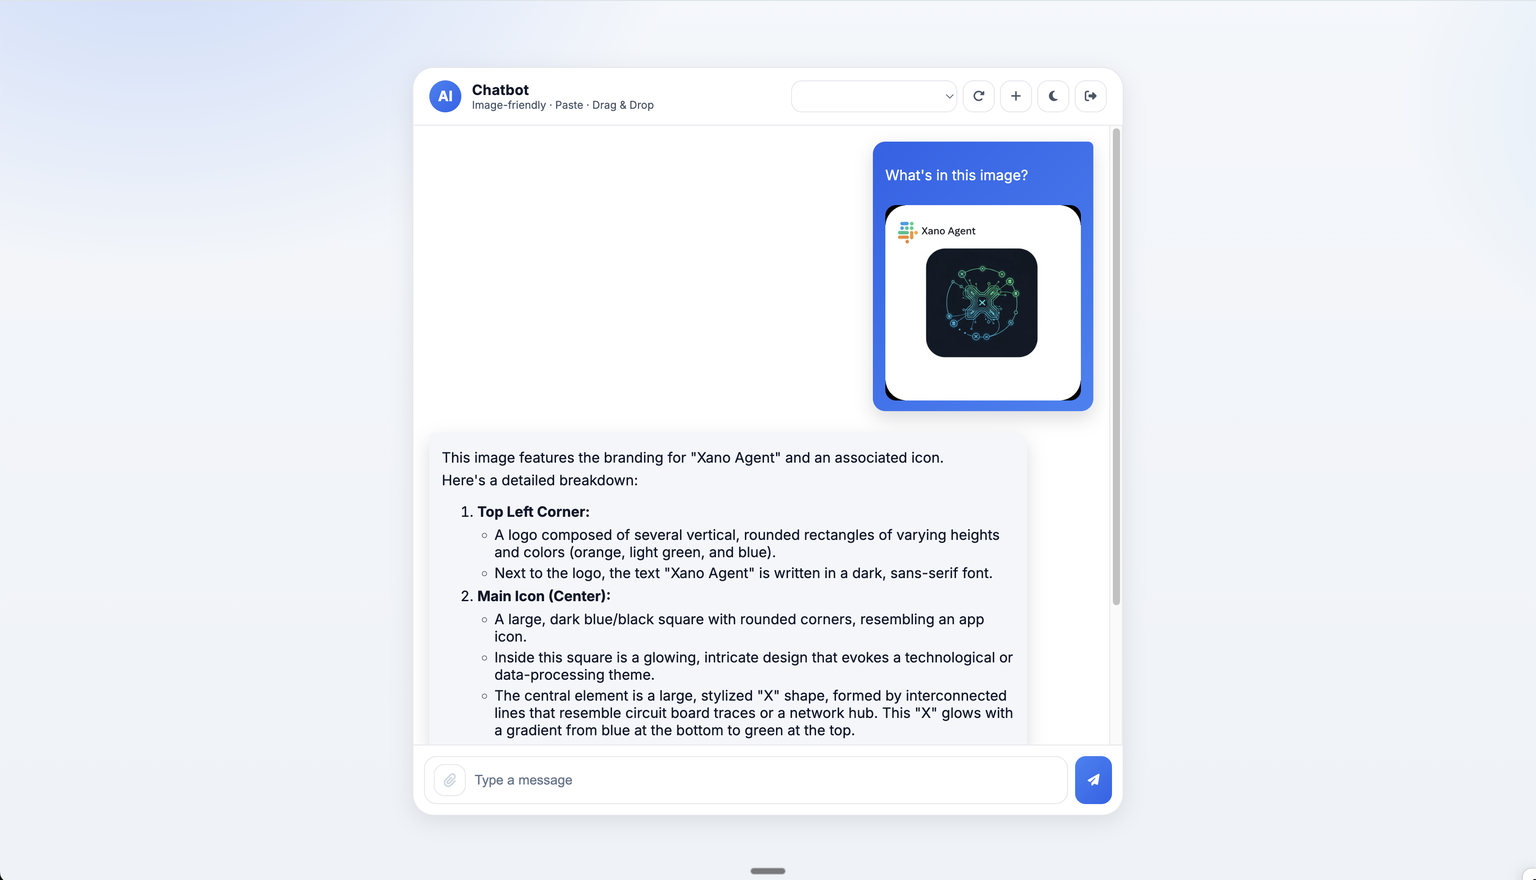
- A chatbot UI that you can use to test your agents.\
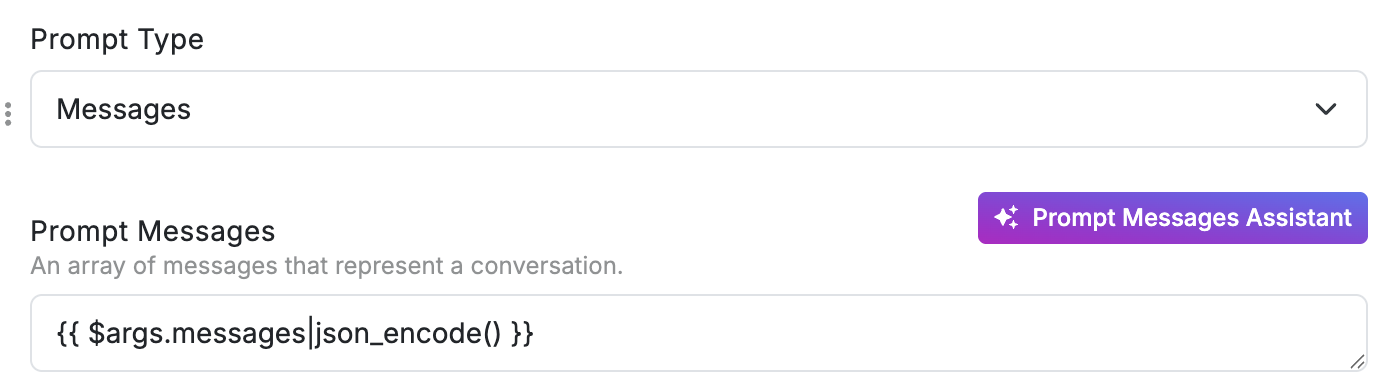
- Agent must be configured with prompt type set to “Messages”
- Agent messages value must be set to:
{{ $args.messages|json_encode() }}
Install the Snippet
Conversation History
Install this snippet to manage and persist user interactions. It’s the perfect starting point for any chatbot or conversational agent.
Get the Base URL from the Chatbot API group
Navigate to your APIs from the sidebar. Find Chatbot* and click the copy button as shown below.
Replace the Base URL in the /conversation API
Click on the Agent History API group to enter it.Click on the **/dashboard **API.Click on the first step inside of that function stack, and replace the value with the base URL you copied in the previous step.
Call your agent inside of a function stack
Navigate to your APIs from the sidebar.Click on the Conversation API group, and then select the /conversation API.In the group called “Add your Agent statement here”, add a Call Agent function, and select your agent from the listIn step 5, update the agent_response variable to use the Call AI Agent function’s output.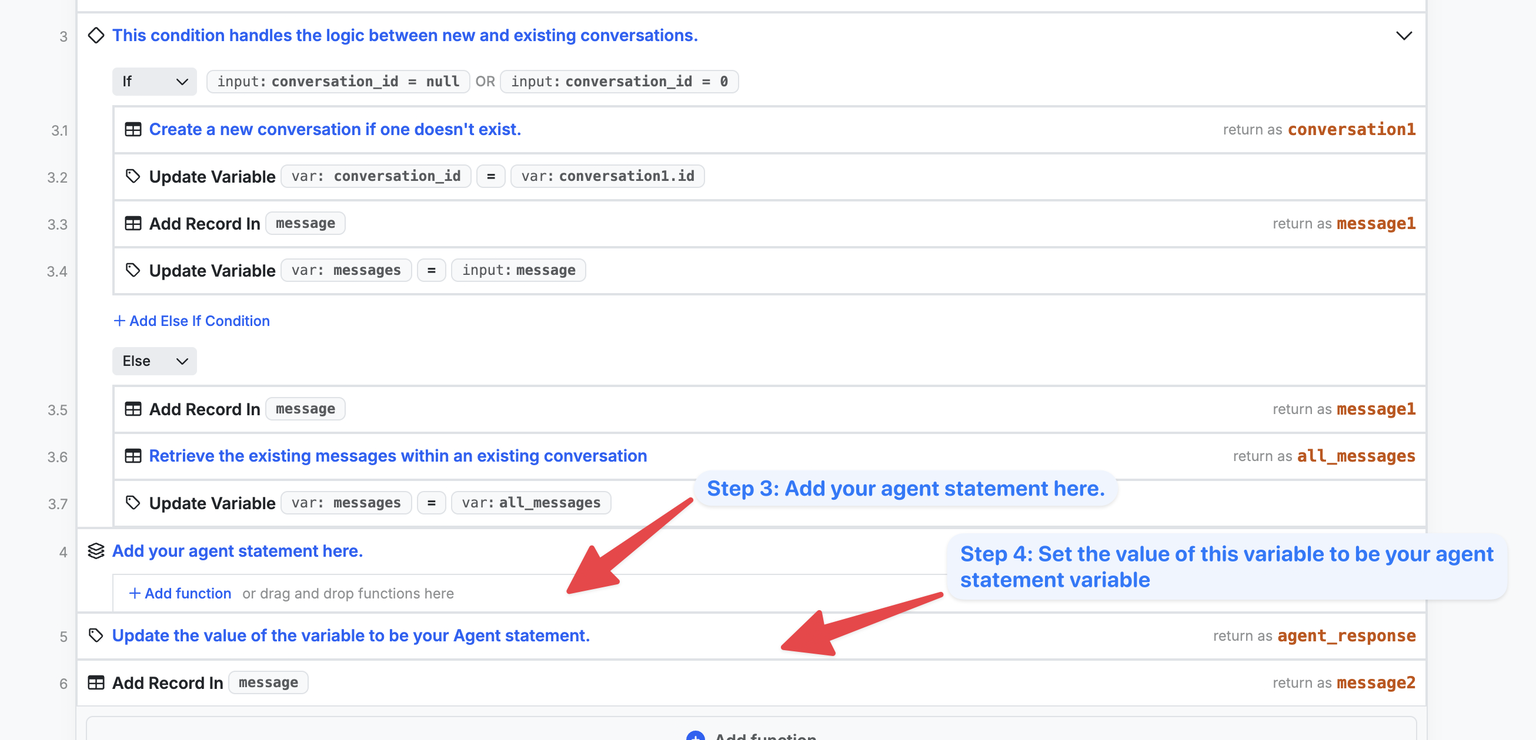
Access the Chatbot example and observe conversation history in action
From the /chatbot API, copy the endpoint URL using the button at the top of the page.Paste that URL into a new tab.