Prefer Git? If you’re using the Xano CLI for local development, you can use standard Git branching, diffs, and PRs alongside Xano’s push & pull workflow instead of Xano’s built-in branching. Use whichever fits your team — or both together.
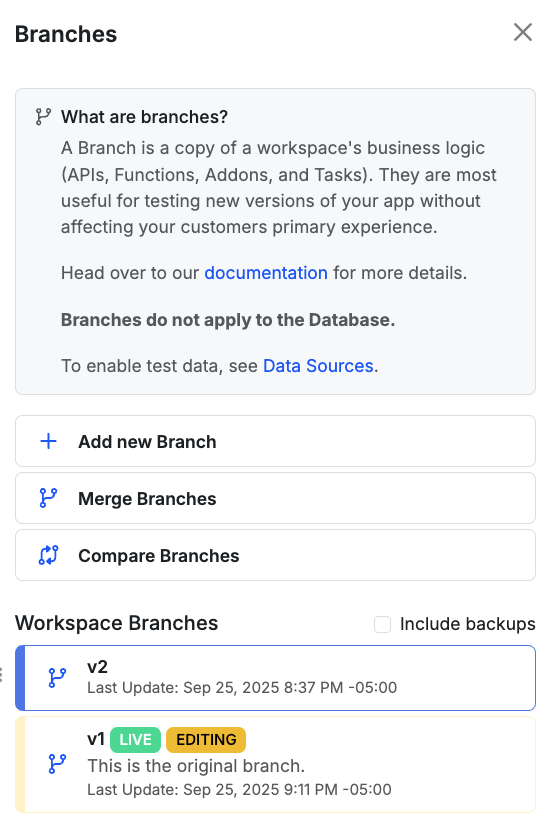
A Branch is a copy of a workspace’s business logic (APIs, Functions, Addons, and Tasks). They are most useful for testing and developing new versions of your app without affecting your customers’ primary experience.You can create new Branches and select which Branch to make a copy of, choose which Branch to make edits to, and select which Branch you want to be live for your API.Branches can also merge from a source Branch to a destination Branch to make managing development, test, and live environments as seamless as ever.Your initial Branch will be considered v1 of your business logic. Below your workspace name, you will be able to identify which Branch you are currently editing.
Branches do not apply to the database. To enable test data sources, see Data
Sources.
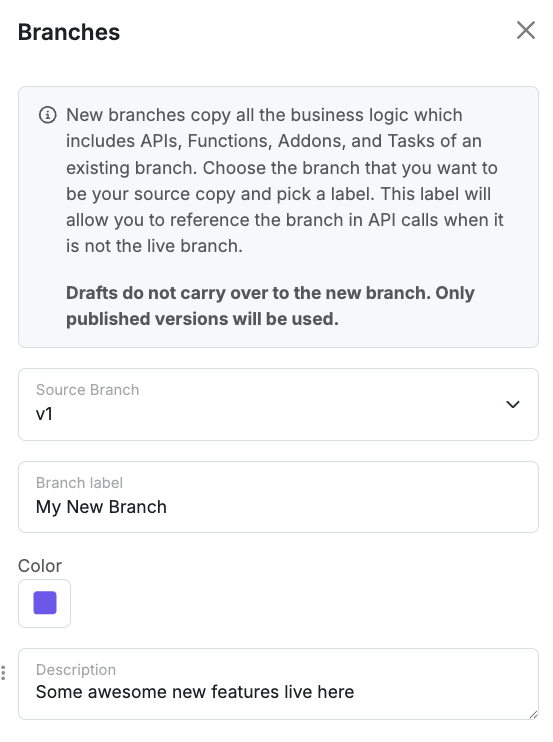
Select the Branch identifier located in the footer.This will allow you to see and change which Branch you are currently editing and which is live for your users, and take you to branch management for adding or modifying branches.When you select Add new Branch you will be able to choose a source Branch to make a copy from, the name of your new Branch, set a color, and add a description.The color you select will be reflected in different elements of the Xano UI to represent and easily inform which branch you are currently working on.Adding a new Branch makes a copy of the source Branch at that given time. So for example, if you create v2 from source Branch v1, you will have all the same business logic (APIs, Functions, Addons, and Tasks).
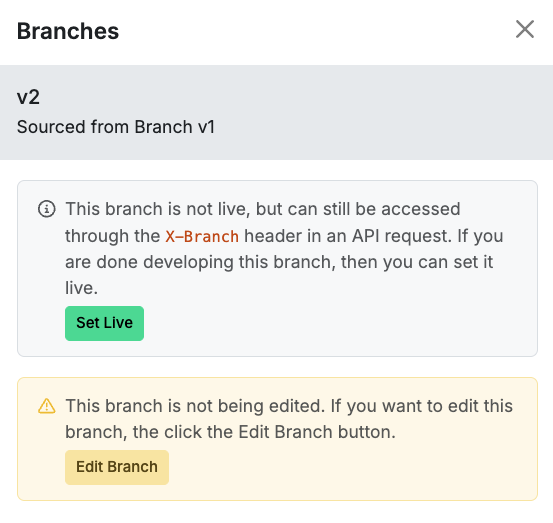
The Branch you are currently editing will be identified in the status footer at the bottom of the screen.To change which branch you are editing, select the branch you’d like to switch to.When editing a Branch that is not live, the Swagger documentation and API Endpoint URL buttons will provide the version of that branch and not the live Branch.To get the URL of the live branch, either remove the :branch name after the canonical or switch back to editing the live branch.When you’re ready to set a branch live, you can do so by clicking on the branches icon in the footer and selecting Manage Branches to access the panel shown below.When a Branch is set live, the changes are immediately available to your users.If you wish to call an API endpoint from a Branch that is not live, you can do so by adding the branch name after the canonical ID in the URL, for example:If the live branch is:
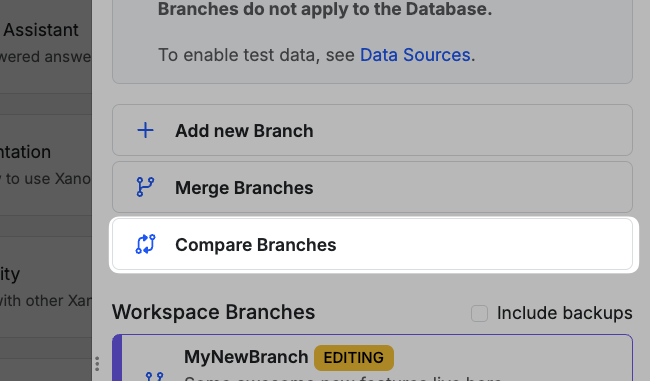
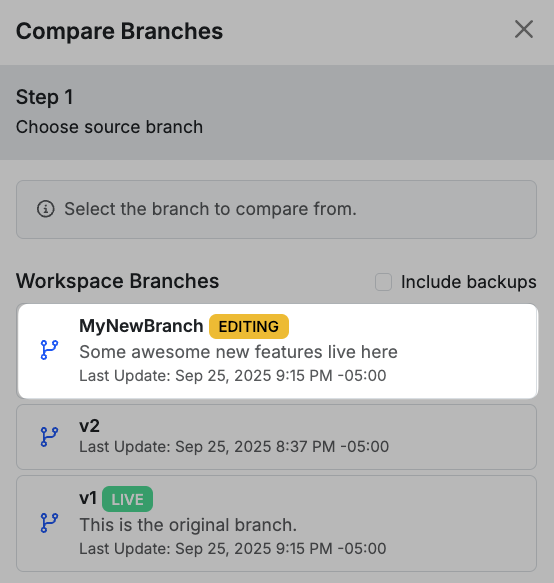
Comparing differences allows you to see the differences between a source branch and a destination branch. Comparing differences gives you full context into what’s going to change before you decide to merge branches.
Step 2 - Select the destination branch to compare to.
Next, select the destination branch to compare to. If you were to merge, this is the branch to merge into.
Comparing mode will not commit to a merge; it is simply an opportunity to see and compare differences between the branches. You will only merge by selecting the merge option on the branches menu.
The Compare Branches modal will open, showing you all the differences between the source branch and the destination branch, separated by workflow. On the left-hand side, you’ll see a list of everything that’s been updated. Selecting an item will present you with a diff view, written in (XanoScript)[/xanoscript/introduction] to show you exactly what has changed.Additions are highlighted in green, and deletions are highlighted in red.Use the > and < buttons in the top-right to navigate between changes.
Merging Branches allows for seamless development management of different environments. It allows you to update a destination Branch with changes and updates created from a source Branch. Merging will include changes to published objects such as APIs, Functions, Addons, and Tasks, and newly created ones.For example, your live Branch is v1. You are editing v2, which has some new API endpoints for a new feature you are rolling out. During the development phase of v2, you had to modify an API endpoint in v1. When you’re ready to merge v2 into v1, Xano will add the new API endpoints from v2 and maintain the update to the API endpoint on the destination v1 Branch.
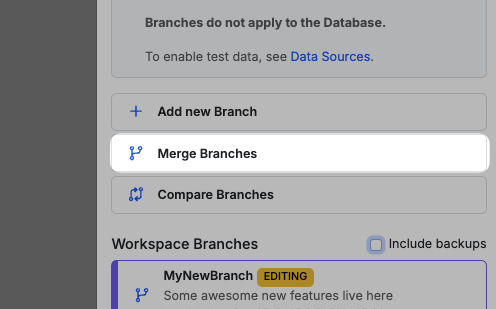
To merge Branches, open the Branches menu by clicking the Branch name in the status footer at the bottom of the screen.Next, select Merge Branches.After selecting Merge Branches, Xano will ask you to select the source Branch.
The Source Branch is the Branch containing the updates and modifications that you want to merge into the Destination Branch.
Next, select the Destination Branch to merge the changes from the Source Branch.You’ll then be taken to the Merge Branches modal, which is very similar to the Compare Branches modal detailed above, but with a few additional options for performing the merge.In the top-right, you’ll see a BACKUP DESTINATION option. This allows you to toggle on/off automatic backup of the destination branch before merging. It’s recommended to leave this on to ensure you have a restore point if needed.On the left, using the checkboxes, you can select what to include in the merge. By default, all changes will be selected.Once satisfied with all the updates included in the merge, click Merge in the bottom-right to merge the Branches.
If you receive a merge conflict notice but there is no apparent conflict, you might have a function stack with the same name, but a different GUID.
If you aren’t sure updating the GUID is necessary in your situation, please reach out to support before proceeding.
Head to the settings of the function stack and choose Security.You can update the GUID in the **destination branch **to match the function stack of the same name from the source branch
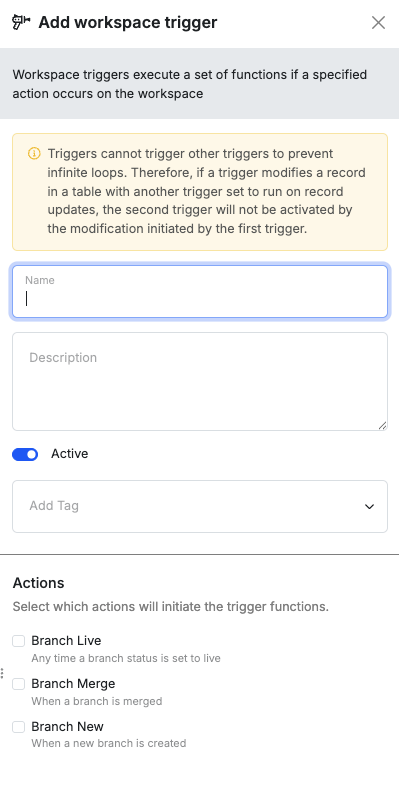
From your workspace settings, you have the option to enable triggers based on certain events.
Branch Live - Any time a branch status is set to live
Branch Merge - When a branch is merged
Branch New - When a new branch is created
Click the icon in the upper-right corner to open Settings, and select Workspace TriggersChoose ‘Add Workspace Trigger’ and provide the requested information. In the example below, we are creating a trigger called My Workspace Trigger that will run anytime a branch merge takes place, or a new branch is created.Your Workspace Trigger will have three inputs defined. Inputs for triggers can not be modified.
to_branch - Information regarding the destination branch
from_branch - Information regarding the source branch
action - The action taking place
Now that your trigger is set up, you can build a function stack that will run every time one of the actions selected takes place.
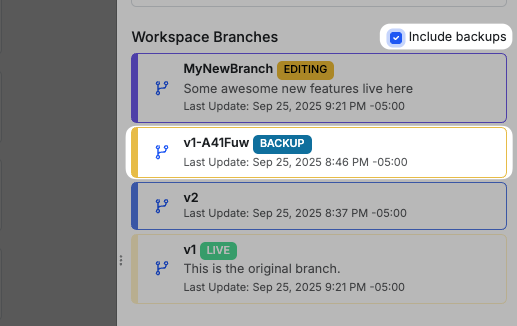
If after you have merged branches, you would like to restore from a backed up branch, click on the branches option, and check the “Include Backups” checkbox. This will show you all available backups, which you can then click and edit or set live just like any other branches. Setting live the backed up branch will allow you to quickly roll back to before the merge was made.