Getting Started
- Make sure you’ve reviewed the Realtime documentation here, as it is helpful to understand the process and how to use the Xano SDK before continuing.
- You need to be comfortable adding and modifying custom code in your Webflow project.
Building a Live Chat in Webflow (Example)
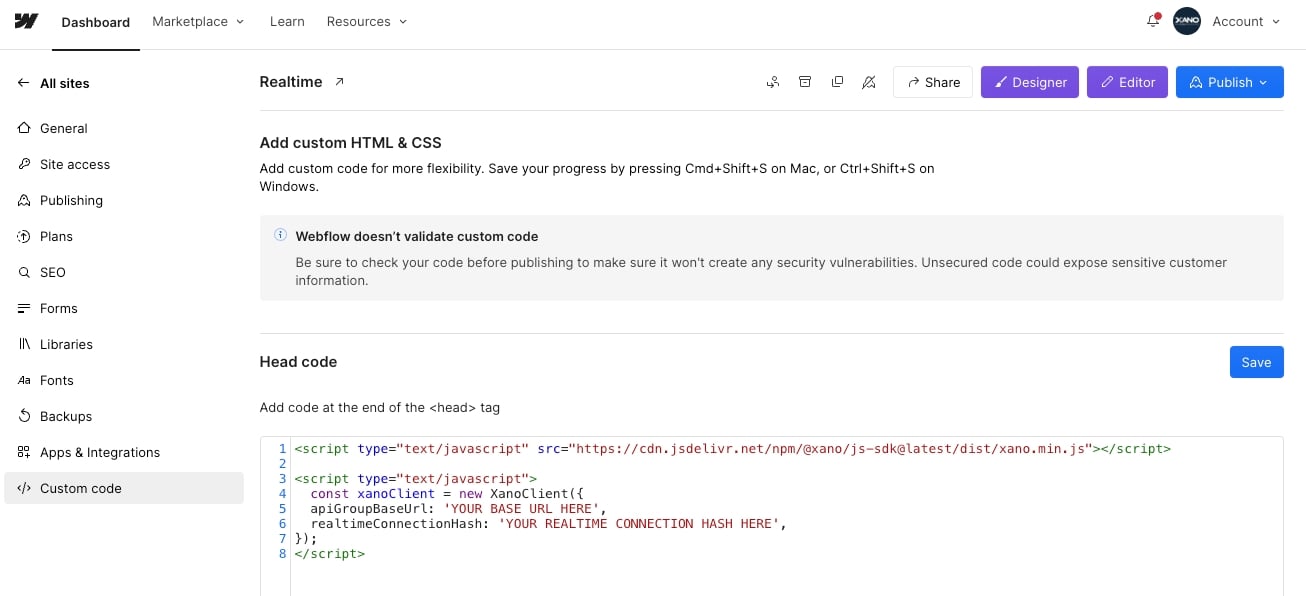
Head to your Site Settings.
const ``xanoClient to something else. Please note that any of our examples here will continue to use xanoClient, and you’ll need to update them accordingly.
At this point, Webflow will ask you to publish your site to see the changes. Please note that you may need to view a published version of the site to verify that Realtime is enabled and working as expected.
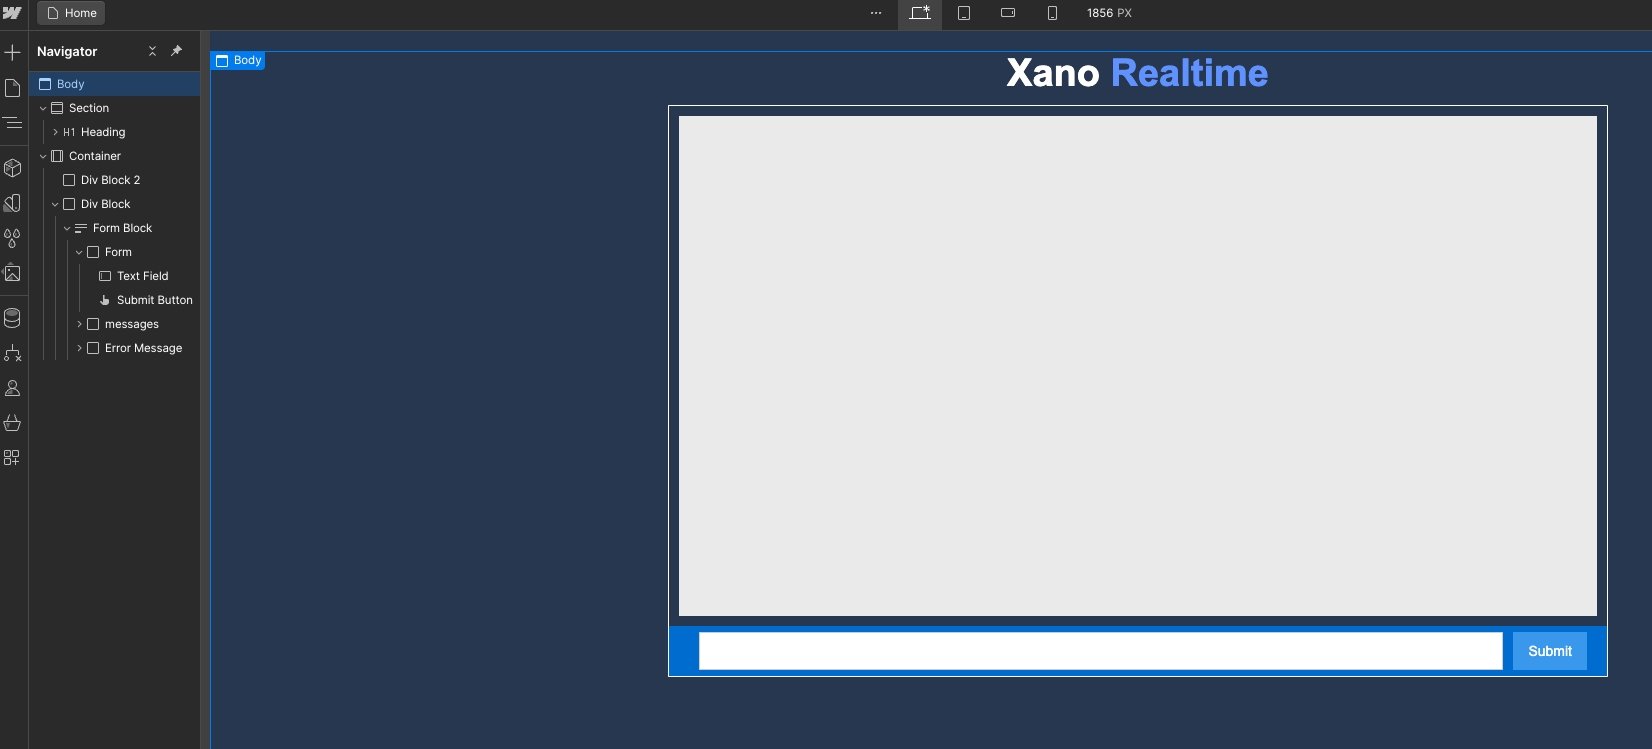
Please note that when it comes to how you want to handle realtime implementation for your specific project, your custom code and configuration may look vastly different. The code provided in this section is for demonstration purposes only. Typically when performing an action like this in Webflow, it follows a basic structure, where we…
- Create an element on our page to serve as a template, and assign it a class.
- Once you have styled the element to your liking, give it a subclass. Change the properties of the subclass to set Display to None.
- In your custom code, when it’s time to render a message, you’ll need to generate a copy of the original element containing the message or other content to show.
Code Explanation
Code Explanation
In this code, we start by defining our function and the data it needs to run.We then define a couple of variables, messageDiv and messageText, targeting newly created div elements to contain our message. We’re also applying some styling to the message block to make sure it displays.In the final section, we look for the element on our page with the class of ‘chatbox’ and place the new div inside of it.
Code Explanation
Code Explanation
First, we define a new function called sendMessage that is triggered every time we need to send a new message to the channel.Inside of this function, we define our message as the value of our input.We can then send our message to the channel, and then clear the input value to prepare for a new message.The last line of the code adds an event listener to our sendButton. This makes sure that every time the button is clicked, the function is executed.