You’ll also want to make sure you’ve already built something to apply middleware to.
Middleware enables additional control of your logic at pivotal points of execution. They are separate pieces of logic that can run before the logic executes (before input validation) or after the logic executes (after the response is generated, but before it is delivered).Middleware can be applied to:
APIs
Custom Functions
Background Tasks
AI Tools
Middleware is available on any paid plan. You may be limited on the amount of middleware you can create depending on your plan; if you have questions, check your billing screen or contact our support team.There are two types of middleware:
Pre-middleware that runs before input validation
Post-middleware that runs after the logic executes and a response is generated, but before it is delivered
You’ll need to understand response and exception types when building your middleware.Response types are used to determine how the middleware handles generating a response once it’s done executing.
Response Type
Description
merge
Merges the response of the middleware with the existing response. If the middleware response contains a key that already exists in the generated response, it will be overwritten.
replace
Replaces the existing response entirely with the new response
Exception methods are used to determine how the middleware handles errors that occur during execution.
Exception Method
Description
critical
Stops execution completely and returns an error
silent
Silently ignores errors
rethrow
When paired with post-middleware, it allows the post-middleware to run even when an error occurs in the pre-middleware. Good for error logging or monitoring.
Middleware has predefined inputs that can not be changed. These inputs are:
vars - The variables from the parent object. This could be either the inputs sent to the workflow for a pre-middleware, or the response generated by the parent object for a post-middleware.
Click the Add Middleware button in the top-right corner.
Visually
XanoScript
1
Provide some basic information
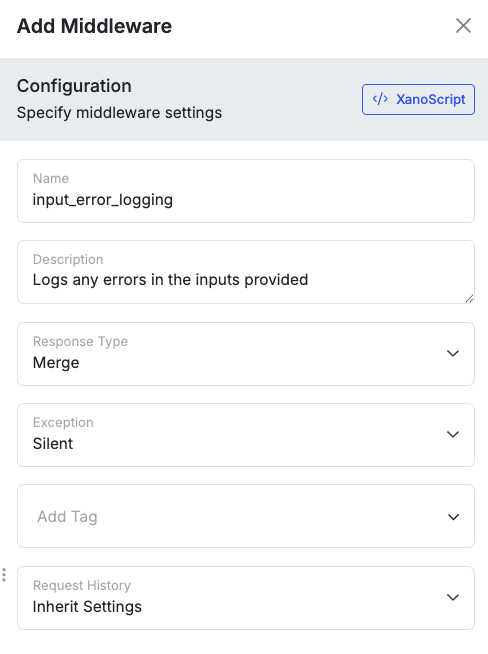
Give your middleware a name, description, and any tags you’d like to apply. Choose your response type and exception method.
Providing basic information for Middleware
2
Build the middleware logic
A basic middleware in XanoScript has three parts — inputs, functions, and response — just like in the visual builder:
Example of a basic middleware in XanoScript
middleware check_banned_user {
  description = "Checks to see if a banned user is attempting to perform any action, and if so, blocks it"

  input {
    json vars
    enum type {
      values = ["pre", "post"]
    }
  }

  stack {
    db.get user {
      field_name = "id"
      field_value = $auth.id
    } as $user1

    precondition ($user1.banned == false) {
      error_type = "unauthorized"
      error = "Your account has been suspended."
    }
  }

  response {
    value = {user1: $user1}
  }

  response_strategy = "merge"
  exception_policy = "critical"
  tags = ["user actions"]
Learn how to build middleware in XanoScript
For more information on how to build middleware in XanoScript, see the XanoScript Middleware documentation.
Once you’ve build your middleware, you’ll need to apply it to the workflows you want it to run with.
Middleware can be applied at the workspace level, workflow group level (like API groups), or onto individual workflows. If no customizations are set on a workflow, it will inherit middleware settings from their parent object, such as the group they reside in or the workspace.You can quickly disable middleware by clicking the toggle and remove it completely from the object by clicking the .
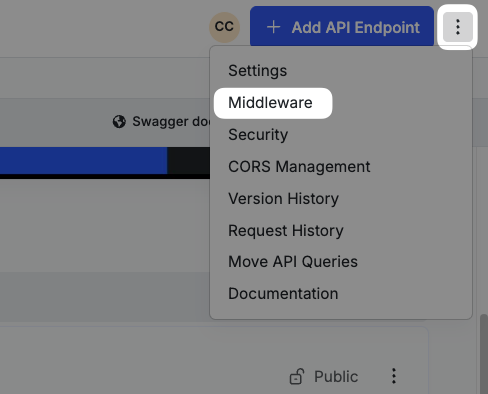
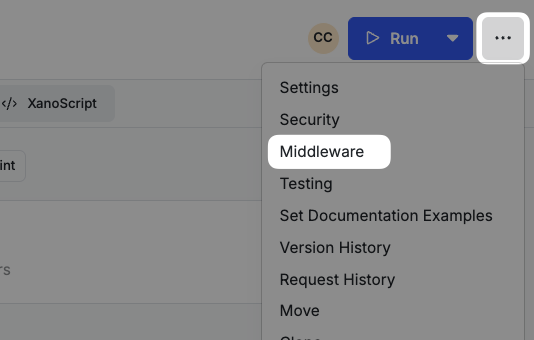
Click Middleware in the left-hand navigation. On the middleware screen, click Manage Global Defaults.Alternatively, you can click the in the top right anywhere in Xano and choose Middleware Defaults from the modal that opens.
Middleware Defaults will only be available once you have at least one middleware built. Until then, you’ll simply be redirected to the Middleware section.
Select the workflow type you want to apply your middleware to. You can choose from:
APIs
AI Tools
Functions
Tasks
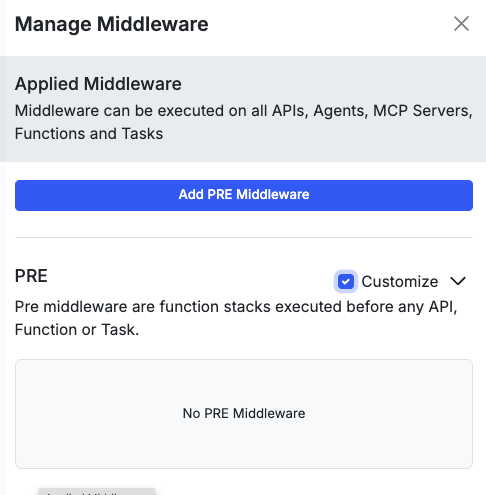
Click Add on either PRE or POST middleware to apply one of your created middleware to that section.
When you apply middleware globally — such as an audit log that runs on every API — it will execute on both authenticated and public endpoints. Public endpoints (and any endpoint reached without a valid token) don’t have an authenticated user, so you can’t assume $auth is populated.If your middleware references $auth.id directly, an unauthenticated request can fail. The two things to watch for are:
Reading the user. On a request without a valid token, there is no authenticated user, so $auth.id throws an error when referencing normally, or a 0 in expressions, rather than a real record ID. Looking up $auth.id via an expression is a quick and easy way to handle both cases.
Writing the user. If you store the user ID on a record (like an audit log), the column must accept an empty value. Make the auth_id (or user_id) column nullable in your table so the Add Record step succeeds when no user is present.
Give logging or monitoring middleware an exception method of silent so a hiccup in the middleware never blocks the underlying request. Use critical only when the middleware is meant to gate access (like the banned-user check above).
The pattern below normalizes the missing user to null before logging, so the same middleware works on public and authenticated endpoints alike.
Visually
XanoScript
1
Capture the user ID in a new variable
Add a Create Variable step (for example, user_id) and set its value to an expression, $auth.id — if auth.id is populated, this will contain the user ID. If it isn’t, it will contain 0.
2
Use a conditional to check and confirm user_id
Add a Conditional step to check if user_id = 0, and if it does, update it to null.
3
Log the request
Add an Add Record step that writes user_id along with any other details you want to capture. Make sure the target column allows null values. This will write null if no token was sent, or the actual $auth.id if a valid token is sent with the request.
// Logs every request; user_id is null for unauthenticated callsmiddleware audit_log { input { json vars enum type { values = ["pre", "post"] } } stack { var $user_id { value = `$auth.id` } // Turn the anonymous 0 into a real null for the column. conditional { if ($user_id == 0) { var.update $user_id { value = null } } } db.add audit_log { data = { user_id : $user_id request_type: $input.type created_at : now } } as $log_entry } response = {log_entry: $log_entry} response_strategy = "merge" exception_policy = "silent" tags = ["logging"]}
Was this page helpful?
{"docsConfig":{"theme":"sequoia","$schema":"https://mintlify.com/docs.json","name":"Xano Documentation","colors":{"primary":"#1b62f8","light":"#3884ff","dark":"#1b62f8"},"logo":{"light":"https://mintcdn.com/xano-997cb9ee/hLg--ImSu58u2jLW/logo/logo_wordmark_blue_1_.svg?fit=max\u0026auto=format\u0026n=hLg--ImSu58u2jLW\u0026q=85\u0026s=487b8933249723b2ebc7bf7b6179ea0c","dark":"https://mintcdn.com/xano-997cb9ee/hLg--ImSu58u2jLW/logo/logo_wordmark_white.svg?fit=max\u0026auto=format\u0026n=hLg--ImSu58u2jLW\u0026q=85\u0026s=2d791d4d44350552266e449b7bea065c"},"favicon":"https://mintcdn.com/xano-997cb9ee/hLg--ImSu58u2jLW/logo/logo_symbol_blue.svg?fit=max\u0026auto=format\u0026n=hLg--ImSu58u2jLW\u0026q=85\u0026s=5d31c3241d161111c202c2ec3afcbcc0","background":{"color":{"light":"#f9f9f9","dark":"#141518"}},"navbar":{"links":[{"href":"/legal","label":"Legal"},{"href":"/updates","label":"Releases"},{"href":"https://status.xano.com/","label":"Status"},{"href":"https://app.xano.com/","label":"Log in"}],"primary":{"type":"button","label":"Get started for free","href":"https://app.xano.com/signup?plan=build\u0026cluster_id=1\u0026segment=eyJhbm9ueW1vdXNJZCI6IjU4NTcwNzY4NDUuODY1MzMwMTE5MCIsInV0bV9tZWRpdW0iOiIiLCJ1dG1fc291cmNlIjoiIiwidXRtX2NhbXBhaWduIjoiIiwidXRtX3Rlcm0iOiIiLCJ1dG1fY29udGVudCI6IiIsInJlZmVycmVyIjoiIn0%3D"}},"footer":{"socials":{"x":"https://x.com/nocodebackend","youtube":"https://www.youtube.com/@nocodebackend","linkedin":"https://www.linkedin.com/company/xano","facebook":"https://www.facebook.com/xanoinc"}},"seo":{"metatags":{"og:type":"website","og:site_name":"Xano Documentation","og:description":"Visual-first unified backend for modern apps. Build APIs, AI Agents, data, logic, auth, \u0026 more—all in one platform."},"indexing":"all"},"styling":{"eyebrows":"breadcrumbs","latex":true},"integrations":{"intercom":{"appId":"abk6h5qu"},"segment":{"key":"manKNsFY6zkgO9hggr91nc5yFYUh2d4B"}},"errors":{"404":{"redirect":false,"title":"Looks like a wire came loose","description":"The page you're looking for doesn't exist, or it moved. Try the search bar above, browse the [documentation home](/), or [contact support](https://xano.com/contact/) if you think something's broken."}},"contextual":{"options":["copy","view","chatgpt","claude","perplexity"],"display":"header"},"navigation":{"pages":[]}},"deployment":{"deploymentMetadataValue":{"subdomain":"xano-997cb9ee","hasAudioNarration":false,"actualSubdomain":"xano-997cb9ee","customDomains":["docs.xano.com"],"gitSource":{"type":"github","owner":"xano-labs","repo":"docs","deployBranch":"main","contentDirectory":"","isPrivate":true,"mountPath":"","label":""},"chroma":{"liveDeploymentHistoryId":"6ad8255dba2d90e54c9e0441","collectionId":"1578fd99-9250-4790-952f-f6c3033cdfd2","schemaVersion":"v3","latestBuiltDeploymentHistoryId":"6ad8255dba2d90e54c9e0441"},"feedback":{"thumbs":true,"edits":false,"issues":false,"agentFeedback":true},"entitlements":{"AI_CHAT":{"status":"ENABLED"},"WEB_MCP":{"status":"ENABLED"},"NARRATION":{"status":"ENABLED"}},"buildId":"6ada8b1ace28e6e5b1a2de33","clientVersion":"0.0.3939","searchFilterCounts":[{"language":"default","tag":"Metadata API","count":208},{"language":"default","tag":"Xano","count":129},{"language":"default","tag":"XanoScript","count":46},{"language":"default","tag":"Build","count":45},{"language":"default","tag":"References","count":32},{"language":"default","tag":"table / schema / type","count":25},{"language":"default","tag":"Test \u0026 Deploy","count":20},{"language":"default","tag":"Enterprise","count":17},{"language":"default","tag":"CLI","count":17},{"language":"default","tag":"Logic \u0026 Workflows","count":13}]},"assistantConfig":{"enableAskAiButton":true,"enableStarterQuestions":true,"enableContextualStarterQuestions":true,"enableAskAiSearchBar":true},"hasChatPermissions":true,"hasWebMcpPermissions":true,"toggles":[{"name":"kill-isr","enabled":true,"variant":{"name":"disabled","enabled":false,"feature_enabled":true},"impressionData":false},{"name":"agent-mintlify-slack","enabled":true,"variant":{"name":"disabled","enabled":false,"feature_enabled":true},"impressionData":false},{"name":"editor-v7-file-tree","enabled":true,"variant":{"name":"disabled","enabled":false,"feature_enabled":true},"impressionData":false},{"name":"agent-integrations-settings","enabled":true,"variant":{"name":"disabled","enabled":false,"feature_enabled":true},"impressionData":false},{"name":"automations-pr-grouping","enabled":true,"variant":{"name":"disabled","enabled":false,"feature_enabled":true},"impressionData":false},{"name":"custom-prefix","enabled":true,"variant":{"name":"disabled","enabled":false,"feature_enabled":true},"impressionData":false},{"name":"analytics-v7","enabled":true,"variant":{"name":"disabled","enabled":false,"feature_enabled":true},"impressionData":false},{"name":"user-flows-analytics","enabled":true,"variant":{"name":"disabled","enabled":false,"feature_enabled":true},"impressionData":false},{"name":"no-publish-flow","enabled":true,"variant":{"name":"disabled","enabled":false,"feature_enabled":true},"impressionData":false},{"name":"workos-onboarding","enabled":true,"variant":{"name":"disabled","enabled":false,"feature_enabled":true},"impressionData":false},{"name":"llms-txt-v2","enabled":true,"variant":{"name":"disabled","enabled":false,"feature_enabled":true},"impressionData":false},{"name":"pause-universal-search-reconcile","enabled":true,"variant":{"name":"disabled","enabled":false,"feature_enabled":true},"impressionData":false},{"name":"snapshot-serving-live","enabled":true,"variant":{"name":"disabled","enabled":false,"feature_enabled":true},"impressionData":false},{"name":"stripTemperatureMiddleware","enabled":true,"variant":{"name":"disabled","enabled":false,"feature_enabled":true},"impressionData":false},{"name":"per-site-search-delta","enabled":true,"variant":{"name":"disabled","enabled":false,"feature_enabled":true},"impressionData":false},{"name":"support-platform-pylon-zendesk","enabled":true,"variant":{"name":"disabled","enabled":false,"feature_enabled":true},"impressionData":false},{"name":"snapshot-serving","enabled":true,"variant":{"name":"disabled","enabled":false,"feature_enabled":true},"impressionData":false},{"name":"instant-rollback","enabled":true,"variant":{"name":"disabled","enabled":false,"feature_enabled":true},"impressionData":false},{"name":"granular-notifications-server","enabled":true,"variant":{"name":"disabled","enabled":false,"feature_enabled":true},"impressionData":false},{"name":"granular-notifications","enabled":true,"variant":{"name":"disabled","enabled":false,"feature_enabled":true},"impressionData":false},{"name":"editor-private-page-search","enabled":true,"variant":{"name":"disabled","enabled":false,"feature_enabled":true},"impressionData":false},{"name":"automations-fable","enabled":true,"variant":{"name":"disabled","enabled":false,"feature_enabled":true},"impressionData":false},{"name":"fixed-ai-action-pricing","enabled":true,"variant":{"name":"disabled","enabled":false,"feature_enabled":true},"impressionData":false},{"name":"automation-resolve-merge-conflict","enabled":true,"variant":{"name":"disabled","enabled":false,"feature_enabled":true},"impressionData":false},{"name":"scoped-publishing","enabled":true,"variant":{"name":"disabled","enabled":false,"feature_enabled":true},"impressionData":false},{"name":"mintql","enabled":true,"variant":{"name":"disabled","enabled":false,"feature_enabled":true},"impressionData":false},{"name":"page-level-analytics","enabled":true,"variant":{"name":"disabled","enabled":false,"feature_enabled":true},"impressionData":false},{"name":"editor-version-history-v2","enabled":true,"variant":{"name":"disabled","enabled":false,"feature_enabled":true},"impressionData":false},{"name":"editor-nav-generations","enabled":true,"variant":{"name":"disabled","enabled":false,"feature_enabled":true},"impressionData":false},{"name":"billing-page-v2","enabled":true,"variant":{"name":"disabled","enabled":false,"feature_enabled":true},"impressionData":false},{"name":"workspace-projects","enabled":true,"variant":{"name":"disabled","enabled":false,"feature_enabled":true},"impressionData":false},{"name":"assistant-v5","enabled":true,"variant":{"name":"disabled","enabled":false,"feature_enabled":true},"impressionData":false},{"name":"byok-sep-25","enabled":true,"variant":{"name":"disabled","enabled":false,"feature_enabled":true},"impressionData":false},{"name":"fork-pr-previews","enabled":true,"variant":{"name":"disabled","enabled":false,"feature_enabled":true},"impressionData":false},{"name":"revalidation-jwt","enabled":true,"variant":{"name":"disabled","enabled":false,"feature_enabled":true},"impressionData":false},{"name":"vite-origin","enabled":true,"variant":{"name":"disabled","enabled":false,"feature_enabled":true},"impressionData":false},{"name":"editor-agent-model-picker","enabled":true,"variant":{"name":"disabled","enabled":false,"feature_enabled":true},"impressionData":false},{"name":"billing-updated-9-15","enabled":true,"variant":{"name":"disabled","enabled":false,"feature_enabled":true},"impressionData":false},{"name":"hobby-abuse-scan","enabled":true,"variant":{"name":"disabled","enabled":false,"feature_enabled":true},"impressionData":false},{"name":"dashboard-inbox","enabled":true,"variant":{"name":"disabled","enabled":false,"feature_enabled":true},"impressionData":false}],"isAtlas":false,"googleFontsInlined":false},"customCss":[{"filePath":"style.css","content":"@keyframes opsai-glow{0%,to{box-shadow:0 0 0 8px rgba(56,132,255,.06)}50%{box-shadow:0 0 0 13px rgba(56,132,255,.03)}}#content-area .link{color:#103b95}.prose img:not([data-rmiz-modal-img]){max-width:60%;height:auto}.w-full aspect-video rounded-xl{max-width:60%!important}[data-rmiz-modal-content] img[data-rmiz-modal-img]{max-width:90vw!important;max-height:90vh!important;object-fit:contain}html.dark #content-area .link{color:#6b99fa}html.dark .mermaid svg g.node .label text,html.dark .mermaid svg g.node span.nodeLabel{fill:#eaf1ff!important;color:#103b95!important}html.dark .mermaid svg g.node circle,html.dark .mermaid svg g.node ellipse,html.dark .mermaid svg g.node path,html.dark .mermaid svg g.node polygon,html.dark .mermaid svg g.node rect{stroke:#8fb3ff!important;stroke-width:15px!important}img{background:0 0!important;background-color:transparent!important}.nodeLabel{font-size:12px}.stickyDiagram{position:sticky;top:var(--scroll-mt);flex:0 0 180px;min-width:100px}@media (max-width:768px){.stickyDiagram{position:static;top:auto;flex:none;width:100%;margin-bottom:1rem}}table{display:table!important;width:100%;table-layout:auto}table td,table th{vertical-align:top;border-left:1px solid #dadada!important;border-right:1px solid #dadada!important;padding:.5rem!important}.table-wrapper{overflow-x:visible}.supportButton{border:0!important}.arcadediv{position:relative;padding-bottom:calc(80.4861% + 41px);height:0;width:100%}.arcadeiframe{position:absolute;top:0;left:0;width:100%;height:100%!important;color-scheme:light}.tab-icon{display:inline-block;border-radius:4px;padding:2px}html.dark .tab-icon{background-color:#bababa!important}h2>span>.icon{position:relative;top:-.1em;margin-right:.4rem;vertical-align:middle}.ui-bubble{gap:.35rem;padding:.2rem .5rem;font-size:.9em!important;font-weight:800!important}html.dark .kb,html.dark .kbd,html.dark .ui-bubble{background-color:#1f2937;border-color:#374151}.ui-bubble .icon{width:1.2em!important;height:1.2em!important;flex-shrink:0;display:inline-block;vertical-align:middle}.kb,.kbd,.ui-bubble{display:inline-flex;align-items:center;margin-bottom:.2rem;margin-left:.2rem;margin-right:.2rem;background-color:var(--mintlify-code-bg, #f3f4f6);border:1px solid var(--mintlify-border-color, #e5e7eb);border-radius:6px;font:inherit;vertical-align:middle}.kb{gap:.35rem;padding:.2rem .5rem;font-size:.8em!important;font-weight:600!important;font-family:ui-monospace,\"SFMono-Regular\",\"Fira Code\",\"Cascadia Code\",Menlo,Consolas,monospace!important}.kb .icon{width:1em!important;height:1em!important;display:inline-block}.kbd{gap:.3rem;padding:.15rem .45rem;border-bottom-width:3px;font-size:.85em!important;font-weight:700!important;line-height:1.4;white-space:nowrap;user-select:none;color:var(--mintlify-content-color, #374151)}html.dark .kbd{border-color:#374151 #374151 #4b5563;color:#e5e7eb}.kb .icon,.kbd .icon,.kbd svg{flex-shrink:0;vertical-align:middle}.kbd .icon{width:1.1em!important;height:1.1em!important;display:inline-block}.kbd svg{width:1em;height:1em}.kbd--linux::before,.kbd--mac::before,.kbd--windows::before{font-family:\"Font Awesome 6 Brands\",\"Font Awesome 6 Free\",FontAwesome;content:\"\\f179\";font-weight:900;font-style:normal;font-size:.95em;margin-right:.25em;vertical-align:middle}.kbd--linux::before,.kbd--windows::before{content:\"\\f17a\";font-weight:400;font-size:.9em}.kbd--linux::before{content:\"\\f17c\";font-size:.95em}:root[data-theme=dark] .prose :where(h1,h2,h3,h4,h5,h6),html.dark .prose :where(h1,h2,h3,h4,h5,h6){color:#fff!important}.prose :where(img):not(:where([class~=not-prose],[class~=not-prose] *)){margin-top:0!important;margin-bottom:0!important}.prose :where(h1, h2, h3, h4, h5, h6)[id]{scroll-margin-top:120px!important}.browser-frame{--bf-radius:10px;--bf-shadow:0 8px 24px rgba(0,0,0,.06);--bf-border:#e5e7eb;--bf-bg:#ffffff;--bf-chrome:#f3f4f6;--bf-text:#6b7280;--bf-address-bg:rgba(255,255,255,.75);border:1px solid var(--bf-border);border-radius:var(--bf-radius);background:var(--bf-bg);box-shadow:var(--bf-shadow);overflow:hidden;max-width:100%}.dark .browser-frame{--bf-border:rgba(255,255,255,.12);--bf-bg:#0b0f19;--bf-chrome:#111827;--bf-text:rgba(255,255,255,.70);--bf-address-bg:rgba(255,255,255,.06);--bf-shadow:0 12px 34px rgba(0,0,0,.45)}.browser-frame__top{display:flex;align-items:center;gap:8px;padding:7px 10px;background:var(--bf-chrome);border-bottom:1px solid var(--bf-border)}.browser-frame__controls{display:flex;align-items:center;gap:6px;flex:0 0 auto}.browser-frame__dot{width:10px;height:10px;border-radius:999px;box-shadow:inset 0 0 0 1px rgba(0,0,0,.12)}.dark .browser-frame__dot{box-shadow:inset 0 0 0 1px rgba(255,255,255,.1)}.browser-frame__dot--red{background:#ff5f57}.browser-frame__dot--yellow{background:#febc2e}.browser-frame__dot--green{background:#28c840}.browser-frame__address{flex:1 1 auto;height:22px;border-radius:999px;border:1px solid rgba(0,0,0,.06);background:var(--bf-address-bg);display:flex;align-items:center;justify-content:center;padding:0 10px;font:500 11px/1.2 ui-sans-serif,system-ui,-apple-system,Segoe UI,Roboto,Helvetica,Arial;color:var(--bf-text);letter-spacing:.2px;user-select:none}.dark .browser-frame__address{border-color:rgba(255,255,255,.08)}.browser-frame__body{background:var(--bf-bg)}.browser-frame__body img{width:100%;height:auto}.browser-frame__body *{border:0!important;border-radius:0!important;box-shadow:none!important;background:0 0!important}.browser-frame__body pre,.browser-frame__body>*{margin:0!important;padding:0!important}.browser-frame__body .browser-frame__img--light{display:block}.browser-frame__body .browser-frame__img--dark,.dark .browser-frame__body .browser-frame__img--light{display:none}.dark .browser-frame__body .browser-frame__img--dark{display:block}.qs-step{border:1px solid var(--mintlify-border-color, #e5e7eb);border-radius:1rem;padding:2rem;margin-bottom:2rem;position:relative}.qs-step-number{position:absolute;top:-.75rem;left:1.25rem;width:1.75rem;height:1.75rem;border-radius:50%;background:linear-gradient(135deg,#1b62f8,#6366f1);display:flex;align-items:center;justify-content:center;color:#fff;font-size:.8rem;font-weight:700;line-height:1}.qs-step h3:first-of-type{margin-top:.25rem}.feature-grid{display:grid;grid-template-columns:1fr 1fr;border:0;margin:.5rem 0}.feature-grid__item{padding:1.25rem 1.5rem;text-align:justify}.feature-grid__item strong{font-size:1.15rem}.feature-grid__item svg{margin-right:.4rem;width:1.75em;height:1.75em;vertical-align:middle;position:relative;top:-.1em}.feature-grid__desc{margin-top:.75rem}.feature-grid__item:nth-child(odd){border-right:1px solid var(--mintlify-border-color, #e5e7eb)}.feature-grid__item:nth-child(n+3){border-top:1px solid var(--mintlify-border-color, #e5e7eb)}html.dark .feature-grid__item:nth-child(odd){border-right-color:rgba(255,255,255,.1)}html.dark .feature-grid__item:nth-child(n+3){border-top-color:rgba(255,255,255,.1)}@media (max-width:640px){.feature-grid{grid-template-columns:1fr}.feature-grid__item:nth-child(odd){border-right:none}.feature-grid__item:nth-child(n+2){border-top:1px solid var(--mintlify-border-color, #e5e7eb)}}html.dark .callout[data-callout-type=tip]{background-color:rgba(5,46,22,.6)!important}.hero-tabs [role=tablist]{display:flex!important;gap:.75rem;border-bottom:none!important;margin-bottom:1.5rem}.hero-tabs [role=tab]{flex:1;text-align:center;padding:.625rem 1rem;border:1px solid var(--mintlify-border-color, #e5e7eb);border-radius:.75rem;font-weight:500;font-size:.9rem;color:#374151;background:var(--mintlify-card-bg, #fff);cursor:pointer;transition:all .15s ease;box-shadow:0 1px 2px rgba(0,0,0,.04)}html.dark .hero-tabs [role=tab]{color:#d1d5db;background:var(--mintlify-card-bg, rgba(255, 255, 255, 0.05));border-color:var(--mintlify-border-color, rgba(255, 255, 255, 0.1));box-shadow:0 1px 2px rgba(0,0,0,.2)}.hero-tabs [role=tab]:hover{border-color:#1b62f8;color:#111827;box-shadow:0 1px 3px rgba(56,132,255,.15)}html.dark .hero-tabs [role=tab]:hover{border-color:#3884ff;color:#f3f4f6;box-shadow:0 1px 3px rgba(56,132,255,.25)}.hero-tabs [role=tab][aria-selected=true]{border-color:#1b62f8;color:#103b95;background:#eef4ff;box-shadow:0 1px 3px rgba(56,132,255,.18)}html.dark .hero-tabs [role=tab][aria-selected=true]{border-color:#6b99fa;color:#eaf1ff;background:rgba(56,132,255,.16);box-shadow:0 1px 3px rgba(0,0,0,.3)}.hero-tabs [role=tab],.hero-tabs [role=tab] *,.opsai-nav a{text-decoration:none!important}.hero-tabs [role=tab] *{border-bottom:none!important}@media (min-width:1024px){#content-area{max-width:1100px!important}}@media (min-width:1280px){#content-area{margin-left:auto!important;margin-right:auto!important}}@media (min-width:1800px){#content-area{max-width:1200px!important}}.opsai-hero{position:relative;display:flex;flex-direction:column;align-items:center;margin:0 0 2.5rem;padding:3.25rem 2rem 3rem;border-radius:1.25rem;overflow:hidden;text-align:center;background:radial-gradient(120% 140% at 50% -20%,rgba(56,132,255,.35) 0,rgba(56,132,255,0) 60%),linear-gradient(160deg,#0b1220 0,#0e1729 55%,#0b1220 100%);border:1px solid rgba(56,132,255,.25)}.opsai-hero::after{content:\"\";position:absolute;inset:0;background-image:linear-gradient(rgba(56,132,255,.06) 1px,transparent 1px),linear-gradient(90deg,rgba(56,132,255,.06) 1px,transparent 1px);background-size:36px 36px;-webkit-mask-image:radial-gradient(70% 70% at 50% 0,#000 0,transparent 75%);mask-image:radial-gradient(70% 70% at 50% 0,#000 0,transparent 75%);pointer-events:none}.opsai-hero>*{position:relative;z-index:1}.opsai-mark{display:flex;align-items:center;justify-content:center;width:72px;height:72px;margin:0 0 1rem;border-radius:50%;background:rgba(56,132,255,.12);box-shadow:0 0 0 8px rgba(56,132,255,.06);animation:opsai-glow 4.5s ease-in-out infinite}.opsai-mark::before{content:\"\";width:34px;height:34px;background-repeat:no-repeat;background-position:center;background-size:contain;background-image:url(\"data:image/svg+xml,%3Csvg xmlns='http://www.w3.org/2000/svg' viewBox='0 0 24 24' fill='none' stroke='%237db4ff' stroke-width='2' stroke-linecap='round' stroke-linejoin='round'%3E%3Ccircle cx='12' cy='12' r='3'/%3E%3Cpath d='M12 1v2M12 21v2M4.22 4.22l1.42 1.42M18.36 18.36l1.42 1.42M1 12h2M21 12h2M4.22 19.78l1.42-1.42M18.36 5.64l1.42-1.42'/%3E%3C/svg%3E\")}@media (prefers-reduced-motion:reduce){.opsai-mark{animation:none}}.opsai-wordmark{display:flex;justify-content:center;align-items:baseline;width:100%;font-size:3rem!important;font-weight:800!important;letter-spacing:-.04em;line-height:1!important;margin:0!important;padding:0!important;border:0!important;color:#f8fafc!important}.opsai-wordmark .accent{background:linear-gradient(90deg,#1b62f8,#7db4ff);-webkit-background-clip:text;background-clip:text;color:transparent}.opsai-tagline{margin:1.15rem 0 0!important;max-width:40rem;font-size:1.15rem;line-height:1.55;color:#cbd5e1!important}.opsai-tagline strong{color:#f1f5f9;font-weight:700}.opsai-pills{display:flex;flex-wrap:wrap;gap:.5rem;justify-content:center;margin-top:1.5rem}.opsai-pill{font-size:.8rem;font-weight:600;letter-spacing:.01em;color:#bfdbfe;padding:.35rem .85rem;border-radius:999px;border:1px solid rgba(56,132,255,.35);background:rgba(56,132,255,.1)}.opsai-stats{display:grid;grid-template-columns:repeat(3,1fr);gap:1rem;margin:0 0 2.5rem}@media (max-width:720px){.opsai-stats{grid-template-columns:1fr}}.opsai-stat{text-align:center;padding:1.4rem 1rem;border-radius:.9rem;border:1px solid rgba(148,163,184,.18);background:linear-gradient(180deg,rgba(56,132,255,.06),rgba(56,132,255,.01))}.opsai-stat__num{font-size:1.7rem;font-weight:800;letter-spacing:-.03em;background:linear-gradient(90deg,#1b62f8,#7db4ff);-webkit-background-clip:text;background-clip:text;color:transparent;line-height:1.1}.opsai-stat__label{margin-top:.45rem;font-size:.9rem;color:#94a3b8;line-height:1.45}.opsai-nav{display:flex;gap:1rem;margin-top:3rem}@media (max-width:600px){.opsai-nav{flex-direction:column}}.opsai-nav a{flex:1 1 0;display:block;padding:1rem 1.15rem;border-radius:.75rem;border:1px solid rgba(148,163,184,.22);background:linear-gradient(180deg,rgba(56,132,255,.05),rgba(56,132,255,.01));transition:border-color .15s ease,transform .15s ease}.opsai-nav a:hover{border-color:rgba(56,132,255,.5);transform:translateY(-1px)}.opsai-nav a.opsai-nav--next{text-align:right}.opsai-nav__dir{display:block;font-size:.72rem;font-weight:700;letter-spacing:.06em;text-transform:uppercase;color:#64748b}.opsai-nav__title{display:block;margin-top:.25rem;font-size:1.02rem;font-weight:600;color:#1b62f8}div:has(>div>.chat-assistant-input){background-color:#eef4ff!important;border-color:#cbd5e1!important;box-shadow:0 2px 12px rgba(16,59,149,.14)!important;transition:border-color .15s ease,box-shadow .15s ease,opacity .25s ease!important}html.chat-dimmed div:has(>div>.chat-assistant-input){opacity:.35}html.chat-dimmed div:has(>div>.chat-assistant-input):focus-within,html.chat-dimmed div:has(>div>.chat-assistant-input):hover{opacity:1}@media (prefers-reduced-motion:reduce){div:has(>div>.chat-assistant-input){transition:none!important}}div:has(>div>.chat-assistant-input):hover{border-color:#94a3b8!important}div:has(>div>.chat-assistant-input):focus-within{border-color:#1b62f8!important;box-shadow:0 4px 18px rgba(16,59,149,.22)!important}html.dark div:has(>div>.chat-assistant-input){background-color:#16203a!important;border-color:rgba(255,255,255,.3)!important;box-shadow:0 2px 14px rgba(0,0,0,.45)!important}html.dark div:has(>div>.chat-assistant-input):hover{border-color:rgba(255,255,255,.5)!important}html.dark div:has(>div>.chat-assistant-input):focus-within{border-color:#6b99fa!important}.chat-assistant-input::placeholder{color:#103b95!important;opacity:1!important;font-weight:600}html.dark .chat-assistant-input::placeholder{color:#9dc0ff!important}.steps [data-component-part=step-number]>div{border-radius:.5rem!important;background-color:#f1f5f9!important;border:1px solid #cbd5e1;color:#0f172a!important;box-shadow:0 1px 2px rgba(15,23,42,.06)}html.dark .steps [data-component-part=step-number]>div{background-color:#1f2937!important;border-color:rgba(255,255,255,.18);color:#f3f4f6!important;box-shadow:none}.steps [data-component-part=step-line]{width:1.5px!important}.steps [data-component-part=step-line]:not([class*=to-transparent]){background-color:#cbd5e1!important}.steps [data-component-part=step-line][class*=to-transparent]{background-color:transparent!important;background-image:linear-gradient(to bottom,#cbd5e1,rgba(203,213,225,0))!important}html.dark .steps [data-component-part=step-line]:not([class*=to-transparent]){background-color:rgba(255,255,255,.18)!important}html.dark .steps [data-component-part=step-line][class*=to-transparent]{background-image:linear-gradient(to bottom,rgba(255,255,255,.18),rgba(255,255,255,0))!important}.steps [data-component-part=step-content]:first-child>h3:first-child{margin-top:0;font-size:1em;line-height:1.75;font-weight:600}nav ul.toc{padding-left:.875rem}nav ul.toc,nav ul.toc li.toc-item>a{position:relative}nav ul.toc li.toc-item>a::after{content:\"\";position:absolute;top:0;bottom:0;left:calc(var(--toc-padding-left, 0rem) - .875rem);width:1.5px;background-color:#e5e7eb;transition:background-color .2s ease}html.dark nav ul.toc li.toc-item>a::after{background-color:rgba(255,255,255,.12)}nav ul.toc .toc-slider{position:absolute;top:0;left:0;z-index:1;list-style:none;width:1.5px;height:0;opacity:0;background-color:#1b62f8;transition:transform .25s cubic-bezier(.4,0,.2,1),height .25s cubic-bezier(.4,0,.2,1),opacity .15s ease;pointer-events:none}html.dark nav ul.toc .toc-slider{background-color:#6b99fa}nav ul.toc .toc-link,nav ul.toc .toc-tracer{position:absolute;top:0;left:0;height:1.5px;list-style:none;pointer-events:none}nav ul.toc .toc-link{background-image:repeating-linear-gradient(to right,#d1d5db 0 2px,transparent 2px 5px)}html.dark nav ul.toc .toc-link{background-image:repeating-linear-gradient(to right,rgba(255,255,255,.22) 0 2px,transparent 2px 5px)}nav ul.toc .toc-tracer{width:0;opacity:0;z-index:1;background-color:#1b62f8;transition:transform .15s cubic-bezier(.4,0,.2,1),width .15s cubic-bezier(.4,0,.2,1),opacity .15s ease}html.dark nav ul.toc .toc-tracer{background-color:#6b99fa}@media (prefers-reduced-motion:reduce){nav ul.toc .toc-slider,nav ul.toc .toc-tracer{transition:none}}html:not(.toc-slide) nav ul.toc li.toc-item[data-active]>a::after{background-color:#1b62f8}html:not(.toc-slide) nav ul.toc li.toc-item[data-active]:has(li.toc-item[data-active])>a::after,html:not(.toc-slide) nav ul.toc li.toc-item[data-active]:has(~li.toc-item[data-active])>a::after{background-color:#e5e7eb}html.dark:not(.toc-slide) nav ul.toc li.toc-item[data-active]>a::after{background-color:#6b99fa}html.dark:not(.toc-slide) nav ul.toc li.toc-item[data-active]:has(li.toc-item[data-active])>a::after,html.dark:not(.toc-slide) nav ul.toc li.toc-item[data-active]:has(~li.toc-item[data-active])>a::after{background-color:rgba(255,255,255,.12)}div.border-l:has(ul.toc){border-left:none!important}.chat-assistant-send-button,.prompt [data-component-part=prompt-icon] svg{background-color:#1b62f8!important}.chat-assistant-send-button:hover{background-color:#1f6dea!important}@font-face{font-family:\"Press Start 2P\";font-style:normal;font-weight:400;font-display:swap;src:url(/fonts/press-start-2p-latin.woff2) format(\"woff2\");unicode-range:U+0030-0039}div:has(>#error-badge)::before{content:\"\";display:block;width:100%;max-width:131px;aspect-ratio:262/292;margin:0 auto -.9rem;translate:-5px;z-index:1;background:url(/images/robot-not-found.png) center bottom/contain no-repeat;image-rendering:pixelated}#error-badge{font-family:\"Press Start 2P\",ui-monospace,monospace;font-size:5.5rem;line-height:1;letter-spacing:0;padding:0}.sidebar-group-header .sidebar-title{text-transform:uppercase;font-size:.6875rem;font-weight:600;letter-spacing:.06em}#navigation-items div:has(>.sidebar-group-header):not(:first-child){margin-top:2.5rem}#navigation-items button.group>div:has(>svg.transition-transform){margin-left:auto}#navigation-items li ul li a>div:first-child:has(>:is(svg, img)){display:none}.prompt{padding:1.25rem!important;gap:.875rem!important;border-color:#cfe0ff!important;background:linear-gradient(180deg,#f6faff 0,#edf4ff 100%)!important;box-shadow:0 1px 2px rgba(16,59,149,.06)}html.dark .prompt{border-color:rgba(56,132,255,.28)!important;background:rgba(56,132,255,.08)!important;box-shadow:none}html.dark .prompt [data-component-part=prompt-icon] svg{background-color:#6b99fa!important}.prompt [data-component-part=prompt-description]{font-size:.9375rem;line-height:1.5}.prompt [data-component-part=prompt-actions-wrapper]{flex-basis:100%;justify-content:flex-end;gap:.5rem!important}.prompt [data-component-part=prompt-action-copy-button],.prompt [data-component-part=prompt-action-cursor-button]{padding:.4375rem .875rem!important;font-size:.8125rem!important;line-height:1.25rem!important;border-radius:.625rem!important}.prompt [data-component-part=prompt-action-copy-button]{background-color:#1b62f8!important;box-shadow:0 1px 2px rgba(16,59,149,.18)}.prompt [data-component-part=prompt-action-copy-button]:hover{background-color:#2f6fd9!important}.prompt [data-component-part=prompt-action-cursor-button]{color:#103b95!important;background:#fff!important;border-color:#cfe0ff!important;box-shadow:0 1px 2px rgba(16,59,149,.06)}.prompt [data-component-part=prompt-action-cursor-button]:hover{background:#f3f8ff!important;border-color:#1b62f8!important}html.dark .prompt [data-component-part=prompt-action-cursor-button]{color:#eaf1ff!important;background:rgba(255,255,255,.06)!important;border-color:rgba(56,132,255,.35)!important;box-shadow:none}html.dark .prompt [data-component-part=prompt-action-cursor-button]:hover{background:rgba(56,132,255,.18)!important;border-color:#6b99fa!important}@font-face{font-family:\"Kalam\";font-style:normal;font-weight:400;font-display:swap;src:url(/fonts/kalam-latin-400.woff2) format(\"woff2\");unicode-range:U+0000-00FF,U+2018-2019,U+201C-201D,U+2013-2014}.hand-note{position:relative;z-index:5;display:flex;align-items:flex-end;gap:.25rem;margin:1.5rem 0 .75rem;color:#1b62f8;pointer-events:none}.hand-note-right{justify-content:flex-end;padding-right:1rem}.hand-note-left{justify-content:flex-start;padding-left:1rem;flex-direction:row-reverse}html.dark .hand-note{color:#6b99fa}.hand-note-text{font-family:\"Kalam\",\"Comic Sans MS\",cursive;font-size:1.125rem;line-height:1.2;transform:rotate(-3deg)}.hand-note-arrow{width:44px;height:66px;margin-bottom:-44px;flex:none}.hand-note-left .hand-note-arrow{transform:scaleX(-1)}:not(pre)>code{color:#18181b!important;background-color:rgba(17,24,39,.08)!important;border-color:rgba(17,24,39,.1)!important}html.dark :not(pre)>code{color:#f4f4f5!important;background-color:rgba(255,255,255,.1)!important;border-color:rgba(255,255,255,.14)!important}a :not(pre)>code,a>code{color:inherit!important}details.accordion{border-color:rgba(17,24,39,.08)!important;background:#fff!important}html.dark details.accordion{border-color:rgba(255,255,255,.12)!important;background:0 0!important}details.accordion>summary{padding:1.0625rem 1.5rem!important}details.accordion>summary:hover{background:#f6f8fb!important}details.accordion>[data-component-part=accordion-content]{padding-top:.75rem!important}html.dark details.accordion>summary:hover{background:rgba(255,255,255,.04)!important}.faqx{--faqx-line:var(--gray-200,#e5e7eb);--faqx-fg:var(--gray-900,#111827);--faqx-fg2:var(--gray-500,#6b7280);--faqx-bg:#fff;--faqx-accent:#3884ff;display:flex;align-items:center;justify-content:flex-end;gap:8px;flex-wrap:wrap;margin-bottom:12px}html.dark .faqx{--faqx-line:rgba(255,255,255,.1);--faqx-fg:var(--gray-100,#f3f4f6);--faqx-fg2:var(--gray-400,#9ca3af);--faqx-bg:transparent}.faqx--inline{margin-top:-2.5rem}@media (max-width:640px){.faqx--inline{margin-top:0;justify-content:flex-start}}.faqx-search{position:relative;flex:0 1 260px;min-width:180px}.faqx-search svg{position:absolute;left:9px;top:50%;transform:translateY(-50%);width:13px;height:13px;color:var(--faqx-fg2);pointer-events:none}.faqx-input{width:100%;box-sizing:border-box;font-size:13px;line-height:1.4;color:var(--faqx-fg);background:var(--faqx-bg);border:1px solid var(--faqx-line);border-radius:8px;padding:6px 10px 6px 27px;outline:0;transition:border-color .15s ease,box-shadow .15s ease}.faqx-input::placeholder{color:var(--faqx-fg2)}.faqx-input:focus{border-color:var(--faqx-accent);box-shadow:0 0 0 3px color-mix(in srgb,var(--faqx-accent) 18%,transparent)}.faqx-input::-webkit-search-cancel-button{cursor:pointer}.faqx-btn{font-size:13px;line-height:1.4;font-weight:500;color:var(--faqx-fg);white-space:nowrap;background:var(--faqx-bg);border:1px solid var(--faqx-line);border-radius:8px;padding:6px 11px;cursor:pointer;transition:border-color .15s ease,color .15s ease}.faqx-btn:hover{border-color:var(--faqx-accent);color:var(--faqx-accent)}.faqx-btn:focus-visible{outline:2px solid var(--faqx-accent);outline-offset:2px}.faqx-count{font-size:12px;color:var(--faqx-fg2);white-space:nowrap}.faqx--hero{flex-wrap:nowrap;gap:10px;margin:0 0 2rem}.faqx--hero .faqx-search{flex:1 1 auto;min-width:0}.faqx--hero .faqx-search svg{left:14px;width:16px;height:16px}.faqx--hero .faqx-input{font-size:15px;padding:11px 84px 11px 40px;border-radius:12px;box-shadow:0 1px 2px rgba(17,24,39,.05)}.faqx--hero .faqx-btn{font-size:14px;padding:11px 16px;border-radius:12px;flex:none}.faqx--hero .faqx-count{position:absolute;right:14px;top:50%;transform:translateY(-50%);pointer-events:none}html.dark .faqx--hero .faqx-input{background:rgba(255,255,255,.03);box-shadow:none}.faqx-empty{font-size:14px;color:var(--faqx-fg2);border:1px dashed var(--faqx-line);border-radius:12px;padding:16px;text-align:center;margin-bottom:12px}.accordion-group>details[data-faqx-hidden],.accordion-group[data-faqx-hidden],h2[data-faqx-hidden],h3[data-faqx-hidden]{display:none!important}.accordion-group>details[data-faqx-first]{border-top-width:0!important}::highlight(faqx-hit){background:color-mix(in srgb,#3884ff 22%,transparent);color:inherit;border-radius:2px}html.dark ::highlight(faqx-hit){background:color-mix(in srgb,#3884ff 38%,transparent)}@media (prefers-reduced-motion:reduce){.faqx-btn,.faqx-input{transition:none}}.faqx-count[hidden],.faqx-empty[hidden]{display:none}.xano-hs-trigger{display:inline-flex;align-items:center;gap:.5rem;padding:.5rem 1rem;font-size:.875rem;font-weight:600;line-height:1.25rem;color:#fff;background-color:#3884ff;border:0;border-radius:.5rem;cursor:pointer;transition:background-color .15s ease,transform .15s ease}.xano-hs-trigger:hover{background-color:#2f74e6}.xano-hs-trigger:active{transform:translateY(1px)}.xano-hs-trigger:focus-visible{outline:2px solid #3884ff;outline-offset:2px}.xano-hs-trigger--header{margin-right:.5rem;padding:.375rem .75rem;border-radius:.75rem;font-weight:500;color:#fff;background-color:#3884ff;white-space:nowrap;flex-shrink:0}.xano-hs-trigger--header:hover{background-color:#2f74e6}#page-context-menu{flex-wrap:wrap;row-gap:.5rem}.xano-hs-overlay{position:fixed;inset:0;z-index:2147483000;display:flex;align-items:flex-start;justify-content:center;padding:1.5rem;overflow-y:auto;background-color:rgba(15,17,21,.55);backdrop-filter:blur(2px)}.xano-hs-modal{position:relative;width:100%;max-width:30rem;margin:auto;padding:1.75rem;border-radius:.875rem;background-color:#fff;border:1px solid rgba(0,0,0,.08);box-shadow:0 24px 48px -12px rgba(0,0,0,.35);color:#1a1c20}html.dark .xano-hs-modal{background-color:#1a1c20;border-color:rgba(255,255,255,.1);color:#f2f3f5}.xano-hs-close{position:absolute;top:.75rem;right:.75rem;width:2rem;height:2rem;display:flex;align-items:center;justify-content:center;font-size:1.25rem;line-height:1;color:inherit;opacity:.55;background:0 0;border:0;border-radius:.375rem;cursor:pointer}.xano-hs-close:hover{opacity:1;background:rgba(127,127,127,.14)}.xano-hs-title{margin:0 1.75rem .375rem 0;font-size:1.125rem;font-weight:600;line-height:1.4}.xano-hs-subtitle{margin:0 0 1.25rem}.xano-hs-status,.xano-hs-subtitle{font-size:.875rem;line-height:1.5;opacity:.7}.xano-hs-status--error{color:#dc2626;opacity:1}html.dark .xano-hs-form .hs-error-msgs label,html.dark .xano-hs-status--error{color:#f87171}.xano-hs-row{display:grid;grid-template-columns:1fr 1fr;gap:0 .75rem}@media (max-width:480px){.xano-hs-row{grid-template-columns:1fr}}.xano-hs-form .hs-form-field{margin-bottom:.875rem}.xano-hs-form label{display:block;margin-bottom:.3rem;font-size:.8125rem;font-weight:500}.xano-hs-form .hs-form-required{color:#dc2626;margin-left:.15rem}.xano-hs-form .hs-input:not([type=checkbox]):not([type=radio]){width:100%;box-sizing:border-box;padding:.5rem .7rem;font-size:.875rem;font-family:inherit;color:inherit;background-color:rgba(127,127,127,.07);border:1px solid rgba(127,127,127,.3);border-radius:.5rem}.xano-hs-form .hs-input:focus{outline:0;border-color:#3884ff;box-shadow:0 0 0 3px rgba(56,132,255,.2)}.xano-hs-form .hs-error-msgs{margin:.35rem 0 0;padding:0;list-style:none}.xano-hs-form .hs-error-msgs label{margin:0;font-weight:400;font-size:.8125rem;color:#dc2626}.xano-hs-form .legal-consent-container{font-size:.75rem;line-height:1.5;opacity:.75}.xano-hs-form .hs-button{width:100%;margin-top:.5rem;padding:.55rem 1rem;font-size:.875rem;font-weight:600;font-family:inherit;color:#fff;background-color:#3884ff;border:0;border-radius:.5rem;cursor:pointer}.xano-hs-form .hs-button:hover{background-color:#2f74e6}.xano-hs-form .hs-button:disabled{opacity:.7;cursor:progress}.xano-hs-form .hs-button:focus-visible{outline:2px solid #3884ff;outline-offset:2px}.xano-hs-form .xano-hs-status{margin-bottom:.5rem}.xano-hs-toast{position:fixed;left:50%;bottom:1.5rem;z-index:2147483000;transform:translateX(-50%);width:max-content;max-width:calc(100vw - 2rem);padding:.75rem 1rem;font-size:.875rem;line-height:1.5;color:#fff;background-color:#1a1c20;border:1px solid rgba(255,255,255,.1);border-left:3px solid #3884ff;border-radius:.625rem;box-shadow:0 12px 32px -8px rgba(0,0,0,.35)}.xano-hs-toast[hidden]{display:none}html.dark .xano-hs-toast{color:#1a1c20;background-color:#fff;border-color:rgba(0,0,0,.08);border-left-color:#3884ff}"}],"page":{"pagePath":"building/logic/middleware","slug":"/building/logic/middleware","pageMetadata":{"title":"Middleware","description":"Middleware is used to add additional logic that executes before or after other logic.","href":"/building/logic/middleware"},"description":{"compiledSource":"\"use strict\";\nconst {jsx: _jsx} = arguments[0];\nconst {useMDXComponents: _provideComponents} = arguments[0];\nfunction _createMdxContent(props) {\n const _components = {\n p: \"p\",\n ..._provideComponents(),\n ...props.components\n };\n return _jsx(_components.p, {\n children: \"Middleware is used to add additional logic that executes before or after other logic.\"\n });\n}\nfunction MDXContent(props = {}) {\n const {wrapper: MDXLayout} = {\n ..._provideComponents(),\n ...props.components\n };\n return MDXLayout ? _jsx(MDXLayout, {\n ...props,\n children: _jsx(_createMdxContent, {\n ...props\n })\n }) : _createMdxContent(props);\n}\nreturn {\n default: MDXContent\n};\n","frontmatter":{},"scope":{}},"pageType":"default","mdx":{"mdxSource":{"compiledSource":"\"use strict\";const{Fragment:_Fragment,jsx:_jsx,jsxs:_jsxs}=arguments[0];const{useMDXComponents:_provideComponents}=arguments[0];function _createMdxContent(props){const _components={a:`a`,code:`code`,li:`li`,p:`p`,pre:`pre`,span:`span`,strong:`strong`,tbody:`tbody`,td:`td`,th:`th`,thead:`thead`,tr:`tr`,ul:`ul`,..._provideComponents(),...props.components},{Card,CodeBlock,Frame,Heading,Icon,Note,OptimizedImage,Step,Steps,Tab,Table,Tabs,Tip}=_components;if(!Card)_missingMdxReference(`Card`,true);if(!CodeBlock)_missingMdxReference(`CodeBlock`,true);if(!Frame)_missingMdxReference(`Frame`,true);if(!Heading)_missingMdxReference(`Heading`,true);if(!Icon)_missingMdxReference(`Icon`,true);if(!Note)_missingMdxReference(`Note`,true);if(!OptimizedImage)_missingMdxReference(`OptimizedImage`,true);if(!Step)_missingMdxReference(`Step`,true);if(!Steps)_missingMdxReference(`Steps`,true);if(!Tab)_missingMdxReference(`Tab`,true);if(!Table)_missingMdxReference(`Table`,true);if(!Tabs)_missingMdxReference(`Tabs`,true);if(!Tip)_missingMdxReference(`Tip`,true);return _jsxs(_Fragment,{children:[_jsxs(Tip,{children:[_jsx(_components.p,{children:`Before continuing, make sure you’re familiar with:`}),_jsxs(_components.ul,{children:[`\n`,_jsx(_components.li,{children:_jsx(_components.a,{href:`/building/logic/core-components`,children:`Core Components`})}),`\n`,_jsx(_components.li,{children:_jsx(_components.a,{href:`/building/logic/working-with-data`,children:`Working with Data`})}),`\n`]}),_jsx(_components.p,{children:`You’ll also want to make sure you’ve already built something to apply middleware to.`})]}),`\n`,_jsx(_components.p,{children:`Middleware enables additional control of your logic at pivotal points of execution. They are separate pieces of logic that can run before the logic executes (before input validation) or after the logic executes (after the response is generated, but before it is delivered).`}),`\n`,_jsx(_components.p,{children:`Middleware can be applied to:`}),`\n`,_jsxs(_components.ul,{children:[`\n`,_jsx(_components.li,{children:`APIs`}),`\n`,_jsx(_components.li,{children:`Custom Functions`}),`\n`,_jsx(_components.li,{children:`Background Tasks`}),`\n`,_jsx(_components.li,{children:`AI Tools`}),`\n`]}),`\n`,_jsxs(_components.p,{children:[`Middleware is available on any paid plan. You may be limited on the amount of middleware you can create depending on your plan; if you have questions, check your `,_jsx(_components.a,{href:`https://app.xano.com/billing`,children:`billing screen`}),` or contact our support team.`]}),`\n`,_jsx(_components.p,{children:`There are two types of middleware:`}),`\n`,_jsxs(_components.ul,{children:[`\n`,_jsxs(_components.li,{children:[_jsx(_components.strong,{children:`Pre-middleware`}),` that runs before input validation`]}),`\n`,_jsxs(_components.li,{children:[_jsx(_components.strong,{children:`Post-middleware`}),` that runs after the logic executes and a response is generated, but before it is delivered`]}),`\n`]}),`\n`,_jsx(_components.p,{children:`You’ll need to understand response and exception types when building your middleware.`}),`\n`,_jsx(_components.p,{children:`Response types are used to determine how the middleware handles generating a response once it’s done executing.`}),`\n`,_jsxs(Table,{children:[_jsx(_components.thead,{children:_jsxs(_components.tr,{children:[_jsx(_components.th,{children:`Response Type`}),_jsx(_components.th,{children:`Description`})]})}),_jsxs(_components.tbody,{children:[_jsxs(_components.tr,{children:[_jsx(_components.td,{children:_jsx(_components.code,{children:`merge`})}),_jsx(_components.td,{children:`Merges the response of the middleware with the existing response. If the middleware response contains a key that already exists in the generated response, it will be overwritten.`})]}),_jsxs(_components.tr,{children:[_jsx(_components.td,{children:_jsx(_components.code,{children:`replace`})}),_jsx(_components.td,{children:`Replaces the existing response entirely with the new response`})]})]})]}),`\n`,_jsx(_components.p,{children:`Exception methods are used to determine how the middleware handles errors that occur during execution.`}),`\n`,_jsxs(Table,{children:[_jsx(_components.thead,{children:_jsxs(_components.tr,{children:[_jsx(_components.th,{children:`Exception Method`}),_jsx(_components.th,{children:`Description`})]})}),_jsxs(_components.tbody,{children:[_jsxs(_components.tr,{children:[_jsx(_components.td,{children:_jsx(_components.code,{children:`critical`})}),_jsx(_components.td,{children:`Stops execution completely and returns an error`})]}),_jsxs(_components.tr,{children:[_jsx(_components.td,{children:_jsx(_components.code,{children:`silent`})}),_jsx(_components.td,{children:`Silently ignores errors`})]}),_jsxs(_components.tr,{children:[_jsx(_components.td,{children:_jsx(_components.code,{children:`rethrow`})}),_jsx(_components.td,{children:`When paired with post-middleware, it allows the post-middleware to run even when an error occurs in the pre-middleware. Good for error logging or monitoring.`})]})]})]}),`\n`,_jsx(_components.p,{children:`Middleware has predefined inputs that can not be changed. These inputs are:`}),`\n`,_jsxs(_components.ul,{children:[`\n`,_jsxs(_components.li,{children:[_jsx(_components.code,{children:`vars`}),` - The variables from the parent object. This could be either the inputs sent to the workflow for a pre-middleware, or the response generated by the parent object for a post-middleware.`]}),`\n`,_jsxs(_components.li,{children:[_jsx(_components.code,{children:`type`}),` - The type of middleware (pre or post).`]}),`\n`]}),`\n`,_jsx(Heading,{level:`2`,id:`building-middleware-in-xano`,children:`Building Middleware in Xano`}),`\n`,_jsxs(Steps,{children:[_jsx(Step,{title:`Open the Middleware library`,children:_jsxs(_components.p,{children:[`From the sidebar, click `,_jsx(`span`,{class:`ui-bubble`,children:`Middleware`}),`.`]})}),_jsx(Step,{title:`Click Add Middleware`,children:_jsxs(_components.p,{children:[`Click the `,_jsxs(`span`,{class:`ui-bubble`,children:[_jsx(Icon,{icon:`plus`}),` Add Middleware`]}),` button in the top-right corner.`]})})]}),`\n`,_jsxs(Tabs,{children:[_jsx(Tab,{title:`Visually`,icon:`hammer-brush`,id:`visually`,children:_jsxs(Steps,{children:[_jsxs(Step,{title:`Provide some basic information`,children:[_jsx(_components.p,{children:`Give your middleware a name, description, and any tags you’d like to apply. Choose your response type and exception method.`}),_jsx(Frame,{caption:`Providing basic information for Middleware`,children:_jsx(OptimizedImage,{src:`https://mintcdn.com/xano-997cb9ee/NgWyYUIOE6OPGYha/images/middleware-20251014-113051.png?fit=max\u0026auto=format\u0026n=NgWyYUIOE6OPGYha\u0026q=85\u0026s=0ce9624326f5daa761ec715c4a306998`,alt:`middleware-20251014-113051`,\"data-og-width\":`488`,width:`488`,\"data-og-height\":`654`,height:`654`,\"data-path\":`images/middleware-20251014-113051.png`,\"data-optimize\":`true`,\"data-opv\":`3`,srcset:`https://mintcdn.com/xano-997cb9ee/NgWyYUIOE6OPGYha/images/middleware-20251014-113051.png?w=280\u0026fit=max\u0026auto=format\u0026n=NgWyYUIOE6OPGYha\u0026q=85\u0026s=505bf9ce215c5f4c11397f873075267b 280w, https://mintcdn.com/xano-997cb9ee/NgWyYUIOE6OPGYha/images/middleware-20251014-113051.png?w=560\u0026fit=max\u0026auto=format\u0026n=NgWyYUIOE6OPGYha\u0026q=85\u0026s=08f0b2e939a3df4f31e1b4952b802254 560w, https://mintcdn.com/xano-997cb9ee/NgWyYUIOE6OPGYha/images/middleware-20251014-113051.png?w=840\u0026fit=max\u0026auto=format\u0026n=NgWyYUIOE6OPGYha\u0026q=85\u0026s=4f6a0c8cf5a1a000f0150dc22d26deb7 840w, https://mintcdn.com/xano-997cb9ee/NgWyYUIOE6OPGYha/images/middleware-20251014-113051.png?w=1100\u0026fit=max\u0026auto=format\u0026n=NgWyYUIOE6OPGYha\u0026q=85\u0026s=4a4c57f92bf845793c7fe7aed8b4ae34 1100w, https://mintcdn.com/xano-997cb9ee/NgWyYUIOE6OPGYha/images/middleware-20251014-113051.png?w=1650\u0026fit=max\u0026auto=format\u0026n=NgWyYUIOE6OPGYha\u0026q=85\u0026s=10dd60f4000dd9994c1e415d6be1b623 1650w, https://mintcdn.com/xano-997cb9ee/NgWyYUIOE6OPGYha/images/middleware-20251014-113051.png?w=2500\u0026fit=max\u0026auto=format\u0026n=NgWyYUIOE6OPGYha\u0026q=85\u0026s=58d467a1786acd25909655e920412427 2500w`})})]}),_jsx(Step,{title:`Build the middleware logic`})]})}),_jsxs(Tab,{title:`XanoScript`,icon:`code`,id:`xanoscript`,children:[_jsxs(_components.p,{children:[`A basic middleware in XanoScript has three parts — `,_jsx(_components.strong,{children:`inputs`}),`, `,_jsx(_components.strong,{children:`functions`}),`, and `,_jsx(_components.strong,{children:`response`}),` — just like in the visual builder:`]}),_jsx(CodeBlock,{filename:`Example of a basic middleware in XanoScript`,icon:`code`,lines:`true`,numberOfLines:`29`,language:`javascript`,children:_jsx(_components.pre,{className:`shiki shiki-themes github-light-default dark-plus`,style:{backgroundColor:`#ffffff`,\"--shiki-dark-bg\":`#0B0C0E`,color:`#1f2328`,\"--shiki-dark\":`#D4D4D4`},language:`javascript`,children:_jsxs(_components.code,{language:`javascript`,numberOfLines:`29`,children:[_jsxs(_components.span,{className:`line`,children:[_jsx(_components.span,{style:{color:`#1F2328`,\"--shiki-dark\":`#9CDCFE`},children:`middleware`}),_jsx(_components.span,{style:{color:`#1F2328`,\"--shiki-dark\":`#9CDCFE`},children:` check_banned_user`}),_jsx(_components.span,{style:{color:`#1F2328`,\"--shiki-dark\":`#D4D4D4`},children:` {`})]}),`\n`,_jsxs(_components.span,{className:`line`,children:[_jsx(_components.span,{style:{color:`#1F2328`,\"--shiki-dark\":`#9CDCFE`},children:` description`}),_jsx(_components.span,{style:{color:`#CF222E`,\"--shiki-dark\":`#D4D4D4`},children:` =`}),_jsx(_components.span,{style:{color:`#0A3069`,\"--shiki-dark\":`#CE9178`},children:` \"Checks to see if a banned user is attempting to perform any action, and if so, blocks it\"`})]}),`\n`,_jsx(_components.span,{className:`line`}),`\n`,_jsxs(_components.span,{className:`line`,children:[_jsx(_components.span,{style:{color:`#1F2328`,\"--shiki-dark\":`#9CDCFE`},children:` input`}),_jsx(_components.span,{style:{color:`#1F2328`,\"--shiki-dark\":`#D4D4D4`},children:` {`})]}),`\n`,_jsxs(_components.span,{className:`line`,children:[_jsx(_components.span,{style:{color:`#1F2328`,\"--shiki-dark\":`#9CDCFE`},children:` json`}),_jsx(_components.span,{style:{color:`#1F2328`,\"--shiki-dark\":`#9CDCFE`},children:` vars`})]}),`\n`,_jsxs(_components.span,{className:`line`,children:[_jsx(_components.span,{style:{color:`#CF222E`,\"--shiki-dark\":`#569CD6`},children:` enum`}),_jsx(_components.span,{style:{color:`#953800`,\"--shiki-dark\":`#4EC9B0`},children:` type`}),_jsx(_components.span,{style:{color:`#1F2328`,\"--shiki-dark\":`#D4D4D4`},children:` {`})]}),`\n`,_jsxs(_components.span,{className:`line`,children:[_jsx(_components.span,{style:{color:`#0550AE`,\"--shiki-dark\":`#4FC1FF`},children:` values`}),_jsx(_components.span,{style:{color:`#CF222E`,\"--shiki-dark\":`#D4D4D4`},children:` =`}),_jsx(_components.span,{style:{color:`#1F2328`,\"--shiki-dark\":`#D4D4D4`},children:` [`}),_jsx(_components.span,{style:{color:`#0A3069`,\"--shiki-dark\":`#CE9178`},children:`\"pre\"`}),_jsx(_components.span,{style:{color:`#1F2328`,\"--shiki-dark\":`#D4D4D4`},children:`, `}),_jsx(_components.span,{style:{color:`#0A3069`,\"--shiki-dark\":`#CE9178`},children:`\"post\"`}),_jsx(_components.span,{style:{color:`#1F2328`,\"--shiki-dark\":`#D4D4D4`},children:`]`})]}),`\n`,_jsx(_components.span,{className:`line`,children:_jsx(_components.span,{style:{color:`#1F2328`,\"--shiki-dark\":`#D4D4D4`},children:` }`})}),`\n`,_jsx(_components.span,{className:`line`,children:_jsx(_components.span,{style:{color:`#1F2328`,\"--shiki-dark\":`#D4D4D4`},children:` }`})}),`\n`,_jsx(_components.span,{className:`line`}),`\n`,_jsxs(_components.span,{className:`line`,children:[_jsx(_components.span,{style:{color:`#1F2328`,\"--shiki-dark\":`#9CDCFE`},children:` stack`}),_jsx(_components.span,{style:{color:`#1F2328`,\"--shiki-dark\":`#D4D4D4`},children:` {`})]}),`\n`,_jsxs(_components.span,{className:`line`,children:[_jsx(_components.span,{style:{color:`#1F2328`,\"--shiki-dark\":`#9CDCFE`},children:` db`}),_jsx(_components.span,{style:{color:`#1F2328`,\"--shiki-dark\":`#D4D4D4`},children:`.`}),_jsx(_components.span,{style:{color:`#1F2328`,\"--shiki-dark\":`#9CDCFE`},children:`get`}),_jsx(_components.span,{style:{color:`#1F2328`,\"--shiki-dark\":`#9CDCFE`},children:` user`}),_jsx(_components.span,{style:{color:`#1F2328`,\"--shiki-dark\":`#D4D4D4`},children:` {`})]}),`\n`,_jsxs(_components.span,{className:`line`,children:[_jsx(_components.span,{style:{color:`#1F2328`,\"--shiki-dark\":`#9CDCFE`},children:` field_name`}),_jsx(_components.span,{style:{color:`#CF222E`,\"--shiki-dark\":`#D4D4D4`},children:` =`}),_jsx(_components.span,{style:{color:`#0A3069`,\"--shiki-dark\":`#CE9178`},children:` \"id\"`})]}),`\n`,_jsxs(_components.span,{className:`line`,children:[_jsx(_components.span,{style:{color:`#1F2328`,\"--shiki-dark\":`#9CDCFE`},children:` field_value`}),_jsx(_components.span,{style:{color:`#CF222E`,\"--shiki-dark\":`#D4D4D4`},children:` =`}),_jsx(_components.span,{style:{color:`#1F2328`,\"--shiki-dark\":`#9CDCFE`},children:` $auth`}),_jsx(_components.span,{style:{color:`#1F2328`,\"--shiki-dark\":`#D4D4D4`},children:`.`}),_jsx(_components.span,{style:{color:`#1F2328`,\"--shiki-dark\":`#9CDCFE`},children:`id`})]}),`\n`,_jsxs(_components.span,{className:`line`,children:[_jsx(_components.span,{style:{color:`#1F2328`,\"--shiki-dark\":`#D4D4D4`},children:` } `}),_jsx(_components.span,{style:{color:`#CF222E`,\"--shiki-dark\":`#C586C0`},children:`as`}),_jsx(_components.span,{style:{color:`#953800`,\"--shiki-dark\":`#4EC9B0`},children:` $user1`})]}),`\n`,_jsx(_components.span,{className:`line`}),`\n`,_jsxs(_components.span,{className:`line`,children:[_jsx(_components.span,{style:{color:`#8250DF`,\"--shiki-dark\":`#DCDCAA`},children:` precondition`}),_jsx(_components.span,{style:{color:`#1F2328`,\"--shiki-dark\":`#D4D4D4`},children:` (`}),_jsx(_components.span,{style:{color:`#1F2328`,\"--shiki-dark\":`#9CDCFE`},children:`$user1`}),_jsx(_components.span,{style:{color:`#1F2328`,\"--shiki-dark\":`#D4D4D4`},children:`.`}),_jsx(_components.span,{style:{color:`#1F2328`,\"--shiki-dark\":`#9CDCFE`},children:`banned`}),_jsx(_components.span,{style:{color:`#CF222E`,\"--shiki-dark\":`#D4D4D4`},children:` ==`}),_jsx(_components.span,{style:{color:`#0550AE`,\"--shiki-dark\":`#569CD6`},children:` false`}),_jsx(_components.span,{style:{color:`#1F2328`,\"--shiki-dark\":`#D4D4D4`},children:`) {`})]}),`\n`,_jsxs(_components.span,{className:`line`,children:[_jsx(_components.span,{style:{color:`#1F2328`,\"--shiki-dark\":`#9CDCFE`},children:` error_type`}),_jsx(_components.span,{style:{color:`#CF222E`,\"--shiki-dark\":`#D4D4D4`},children:` =`}),_jsx(_components.span,{style:{color:`#0A3069`,\"--shiki-dark\":`#CE9178`},children:` \"unauthorized\"`})]}),`\n`,_jsxs(_components.span,{className:`line`,children:[_jsx(_components.span,{style:{color:`#1F2328`,\"--shiki-dark\":`#9CDCFE`},children:` error`}),_jsx(_components.span,{style:{color:`#CF222E`,\"--shiki-dark\":`#D4D4D4`},children:` =`}),_jsx(_components.span,{style:{color:`#0A3069`,\"--shiki-dark\":`#CE9178`},children:` \"Your account has been suspended.\"`})]}),`\n`,_jsx(_components.span,{className:`line`,children:_jsx(_components.span,{style:{color:`#1F2328`,\"--shiki-dark\":`#D4D4D4`},children:` }`})}),`\n`,_jsx(_components.span,{className:`line`,children:_jsx(_components.span,{style:{color:`#1F2328`,\"--shiki-dark\":`#D4D4D4`},children:` }`})}),`\n`,_jsx(_components.span,{className:`line`}),`\n`,_jsxs(_components.span,{className:`line`,children:[_jsx(_components.span,{style:{color:`#1F2328`,\"--shiki-dark\":`#9CDCFE`},children:` response`}),_jsx(_components.span,{style:{color:`#1F2328`,\"--shiki-dark\":`#D4D4D4`},children:` {`})]}),`\n`,_jsxs(_components.span,{className:`line`,children:[_jsx(_components.span,{style:{color:`#1F2328`,\"--shiki-dark\":`#9CDCFE`},children:` value`}),_jsx(_components.span,{style:{color:`#CF222E`,\"--shiki-dark\":`#D4D4D4`},children:` =`}),_jsx(_components.span,{style:{color:`#1F2328`,\"--shiki-dark\":`#D4D4D4`},children:` {`}),_jsx(_components.span,{style:{color:`#1F2328`,\"--shiki-dark\":`#9CDCFE`},children:`user1:`}),_jsx(_components.span,{style:{color:`#1F2328`,\"--shiki-dark\":`#9CDCFE`},children:` $user1`}),_jsx(_components.span,{style:{color:`#1F2328`,\"--shiki-dark\":`#D4D4D4`},children:`}`})]}),`\n`,_jsx(_components.span,{className:`line`,children:_jsx(_components.span,{style:{color:`#1F2328`,\"--shiki-dark\":`#D4D4D4`},children:` }`})}),`\n`,_jsx(_components.span,{className:`line`}),`\n`,_jsxs(_components.span,{className:`line`,children:[_jsx(_components.span,{style:{color:`#1F2328`,\"--shiki-dark\":`#9CDCFE`},children:` response_strategy`}),_jsx(_components.span,{style:{color:`#CF222E`,\"--shiki-dark\":`#D4D4D4`},children:` =`}),_jsx(_components.span,{style:{color:`#0A3069`,\"--shiki-dark\":`#CE9178`},children:` \"merge\"`})]}),`\n`,_jsxs(_components.span,{className:`line`,children:[_jsx(_components.span,{style:{color:`#1F2328`,\"--shiki-dark\":`#9CDCFE`},children:` exception_policy`}),_jsx(_components.span,{style:{color:`#CF222E`,\"--shiki-dark\":`#D4D4D4`},children:` =`}),_jsx(_components.span,{style:{color:`#0A3069`,\"--shiki-dark\":`#CE9178`},children:` \"critical\"`})]}),`\n`,_jsxs(_components.span,{className:`line`,children:[_jsx(_components.span,{style:{color:`#1F2328`,\"--shiki-dark\":`#9CDCFE`},children:` tags`}),_jsx(_components.span,{style:{color:`#CF222E`,\"--shiki-dark\":`#D4D4D4`},children:` =`}),_jsx(_components.span,{style:{color:`#1F2328`,\"--shiki-dark\":`#D4D4D4`},children:` [`}),_jsx(_components.span,{style:{color:`#0A3069`,\"--shiki-dark\":`#CE9178`},children:`\"user actions\"`}),_jsx(_components.span,{style:{color:`#1F2328`,\"--shiki-dark\":`#D4D4D4`},children:`]`})]}),`\n`]})})}),_jsx(Card,{title:`Learn how to build middleware in XanoScript`,icon:`code`,horizontal:true,href:`/xanoscript/middleware`,children:_jsx(_components.p,{children:`For more information on how to build middleware in XanoScript, see the XanoScript Middleware documentation.`})})]})]}),`\n`,_jsx(_components.p,{children:`Once you’ve build your middleware, you’ll need to apply it to the workflows you want it to run with.`}),`\n`,_jsx(Heading,{level:`2`,id:`applying-middleware-to-workflows`,children:`Applying Middleware to Workflows`}),`\n`,_jsx(_components.p,{children:`Middleware can be applied at the workspace level, workflow group level (like API groups), or onto individual workflows. If no customizations are set on a workflow, it will inherit middleware settings from their parent object, such as the group they reside in or the workspace.`}),`\n`,_jsxs(_components.p,{children:[`You can quickly disable middleware by clicking the toggle `,_jsx(`span`,{class:`ui-bubble`,children:_jsx(Icon,{icon:`toggle-off`})}),` and remove it completely from the object by clicking the `,_jsx(`span`,{class:`ui-bubble`,children:_jsx(Icon,{icon:`trash`})}),`.`]}),`\n`,_jsx(Heading,{level:`3`,id:`workspace-level`,children:`Workspace level`}),`\n`,_jsxs(_components.p,{children:[`Click `,_jsx(`span`,{class:`ui-bubble`,children:`Middleware`}),` in the left-hand navigation. On the middleware screen, click `,_jsxs(`span`,{class:`ui-bubble`,children:[_jsx(Icon,{icon:`gear`}),` Manage Global Defaults`]}),`.`]}),`\n`,_jsxs(_components.p,{children:[`Alternatively, you can click the `,_jsx(Icon,{icon:`gear`}),` in the top right anywhere in Xano and choose `,_jsx(`span`,{class:`ui-bubble`,children:`Middleware Defaults`}),` from the modal that opens.`]}),`\n`,_jsx(Note,{children:_jsx(_components.p,{children:`Middleware Defaults will only be available once you have at least one middleware built. Until then, you’ll simply be redirected to the Middleware section.`})}),`\n`,_jsx(_components.p,{children:`Select the workflow type you want to apply your middleware to. You can choose from:`}),`\n`,_jsxs(_components.ul,{children:[`\n`,_jsx(_components.li,{children:`APIs`}),`\n`,_jsx(_components.li,{children:`AI Tools`}),`\n`,_jsx(_components.li,{children:`Functions`}),`\n`,_jsx(_components.li,{children:`Tasks`}),`\n`]}),`\n`,_jsxs(_components.p,{children:[`Click `,_jsxs(`span`,{class:`ui-bubble`,children:[_jsx(Icon,{icon:`plus`}),` Add`]}),` on either PRE or POST middleware to apply one of your created middleware to that section.`]}),`\n`,_jsx(Heading,{level:`3`,id:`applying-middleware-to-a-workflow-group`,children:`Applying middleware to a workflow group`}),`\n`,_jsx(Tip,{children:_jsx(_components.p,{children:`Group level middleware only applies to APIs.`})}),`\n`,_jsxs(_components.p,{children:[`From an API group, click `,_jsx(`span`,{class:`ui-bubble`,children:_jsx(Icon,{icon:`ellipsis-vertical`})}),` and select `,_jsx(`span`,{class:`ui-bubble`,children:`Middleware`}),`.`]}),`\n`,_jsx(Frame,{caption:`Accessing the Middleware menu on an API group`,children:_jsx(OptimizedImage,{src:`https://mintcdn.com/xano-997cb9ee/NgWyYUIOE6OPGYha/images/middleware-20251014-114329.png?fit=max\u0026auto=format\u0026n=NgWyYUIOE6OPGYha\u0026q=85\u0026s=c0f766e19cb51cc57e4976660b3e7fb8`,alt:`middleware-20251014-114329`,\"data-og-width\":`488`,width:`488`,\"data-og-height\":`394`,height:`394`,\"data-path\":`images/middleware-20251014-114329.png`,\"data-optimize\":`true`,\"data-opv\":`3`,srcset:`https://mintcdn.com/xano-997cb9ee/NgWyYUIOE6OPGYha/images/middleware-20251014-114329.png?w=280\u0026fit=max\u0026auto=format\u0026n=NgWyYUIOE6OPGYha\u0026q=85\u0026s=ec0771d68d1d6bc52ab0f6fc4acc2947 280w, https://mintcdn.com/xano-997cb9ee/NgWyYUIOE6OPGYha/images/middleware-20251014-114329.png?w=560\u0026fit=max\u0026auto=format\u0026n=NgWyYUIOE6OPGYha\u0026q=85\u0026s=4fb25dda2ebb4c83bff86c782a4a96b0 560w, https://mintcdn.com/xano-997cb9ee/NgWyYUIOE6OPGYha/images/middleware-20251014-114329.png?w=840\u0026fit=max\u0026auto=format\u0026n=NgWyYUIOE6OPGYha\u0026q=85\u0026s=4d2f52e89b0f849fde30a405acd2b9ff 840w, https://mintcdn.com/xano-997cb9ee/NgWyYUIOE6OPGYha/images/middleware-20251014-114329.png?w=1100\u0026fit=max\u0026auto=format\u0026n=NgWyYUIOE6OPGYha\u0026q=85\u0026s=090d2a81e832d302997372769aab7e34 1100w, https://mintcdn.com/xano-997cb9ee/NgWyYUIOE6OPGYha/images/middleware-20251014-114329.png?w=1650\u0026fit=max\u0026auto=format\u0026n=NgWyYUIOE6OPGYha\u0026q=85\u0026s=e42eef6d02026df7c3f9fc39f3dcec34 1650w, https://mintcdn.com/xano-997cb9ee/NgWyYUIOE6OPGYha/images/middleware-20251014-114329.png?w=2500\u0026fit=max\u0026auto=format\u0026n=NgWyYUIOE6OPGYha\u0026q=85\u0026s=332e1c89ea1654344fa467f876cda6f8 2500w`})}),`\n`,_jsx(`br`,{}),`\n`,_jsx(Frame,{caption:`Check the Customize box next to the type of middleware you want to apply to that API group. You'll see the Add buttons appear once you do.`,children:_jsx(OptimizedImage,{src:`https://mintcdn.com/xano-997cb9ee/NgWyYUIOE6OPGYha/images/middleware-20251014-114401.png?fit=max\u0026auto=format\u0026n=NgWyYUIOE6OPGYha\u0026q=85\u0026s=d179082d61aa0a5f666b8f02e160704c`,alt:`middleware-20251014-114401`,\"data-og-width\":`486`,width:`486`,\"data-og-height\":`495`,height:`495`,\"data-path\":`images/middleware-20251014-114401.png`,\"data-optimize\":`true`,\"data-opv\":`3`,srcset:`https://mintcdn.com/xano-997cb9ee/NgWyYUIOE6OPGYha/images/middleware-20251014-114401.png?w=280\u0026fit=max\u0026auto=format\u0026n=NgWyYUIOE6OPGYha\u0026q=85\u0026s=47eb7d14a8c1ba1332ac6c060d2aba48 280w, https://mintcdn.com/xano-997cb9ee/NgWyYUIOE6OPGYha/images/middleware-20251014-114401.png?w=560\u0026fit=max\u0026auto=format\u0026n=NgWyYUIOE6OPGYha\u0026q=85\u0026s=f2e8dc200dbcda069040b3fca7a06e01 560w, https://mintcdn.com/xano-997cb9ee/NgWyYUIOE6OPGYha/images/middleware-20251014-114401.png?w=840\u0026fit=max\u0026auto=format\u0026n=NgWyYUIOE6OPGYha\u0026q=85\u0026s=21fee929bc67a27967a20ecf1a11e393 840w, https://mintcdn.com/xano-997cb9ee/NgWyYUIOE6OPGYha/images/middleware-20251014-114401.png?w=1100\u0026fit=max\u0026auto=format\u0026n=NgWyYUIOE6OPGYha\u0026q=85\u0026s=bde48bf62e994474b23dd6527d79456b 1100w, https://mintcdn.com/xano-997cb9ee/NgWyYUIOE6OPGYha/images/middleware-20251014-114401.png?w=1650\u0026fit=max\u0026auto=format\u0026n=NgWyYUIOE6OPGYha\u0026q=85\u0026s=c14d6c8e68d92f8bd398dfb2d2c171a2 1650w, https://mintcdn.com/xano-997cb9ee/NgWyYUIOE6OPGYha/images/middleware-20251014-114401.png?w=2500\u0026fit=max\u0026auto=format\u0026n=NgWyYUIOE6OPGYha\u0026q=85\u0026s=8d37e92db3d687aeffb2ec4cbfa565fe 2500w`})}),`\n`,_jsx(Heading,{level:`3`,id:`applying-middleware-to-an-individual-workflow`,children:`Applying middleware to an individual workflow`}),`\n`,_jsxs(_components.p,{children:[`From the workflow, click `,_jsx(`span`,{class:`ui-bubble`,children:_jsx(Icon,{icon:`ellipsis`})}),` and select `,_jsx(`span`,{class:`ui-bubble`,children:`Middleware`}),`.`]}),`\n`,_jsx(Frame,{caption:`Accessing the Middleware menu on a workflow`,children:_jsx(OptimizedImage,{src:`https://mintcdn.com/xano-997cb9ee/NgWyYUIOE6OPGYha/images/middleware-20251014-114536.png?fit=max\u0026auto=format\u0026n=NgWyYUIOE6OPGYha\u0026q=85\u0026s=f98abee9a85d592b953d2089bb3cd59b`,alt:`middleware-20251014-114536`,\"data-og-width\":`534`,width:`534`,\"data-og-height\":`340`,height:`340`,\"data-path\":`images/middleware-20251014-114536.png`,\"data-optimize\":`true`,\"data-opv\":`3`,srcset:`https://mintcdn.com/xano-997cb9ee/NgWyYUIOE6OPGYha/images/middleware-20251014-114536.png?w=280\u0026fit=max\u0026auto=format\u0026n=NgWyYUIOE6OPGYha\u0026q=85\u0026s=6f0758c5408b4cd9cc90afd5e3272900 280w, https://mintcdn.com/xano-997cb9ee/NgWyYUIOE6OPGYha/images/middleware-20251014-114536.png?w=560\u0026fit=max\u0026auto=format\u0026n=NgWyYUIOE6OPGYha\u0026q=85\u0026s=865a6e7e129d168e51891c7eff174f60 560w, https://mintcdn.com/xano-997cb9ee/NgWyYUIOE6OPGYha/images/middleware-20251014-114536.png?w=840\u0026fit=max\u0026auto=format\u0026n=NgWyYUIOE6OPGYha\u0026q=85\u0026s=da4248e66915af26ffc79d10bc8627c7 840w, https://mintcdn.com/xano-997cb9ee/NgWyYUIOE6OPGYha/images/middleware-20251014-114536.png?w=1100\u0026fit=max\u0026auto=format\u0026n=NgWyYUIOE6OPGYha\u0026q=85\u0026s=b8bf52c06cab7510e74b0a9f5bcdc6d9 1100w, https://mintcdn.com/xano-997cb9ee/NgWyYUIOE6OPGYha/images/middleware-20251014-114536.png?w=1650\u0026fit=max\u0026auto=format\u0026n=NgWyYUIOE6OPGYha\u0026q=85\u0026s=881cecc99d2ae14f3ba328bd30a6f461 1650w, https://mintcdn.com/xano-997cb9ee/NgWyYUIOE6OPGYha/images/middleware-20251014-114536.png?w=2500\u0026fit=max\u0026auto=format\u0026n=NgWyYUIOE6OPGYha\u0026q=85\u0026s=5101757af8c58ee6adbbe5f98438e842 2500w`})}),`\n`,_jsx(`br`,{}),`\n`,_jsx(Frame,{caption:`Check the Customize box next to the type of middleware you want to apply to that workflow. You'll see the Add buttons appear once you do.`,children:_jsx(OptimizedImage,{src:`https://mintcdn.com/xano-997cb9ee/NgWyYUIOE6OPGYha/images/middleware-20251014-114401.png?fit=max\u0026auto=format\u0026n=NgWyYUIOE6OPGYha\u0026q=85\u0026s=d179082d61aa0a5f666b8f02e160704c`,alt:`middleware-20251014-114037`,\"data-og-width\":`486`,width:`486`,\"data-og-height\":`495`,height:`495`,\"data-path\":`images/middleware-20251014-114401.png`,\"data-optimize\":`true`,\"data-opv\":`3`,srcset:`https://mintcdn.com/xano-997cb9ee/NgWyYUIOE6OPGYha/images/middleware-20251014-114401.png?w=280\u0026fit=max\u0026auto=format\u0026n=NgWyYUIOE6OPGYha\u0026q=85\u0026s=47eb7d14a8c1ba1332ac6c060d2aba48 280w, https://mintcdn.com/xano-997cb9ee/NgWyYUIOE6OPGYha/images/middleware-20251014-114401.png?w=560\u0026fit=max\u0026auto=format\u0026n=NgWyYUIOE6OPGYha\u0026q=85\u0026s=f2e8dc200dbcda069040b3fca7a06e01 560w, https://mintcdn.com/xano-997cb9ee/NgWyYUIOE6OPGYha/images/middleware-20251014-114401.png?w=840\u0026fit=max\u0026auto=format\u0026n=NgWyYUIOE6OPGYha\u0026q=85\u0026s=21fee929bc67a27967a20ecf1a11e393 840w, https://mintcdn.com/xano-997cb9ee/NgWyYUIOE6OPGYha/images/middleware-20251014-114401.png?w=1100\u0026fit=max\u0026auto=format\u0026n=NgWyYUIOE6OPGYha\u0026q=85\u0026s=bde48bf62e994474b23dd6527d79456b 1100w, https://mintcdn.com/xano-997cb9ee/NgWyYUIOE6OPGYha/images/middleware-20251014-114401.png?w=1650\u0026fit=max\u0026auto=format\u0026n=NgWyYUIOE6OPGYha\u0026q=85\u0026s=c14d6c8e68d92f8bd398dfb2d2c171a2 1650w, https://mintcdn.com/xano-997cb9ee/NgWyYUIOE6OPGYha/images/middleware-20251014-114401.png?w=2500\u0026fit=max\u0026auto=format\u0026n=NgWyYUIOE6OPGYha\u0026q=85\u0026s=8d37e92db3d687aeffb2ec4cbfa565fe 2500w`})}),`\n`,_jsx(Heading,{level:`2`,id:`handling-public-and-authenticated-requests`,children:`Handling public and authenticated requests`}),`\n`,_jsxs(_components.p,{children:[`When you apply middleware globally — such as an audit log that runs on every API — it will execute on both authenticated `,_jsx(_components.strong,{children:`and`}),` public endpoints. Public endpoints (and any endpoint reached without a valid token) don’t have an authenticated user, so you can’t assume `,_jsx(_components.code,{children:`$auth`}),` is populated.`]}),`\n`,_jsxs(_components.p,{children:[`If your middleware references `,_jsx(_components.code,{children:`$auth.id`}),` directly, an unauthenticated request can fail. The two things to watch for are:`]}),`\n`,_jsxs(_components.ul,{children:[`\n`,_jsxs(_components.li,{children:[`\n`,_jsxs(_components.p,{children:[_jsx(_components.strong,{children:`Reading the user.`}),` On a request without a valid token, there is no authenticated user, so `,_jsx(_components.code,{children:`$auth.id`}),` throws an error when referencing normally, or a `,_jsx(_components.code,{children:`0`}),` in expressions, rather than a real record ID. Looking up `,_jsx(_components.code,{children:`$auth.id`}),` via an expression is a quick and easy way to handle both cases.`]}),`\n`]}),`\n`,_jsxs(_components.li,{children:[`\n`,_jsxs(_components.p,{children:[_jsx(_components.strong,{children:`Writing the user.`}),` If you store the user ID on a record (like an audit log), the column must accept an empty value. Make the `,_jsx(_components.code,{children:`auth_id`}),` (or `,_jsx(_components.code,{children:`user_id`}),`) column `,_jsx(_components.strong,{children:`nullable`}),` in your table so the Add Record step succeeds when no user is present.`]}),`\n`]}),`\n`]}),`\n`,_jsx(Tip,{children:_jsxs(_components.p,{children:[`Give logging or monitoring middleware an exception method of `,_jsx(_components.code,{children:`silent`}),` so a hiccup in the middleware never blocks the underlying request. Use `,_jsx(_components.code,{children:`critical`}),` only when the middleware is meant to gate access (like the banned-user check above).`]})}),`\n`,_jsxs(_components.p,{children:[`The pattern below normalizes the missing user to `,_jsx(_components.code,{children:`null`}),` before logging, so the same middleware works on public and authenticated endpoints alike.`]}),`\n`,_jsxs(Tabs,{children:[_jsx(Tab,{title:`Visually`,icon:`hammer-brush`,id:`visually-2`,children:_jsxs(Steps,{children:[_jsx(Step,{title:`Capture the user ID in a new variable`,children:_jsxs(_components.p,{children:[`Add a `,_jsx(_components.strong,{children:`Create Variable`}),` step (for example, `,_jsx(_components.code,{children:`user_id`}),`) and set its value to an expression, `,_jsx(_components.code,{children:`$auth.id`}),` — if `,_jsx(_components.code,{children:`auth.id`}),` is populated, this will contain the user ID. If it isn’t, it will contain `,_jsx(_components.code,{children:`0`}),`.`]})}),_jsx(Step,{title:_jsxs(_Fragment,{children:[`Use a conditional to check and confirm `,_jsx(_components.code,{children:`user_id`})]}),children:_jsxs(_components.p,{children:[`Add a `,_jsx(_components.strong,{children:`Conditional`}),` step to check if `,_jsx(_components.code,{children:`user_id`}),` = `,_jsx(_components.code,{children:`0`}),`, and if it does, update it to `,_jsx(_components.code,{children:`null`}),`.`]})}),_jsx(Step,{title:`Log the request`,children:_jsxs(_components.p,{children:[`Add an `,_jsx(_components.strong,{children:`Add Record`}),` step that writes `,_jsx(_components.code,{children:`user_id`}),` along with any other details you want to capture. Make sure the target column allows null values. This will write `,_jsx(_components.code,{children:`null`}),` if no token was sent, or the actual `,_jsx(_components.code,{children:`$auth.id`}),` if a valid token is sent with the request.`]})})]})}),_jsx(Tab,{title:`XanoScript`,icon:`code`,id:`xanoscript-2`,children:_jsx(CodeBlock,{filename:``,numberOfLines:`37`,language:`javascript`,children:_jsx(_components.pre,{className:`shiki shiki-themes github-light-default dark-plus`,style:{backgroundColor:`#ffffff`,\"--shiki-dark-bg\":`#0B0C0E`,color:`#1f2328`,\"--shiki-dark\":`#D4D4D4`},language:`javascript`,children:_jsxs(_components.code,{language:`javascript`,numberOfLines:`37`,children:[_jsx(_components.span,{className:`line`,children:_jsx(_components.span,{style:{color:`#6E7781`,\"--shiki-dark\":`#6A9955`},children:`// Logs every request; user_id is null for unauthenticated calls`})}),`\n`,_jsxs(_components.span,{className:`line`,children:[_jsx(_components.span,{style:{color:`#1F2328`,\"--shiki-dark\":`#9CDCFE`},children:`middleware`}),_jsx(_components.span,{style:{color:`#1F2328`,\"--shiki-dark\":`#9CDCFE`},children:` audit_log`}),_jsx(_components.span,{style:{color:`#1F2328`,\"--shiki-dark\":`#D4D4D4`},children:` {`})]}),`\n`,_jsxs(_components.span,{className:`line`,children:[_jsx(_components.span,{style:{color:`#1F2328`,\"--shiki-dark\":`#9CDCFE`},children:` input`}),_jsx(_components.span,{style:{color:`#1F2328`,\"--shiki-dark\":`#D4D4D4`},children:` {`})]}),`\n`,_jsxs(_components.span,{className:`line`,children:[_jsx(_components.span,{style:{color:`#1F2328`,\"--shiki-dark\":`#9CDCFE`},children:` json`}),_jsx(_components.span,{style:{color:`#1F2328`,\"--shiki-dark\":`#9CDCFE`},children:` vars`})]}),`\n`,_jsxs(_components.span,{className:`line`,children:[_jsx(_components.span,{style:{color:`#CF222E`,\"--shiki-dark\":`#569CD6`},children:` enum`}),_jsx(_components.span,{style:{color:`#953800`,\"--shiki-dark\":`#4EC9B0`},children:` type`}),_jsx(_components.span,{style:{color:`#1F2328`,\"--shiki-dark\":`#D4D4D4`},children:` {`})]}),`\n`,_jsxs(_components.span,{className:`line`,children:[_jsx(_components.span,{style:{color:`#0550AE`,\"--shiki-dark\":`#4FC1FF`},children:` values`}),_jsx(_components.span,{style:{color:`#CF222E`,\"--shiki-dark\":`#D4D4D4`},children:` =`}),_jsx(_components.span,{style:{color:`#1F2328`,\"--shiki-dark\":`#D4D4D4`},children:` [`}),_jsx(_components.span,{style:{color:`#0A3069`,\"--shiki-dark\":`#CE9178`},children:`\"pre\"`}),_jsx(_components.span,{style:{color:`#1F2328`,\"--shiki-dark\":`#D4D4D4`},children:`, `}),_jsx(_components.span,{style:{color:`#0A3069`,\"--shiki-dark\":`#CE9178`},children:`\"post\"`}),_jsx(_components.span,{style:{color:`#1F2328`,\"--shiki-dark\":`#D4D4D4`},children:`]`})]}),`\n`,_jsx(_components.span,{className:`line`,children:_jsx(_components.span,{style:{color:`#1F2328`,\"--shiki-dark\":`#D4D4D4`},children:` }`})}),`\n`,_jsx(_components.span,{className:`line`,children:_jsx(_components.span,{style:{color:`#1F2328`,\"--shiki-dark\":`#D4D4D4`},children:` }`})}),`\n`,_jsx(_components.span,{className:`line`}),`\n`,_jsxs(_components.span,{className:`line`,children:[_jsx(_components.span,{style:{color:`#1F2328`,\"--shiki-dark\":`#9CDCFE`},children:` stack`}),_jsx(_components.span,{style:{color:`#1F2328`,\"--shiki-dark\":`#D4D4D4`},children:` {`})]}),`\n`,_jsxs(_components.span,{className:`line`,children:[_jsx(_components.span,{style:{color:`#CF222E`,\"--shiki-dark\":`#569CD6`},children:` var`}),_jsx(_components.span,{style:{color:`#1F2328`,\"--shiki-dark\":`#9CDCFE`},children:` $user_id`}),_jsx(_components.span,{style:{color:`#1F2328`,\"--shiki-dark\":`#D4D4D4`},children:` {`})]}),`\n`,_jsxs(_components.span,{className:`line`,children:[_jsx(_components.span,{style:{color:`#1F2328`,\"--shiki-dark\":`#9CDCFE`},children:` value`}),_jsx(_components.span,{style:{color:`#CF222E`,\"--shiki-dark\":`#D4D4D4`},children:` =`}),_jsx(_components.span,{style:{color:`#0A3069`,\"--shiki-dark\":`#CE9178`},children:\" `$auth.id`\"})]}),`\n`,_jsx(_components.span,{className:`line`,children:_jsx(_components.span,{style:{color:`#1F2328`,\"--shiki-dark\":`#D4D4D4`},children:` }`})}),`\n`,_jsx(_components.span,{className:`line`,children:_jsx(_components.span,{style:{color:`#1F2328`,\"--shiki-dark\":`#D4D4D4`},children:` `})}),`\n`,_jsx(_components.span,{className:`line`,children:_jsx(_components.span,{style:{color:`#6E7781`,\"--shiki-dark\":`#6A9955`},children:` // Turn the anonymous 0 into a real null for the column.`})}),`\n`,_jsxs(_components.span,{className:`line`,children:[_jsx(_components.span,{style:{color:`#1F2328`,\"--shiki-dark\":`#9CDCFE`},children:` conditional`}),_jsx(_components.span,{style:{color:`#1F2328`,\"--shiki-dark\":`#D4D4D4`},children:` {`})]}),`\n`,_jsxs(_components.span,{className:`line`,children:[_jsx(_components.span,{style:{color:`#CF222E`,\"--shiki-dark\":`#C586C0`},children:` if`}),_jsx(_components.span,{style:{color:`#1F2328`,\"--shiki-dark\":`#D4D4D4`},children:` (`}),_jsx(_components.span,{style:{color:`#1F2328`,\"--shiki-dark\":`#9CDCFE`},children:`$user_id`}),_jsx(_components.span,{style:{color:`#CF222E`,\"--shiki-dark\":`#D4D4D4`},children:` ==`}),_jsx(_components.span,{style:{color:`#0550AE`,\"--shiki-dark\":`#B5CEA8`},children:` 0`}),_jsx(_components.span,{style:{color:`#1F2328`,\"--shiki-dark\":`#D4D4D4`},children:`) {`})]}),`\n`,_jsxs(_components.span,{className:`line`,children:[_jsx(_components.span,{style:{color:`#1F2328`,\"--shiki-dark\":`#9CDCFE`},children:` var`}),_jsx(_components.span,{style:{color:`#1F2328`,\"--shiki-dark\":`#D4D4D4`},children:`.`}),_jsx(_components.span,{style:{color:`#1F2328`,\"--shiki-dark\":`#9CDCFE`},children:`update`}),_jsx(_components.span,{style:{color:`#1F2328`,\"--shiki-dark\":`#9CDCFE`},children:` $user_id`}),_jsx(_components.span,{style:{color:`#1F2328`,\"--shiki-dark\":`#D4D4D4`},children:` {`})]}),`\n`,_jsxs(_components.span,{className:`line`,children:[_jsx(_components.span,{style:{color:`#1F2328`,\"--shiki-dark\":`#9CDCFE`},children:` value`}),_jsx(_components.span,{style:{color:`#CF222E`,\"--shiki-dark\":`#D4D4D4`},children:` =`}),_jsx(_components.span,{style:{color:`#0550AE`,\"--shiki-dark\":`#569CD6`},children:` null`})]}),`\n`,_jsx(_components.span,{className:`line`,children:_jsx(_components.span,{style:{color:`#1F2328`,\"--shiki-dark\":`#D4D4D4`},children:` }`})}),`\n`,_jsx(_components.span,{className:`line`,children:_jsx(_components.span,{style:{color:`#1F2328`,\"--shiki-dark\":`#D4D4D4`},children:` }`})}),`\n`,_jsx(_components.span,{className:`line`,children:_jsx(_components.span,{style:{color:`#1F2328`,\"--shiki-dark\":`#D4D4D4`},children:` }`})}),`\n`,_jsx(_components.span,{className:`line`,children:_jsx(_components.span,{style:{color:`#1F2328`,\"--shiki-dark\":`#D4D4D4`},children:` `})}),`\n`,_jsxs(_components.span,{className:`line`,children:[_jsx(_components.span,{style:{color:`#1F2328`,\"--shiki-dark\":`#9CDCFE`},children:` db`}),_jsx(_components.span,{style:{color:`#1F2328`,\"--shiki-dark\":`#D4D4D4`},children:`.`}),_jsx(_components.span,{style:{color:`#1F2328`,\"--shiki-dark\":`#9CDCFE`},children:`add`}),_jsx(_components.span,{style:{color:`#1F2328`,\"--shiki-dark\":`#9CDCFE`},children:` audit_log`}),_jsx(_components.span,{style:{color:`#1F2328`,\"--shiki-dark\":`#D4D4D4`},children:` {`})]}),`\n`,_jsxs(_components.span,{className:`line`,children:[_jsx(_components.span,{style:{color:`#1F2328`,\"--shiki-dark\":`#9CDCFE`},children:` data`}),_jsx(_components.span,{style:{color:`#CF222E`,\"--shiki-dark\":`#D4D4D4`},children:` =`}),_jsx(_components.span,{style:{color:`#1F2328`,\"--shiki-dark\":`#D4D4D4`},children:` {`})]}),`\n`,_jsxs(_components.span,{className:`line`,children:[_jsx(_components.span,{style:{color:`#1F2328`,\"--shiki-dark\":`#9CDCFE`},children:` user_id :`}),_jsx(_components.span,{style:{color:`#1F2328`,\"--shiki-dark\":`#9CDCFE`},children:` $user_id`})]}),`\n`,_jsxs(_components.span,{className:`line`,children:[_jsx(_components.span,{style:{color:`#1F2328`,\"--shiki-dark\":`#9CDCFE`},children:` request_type`}),_jsx(_components.span,{style:{color:`#1F2328`,\"--shiki-dark\":`#D4D4D4`},children:`: `}),_jsx(_components.span,{style:{color:`#1F2328`,\"--shiki-dark\":`#9CDCFE`},children:`$input`}),_jsx(_components.span,{style:{color:`#1F2328`,\"--shiki-dark\":`#D4D4D4`},children:`.`}),_jsx(_components.span,{style:{color:`#1F2328`,\"--shiki-dark\":`#9CDCFE`},children:`type`})]}),`\n`,_jsxs(_components.span,{className:`line`,children:[_jsx(_components.span,{style:{color:`#1F2328`,\"--shiki-dark\":`#9CDCFE`},children:` created_at`}),_jsx(_components.span,{style:{color:`#1F2328`,\"--shiki-dark\":`#D4D4D4`},children:` : `}),_jsx(_components.span,{style:{color:`#1F2328`,\"--shiki-dark\":`#9CDCFE`},children:`now`})]}),`\n`,_jsx(_components.span,{className:`line`,children:_jsx(_components.span,{style:{color:`#1F2328`,\"--shiki-dark\":`#D4D4D4`},children:` }`})}),`\n`,_jsxs(_components.span,{className:`line`,children:[_jsx(_components.span,{style:{color:`#1F2328`,\"--shiki-dark\":`#D4D4D4`},children:` } `}),_jsx(_components.span,{style:{color:`#CF222E`,\"--shiki-dark\":`#C586C0`},children:`as`}),_jsx(_components.span,{style:{color:`#953800`,\"--shiki-dark\":`#4EC9B0`},children:` $log_entry`})]}),`\n`,_jsx(_components.span,{className:`line`,children:_jsx(_components.span,{style:{color:`#1F2328`,\"--shiki-dark\":`#D4D4D4`},children:` }`})}),`\n`,_jsx(_components.span,{className:`line`}),`\n`,_jsxs(_components.span,{className:`line`,children:[_jsx(_components.span,{style:{color:`#1F2328`,\"--shiki-dark\":`#9CDCFE`},children:` response`}),_jsx(_components.span,{style:{color:`#CF222E`,\"--shiki-dark\":`#D4D4D4`},children:` =`}),_jsx(_components.span,{style:{color:`#1F2328`,\"--shiki-dark\":`#D4D4D4`},children:` {`}),_jsx(_components.span,{style:{color:`#1F2328`,\"--shiki-dark\":`#9CDCFE`},children:`log_entry:`}),_jsx(_components.span,{style:{color:`#1F2328`,\"--shiki-dark\":`#9CDCFE`},children:` $log_entry`}),_jsx(_components.span,{style:{color:`#1F2328`,\"--shiki-dark\":`#D4D4D4`},children:`}`})]}),`\n`,_jsxs(_components.span,{className:`line`,children:[_jsx(_components.span,{style:{color:`#1F2328`,\"--shiki-dark\":`#9CDCFE`},children:` response_strategy`}),_jsx(_components.span,{style:{color:`#CF222E`,\"--shiki-dark\":`#D4D4D4`},children:` =`}),_jsx(_components.span,{style:{color:`#0A3069`,\"--shiki-dark\":`#CE9178`},children:` \"merge\"`})]}),`\n`,_jsxs(_components.span,{className:`line`,children:[_jsx(_components.span,{style:{color:`#1F2328`,\"--shiki-dark\":`#9CDCFE`},children:` exception_policy`}),_jsx(_components.span,{style:{color:`#CF222E`,\"--shiki-dark\":`#D4D4D4`},children:` =`}),_jsx(_components.span,{style:{color:`#0A3069`,\"--shiki-dark\":`#CE9178`},children:` \"silent\"`})]}),`\n`,_jsxs(_components.span,{className:`line`,children:[_jsx(_components.span,{style:{color:`#1F2328`,\"--shiki-dark\":`#9CDCFE`},children:` tags`}),_jsx(_components.span,{style:{color:`#CF222E`,\"--shiki-dark\":`#D4D4D4`},children:` =`}),_jsx(_components.span,{style:{color:`#1F2328`,\"--shiki-dark\":`#D4D4D4`},children:` [`}),_jsx(_components.span,{style:{color:`#0A3069`,\"--shiki-dark\":`#CE9178`},children:`\"logging\"`}),_jsx(_components.span,{style:{color:`#1F2328`,\"--shiki-dark\":`#D4D4D4`},children:`]`})]}),`\n`,_jsx(_components.span,{className:`line`,children:_jsx(_components.span,{style:{color:`#1F2328`,\"--shiki-dark\":`#D4D4D4`},children:`}`})}),`\n`]})})})})]})]})}function MDXContent(props={}){const{wrapper:MDXLayout}={..._provideComponents(),...props.components};return MDXLayout?_jsx(MDXLayout,{...props,children:_jsx(_createMdxContent,{...props})}):_createMdxContent(props)}return{default:MDXContent};function _missingMdxReference(id,component){throw new Error(`Expected `+(component?`component`:`object`)+\" `\"+id+\"` to be defined: you likely forgot to import, pass, or provide it.\")}","frontmatter":{},"scope":{"config":{},"pageMetadata":{"title":"Middleware","description":"Middleware is used to add additional logic that executes before or after other logic.","href":"/building/logic/middleware"}}},"mdxSourceWithNoJs":null},"mdxExtracts":{"tableOfContents":[{"title":"Building Middleware in Xano","slug":"building-middleware-in-xano","depth":2,"children":[]},{"title":"Applying Middleware to Workflows","slug":"applying-middleware-to-workflows","depth":2,"children":[{"title":"Workspace level","slug":"workspace-level","depth":3,"children":[]},{"title":"Applying middleware to a workflow group","slug":"applying-middleware-to-a-workflow-group","depth":3,"children":[]},{"title":"Applying middleware to an individual workflow","slug":"applying-middleware-to-an-individual-workflow","depth":3,"children":[]}]},{"title":"Handling public and authenticated requests","slug":"handling-public-and-authenticated-requests","depth":2,"children":[]}],"codeExamples":{}},"jsLinks":["/_mintlify/custom/xano-997cb9ee/7ccbde81bbdf9fb7/remark-link-graph.js","/_mintlify/custom/xano-997cb9ee/8b02dc1f3860c4eb/iconvisibility.js","/_mintlify/custom/xano-997cb9ee/8bba6e93fd00475c/chat-dim.js","/_mintlify/custom/xano-997cb9ee/f6ebfcfeda318efb/toc-indicator.js","/_mintlify/custom/xano-997cb9ee/2152a7ac01bb32e6/accordion-hash.js","/_mintlify/custom/xano-997cb9ee/d9385cd9a5429ca0/faq-controls.js"],"subdomain":"xano-997cb9ee","siteName":"Xano Documentation","title":"Middleware - Xano Documentation","relatedPagesConfig":{"enabled":true,"limit":3,"mode":"automatic"},"contextualStarterQuestions":[{"_id":"6a72681dec4c2e9ce1382e8f","deploymentId":"680ff9808abe3a2c762b86fa","questionText":"How do response types work?","status":"active","generatedBy":"contextual","path":"building/logic/middleware","createdAt":"2026-08-04T22:30:53.632Z","updatedAt":"2026-08-04T22:30:53.632Z","__v":0},{"_id":"6a72681dec4c2e9ce1382e8e","deploymentId":"680ff9808abe3a2c762b86fa","questionText":"What can middleware be applied to?","status":"active","generatedBy":"contextual","path":"building/logic/middleware","createdAt":"2026-08-04T22:30:53.632Z","updatedAt":"2026-08-04T22:30:53.632Z","__v":0}],"navMaps":{"firstHrefInVersion":{},"firstHrefInLanguage":{}},"lastModified":"2026-07-06T20:16:44.978Z","originalFileLocation":"building/logic/middleware.mdx"},"headHtml":"\u003cscript data-mint-head>(function(){var d=document.documentElement,p=null;if(!p){try{p=localStorage.getItem(\"isDarkMode\")}catch(e){}if(p==='true')p='dark';else if(p==='false')p='light';if(p!=='light'\u0026\u0026p!=='dark'\u0026\u0026p!=='system')p=\"system\"}var r=p==='system'?(matchMedia(\"(prefers-color-scheme: dark)\").matches?'dark':'light'):p;d.classList.remove(r==='dark'?'light':'dark');d.classList.add(r);d.setAttribute(\"data-theme-preference\",p)})();\u003c/script>\u003cmeta data-mint-head name=\"description\" content=\"Middleware is used to add additional logic that executes before or after other logic.\">\u003cmeta data-mint-head name=\"application-name\" content=\"Xano Documentation\">\u003cmeta data-mint-head name=\"generator\" content=\"Mintlify\">\u003clink data-mint-head rel=\"icon\" type=\"image/png\" sizes=\"192x192\" href=\"/mintlify-assets/_mintlify/favicons/xano-997cb9ee/cgGwIFviWDgTKtuE/_generated/favicon/android-chrome-192x192.png\" media=\"(prefers-color-scheme: light)\">\u003clink data-mint-head rel=\"apple-touch-icon\" type=\"image/png\" sizes=\"180x180\" href=\"/mintlify-assets/_mintlify/favicons/xano-997cb9ee/cgGwIFviWDgTKtuE/_generated/favicon/apple-touch-icon.png\">\u003clink data-mint-head rel=\"icon\" type=\"image/png\" sizes=\"16x16\" href=\"/mintlify-assets/_mintlify/favicons/xano-997cb9ee/cgGwIFviWDgTKtuE/_generated/favicon/favicon-16x16.png\" media=\"(prefers-color-scheme: light)\">\u003clink data-mint-head rel=\"icon\" type=\"image/png\" sizes=\"32x32\" href=\"/mintlify-assets/_mintlify/favicons/xano-997cb9ee/cgGwIFviWDgTKtuE/_generated/favicon/favicon-32x32.png\" media=\"(prefers-color-scheme: light)\">\u003clink data-mint-head rel=\"shortcut icon\" type=\"image/x-icon\" href=\"/mintlify-assets/_mintlify/favicons/xano-997cb9ee/cgGwIFviWDgTKtuE/_generated/favicon/favicon.ico\" media=\"(prefers-color-scheme: light)\">\u003clink data-mint-head rel=\"icon\" type=\"image/png\" sizes=\"192x192\" href=\"/mintlify-assets/_mintlify/favicons/xano-997cb9ee/cgGwIFviWDgTKtuE/_generated/favicon-dark/android-chrome-192x192.png\" media=\"(prefers-color-scheme: dark)\">\u003clink data-mint-head rel=\"icon\" type=\"image/png\" sizes=\"16x16\" href=\"/mintlify-assets/_mintlify/favicons/xano-997cb9ee/cgGwIFviWDgTKtuE/_generated/favicon-dark/favicon-16x16.png\" media=\"(prefers-color-scheme: dark)\">\u003clink data-mint-head rel=\"icon\" type=\"image/png\" sizes=\"32x32\" href=\"/mintlify-assets/_mintlify/favicons/xano-997cb9ee/cgGwIFviWDgTKtuE/_generated/favicon-dark/favicon-32x32.png\" media=\"(prefers-color-scheme: dark)\">\u003clink data-mint-head rel=\"shortcut icon\" type=\"image/x-icon\" href=\"/mintlify-assets/_mintlify/favicons/xano-997cb9ee/cgGwIFviWDgTKtuE/_generated/favicon-dark/favicon.ico\" media=\"(prefers-color-scheme: dark)\">\u003cmeta data-mint-head property=\"og:title\" content=\"Middleware - Xano Documentation\">\u003cmeta data-mint-head property=\"og:description\" content=\"Visual-first unified backend for modern apps. Build APIs, AI Agents, data, logic, auth, \u0026amp; more—all in one platform.\">\u003cmeta data-mint-head property=\"og:site_name\" content=\"Xano Documentation\">\u003cmeta data-mint-head property=\"og:url\" content=\"https://docs.xano.com/building/logic/middleware\">\u003cmeta data-mint-head property=\"og:type\" content=\"website\">\u003cmeta data-mint-head property=\"og:image\" content=\"https://xano-997cb9ee.mintlify.app/_mintlify/api/og/v2?division=Logic+%26+Workflows\u0026amp;title=Middleware\u0026amp;description=Middleware+is+used+to+add+additional+logic+that+executes+before+or+after+other+logic.\u0026amp;theme=991549f2bf4987512c34ef45\u0026amp;signature=35e94e7df185c170d8ab7cc1e1a87860997a8f57eb1a9113f500603cf7932eea\">\u003cmeta data-mint-head property=\"og:image:width\" content=\"1200\">\u003cmeta data-mint-head property=\"og:image:height\" content=\"630\">\u003cmeta data-mint-head name=\"twitter:card\" content=\"summary_large_image\">\u003cmeta data-mint-head name=\"twitter:title\" content=\"Middleware - Xano Documentation\">\u003cmeta data-mint-head name=\"twitter:description\" content=\"Visual-first unified backend for modern apps. Build APIs, AI Agents, data, logic, auth, \u0026amp; more—all in one platform.\">\u003cmeta data-mint-head name=\"twitter:image\" content=\"https://xano-997cb9ee.mintlify.app/_mintlify/api/og/v2?division=Logic+%26+Workflows\u0026amp;title=Middleware\u0026amp;description=Middleware+is+used+to+add+additional+logic+that+executes+before+or+after+other+logic.\u0026amp;theme=991549f2bf4987512c34ef45\u0026amp;signature=35e94e7df185c170d8ab7cc1e1a87860997a8f57eb1a9113f500603cf7932eea\">\u003cmeta data-mint-head name=\"twitter:image:width\" content=\"1200\">\u003cmeta data-mint-head name=\"twitter:image:height\" content=\"630\">\u003cmeta data-mint-head name=\"msapplication-config\" content=\"/mintlify-assets/_mintlify/favicons/xano-997cb9ee/cgGwIFviWDgTKtuE/_generated/favicon/browserconfig.xml\">\u003cmeta data-mint-head name=\"apple-mobile-web-app-title\" content=\"Xano Documentation\">\u003cmeta data-mint-head name=\"msapplication-TileColor\" content=\"#1b62f8\">\u003clink data-mint-head rel=\"canonical\" href=\"https://docs.xano.com/building/logic/middleware\">\u003clink data-mint-head rel=\"alternate\" type=\"application/xml\" href=\"/sitemap.xml\">\u003clink data-mint-head rel=\"alternate\" type=\"text/markdown\" href=\"/building/logic/middleware.md\">\u003cscript data-mint-head type=\"application/ld+json\">{\"@context\":\"https://schema.org\",\"@graph\":[{\"@type\":\"Organization\",\"@id\":\"https://docs.xano.com/#organization\",\"name\":\"Xano Documentation\",\"url\":\"https://docs.xano.com\",\"logo\":{\"@type\":\"ImageObject\",\"url\":\"https://mintcdn.com/xano-997cb9ee/hLg--ImSu58u2jLW/logo/logo_wordmark_blue_1_.svg?fit=max\u0026auto=format\u0026n=hLg--ImSu58u2jLW\u0026q=85\u0026s=487b8933249723b2ebc7bf7b6179ea0c\"}},{\"@type\":\"WebSite\",\"@id\":\"https://docs.xano.com#website\",\"name\":\"Xano Documentation\",\"url\":\"https://docs.xano.com\",\"publisher\":{\"@id\":\"https://docs.xano.com/#organization\"}},{\"@type\":\"WebPage\",\"@id\":\"https://docs.xano.com/building/logic/middleware#webpage\",\"url\":\"https://docs.xano.com/building/logic/middleware\",\"name\":\"Middleware\",\"description\":\"Middleware is used to add additional logic that executes before or after other logic.\",\"dateModified\":\"2026-07-06T20:16:44.978Z\",\"isPartOf\":{\"@id\":\"https://docs.xano.com#website\"},\"breadcrumb\":{\"@id\":\"https://docs.xano.com/building/logic/middleware#breadcrumb\"}},{\"@type\":\"BreadcrumbList\",\"@id\":\"https://docs.xano.com/building/logic/middleware#breadcrumb\",\"itemListElement\":[{\"@type\":\"ListItem\",\"position\":1,\"name\":\"Build\",\"item\":\"https://docs.xano.com/getting-started-ai\"},{\"@type\":\"ListItem\",\"position\":2,\"name\":\"Logic \u0026 Workflows\",\"item\":\"https://docs.xano.com/building/logic/logic\"},{\"@type\":\"ListItem\",\"position\":3,\"name\":\"Middleware\",\"item\":\"https://docs.xano.com/building/logic/middleware\"}]},{\"@type\":[\"Article\",\"TechArticle\"],\"@id\":\"https://docs.xano.com/building/logic/middleware#article\",\"headline\":\"Middleware\",\"name\":\"Middleware\",\"description\":\"Middleware is used to add additional logic that executes before or after other logic.\",\"url\":\"https://docs.xano.com/building/logic/middleware\",\"mainEntityOfPage\":{\"@id\":\"https://docs.xano.com/building/logic/middleware#webpage\"},\"dateModified\":\"2026-07-06T20:16:44.978Z\",\"publisher\":{\"@id\":\"https://docs.xano.com/#organization\"},\"isPartOf\":{\"@id\":\"https://docs.xano.com#website\"}}]}\u003c/script>\u003cscript data-mint-head type=\"application/ld+json\">{\"@context\":\"https://schema.org\",\"@type\":\"WebSite\",\"name\":\"Xano Documentation\",\"creator\":{\"@type\":\"Organization\",\"name\":\"Mintlify\",\"url\":\"https://mintlify.com\"}}\u003c/script>","siteName":"Xano Documentation","nav":{"global":null,"tabs":[{"tab":"Xano","icon":"https://mintlify.s3.us-west-1.amazonaws.com/xano-997cb9ee/images/icons/xano.svg","pages":[{"title":"Get Started","icon":"rocket","href":""},{"title":"What's New","icon":"newspaper","href":"/updates"},{"title":"Xano — Features \u0026 Capabilities FAQ","sidebarTitle":"FAQ","icon":"circle-question","href":"/frequently-asked-questions"},{"title":"Navigating Xano","icon":"compass","tag":"NEW","href":"/navigating-xano"},{"group":"Build","pages":[{"title":"Build from your Local Agent","sidebarTitle":"Agentic Development","icon":"robot","href":"/getting-started-ai"},{"title":"Xano Agent","tag":"NEW","icon":"wand-magic-sparkles","href":"/building/xano-agent"},{"title":"Knowledge","tag":"NEW","icon":"brain","href":"/agent-knowledge"},{"group":"Logic \u0026 Workflows","icon":"diagram-project","pages":[{"title":"Logic \u0026 Workflows","sidebarTitle":"Logic \u0026 Workflows","icon":"sitemap","href":"/building/logic/logic"},{"title":"Building APIs in Xano","sidebarTitle":"APIs","href":"/building/logic/apis"},{"title":"Building Custom Functions in Xano","sidebarTitle":"Custom Functions","href":"/building/logic/custom-functions"},{"title":"Background Tasks in Xano","sidebarTitle":"Background Tasks","href":"/building/logic/background-tasks"},{"title":"Triggers","description":"Triggers are workflows that can run based on other events that happen in your workspace.","href":"/building/logic/triggers"},{"title":"Middleware","href":"/building/logic/middleware"},{"title":"Inputs","sidebarTitle":"Inputs","description":"Data that is supplied to the logic before execution","href":"/building/logic/core-components/inputs"},{"title":"Logic","sidebarTitle":"Logic","href":"/building/logic/core-components/logic"},{"title":"Functions","sidebarTitle":"Functions","href":"/building/logic/core-components/functions"},{"title":"Variables","sidebarTitle":"Variables","href":"/building/logic/working-with-data/variables"},{"title":"Environment Variables","sidebarTitle":"Environment Variables","href":"/building/logic/working-with-data/environment-variables"},{"title":"Filters","sidebarTitle":"Filters","href":"/building/logic/core-components/filters"},{"title":"Response","sidebarTitle":"Response","href":"/building/logic/core-components/response"}]},{"group":"Database","icon":"database","pages":[{"title":"Database Overview","href":"/the-database/database"},{"title":"Database Basics","href":"/the-database/database-basics"},{"title":"Field Types","href":"/the-database/database-basics/field-types"},{"title":"Database Design Fundamentals","href":"/the-database/designing-your-database"},{"title":"Migrating Data to Xano","href":"/the-database/migrating-your-data"},{"title":"Data Sources","href":"/the-database/database-basics/data-sources"},{"title":"Database Views","href":"/the-database/database-basics/database-views"},{"title":"Export And Sharing","href":"/the-database/database-basics/export-and-sharing"},{"title":"Database Performance And Maintenance","href":"/the-database/database-performance-and-maintenance"}]},{"group":"AI Agents","icon":"robot","pages":[{"title":"Agents","href":"/ai-tools/agents"},{"title":"Using OpenTelemetry with AI Agents","sidebarTitle":"OpenTelemetry","href":"/ai-tools/agents/opentelemetry"},{"title":"Templates","href":"/ai-tools/agents/templates"}]},{"group":"MCP Servers","icon":"plug","pages":[{"title":"MCP Builder","sidebarTitle":"MCP Builder","href":"/ai-tools/mcp-builder"},{"title":"MCP Functions","href":"/ai-tools/mcp-builder/mcp-functions"},{"title":"Connecting Clients","href":"/ai-tools/mcp-builder/connecting-clients"},{"title":"Add OAuth to a Xano MCP server","sidebarTitle":"OAuth (Cloudflare Worker)","href":"/ai-tools/mcp-builder/oauth-proxy"}]},{"group":"Authentication","icon":"lock-keyhole","pages":[{"title":"User Auth \u0026 Data","href":"/building-backend-features/user-authentication-and-user-data"},{"title":"Separating User Data","href":"/building-backend-features/user-authentication-and-user-data/separating-user-data"},{"title":"Restricting Access (RBAC)","href":"/building-backend-features/user-authentication-and-user-data/restricting-access-rbac"},{"title":"OAuth (SSO)","href":"/building-backend-features/user-authentication-and-user-data/oauth-sso"},{"title":"Best Practices","icon":"shield-check","href":"/security/best-practices"},{"title":"Getting Answers to Security Questions","sidebarTitle":"Security Questionnaires","icon":"clipboard-question","href":"/security/getting-answers-to-security-questions"}]},{"group":"File Storage","icon":"folder-open","pages":[{"title":"File Storage In Xano","sidebarTitle":"File Storage","href":"/file-storage/file-storage-in-xano"},{"title":"Private File Storage","href":"/file-storage/private-file-storage"}]},{"group":"Realtime","icon":"signal-stream","pages":[{"title":"Realtime","sidebarTitle":"Overview","href":"/realtime/overview"},{"title":"Realtime Servers \u0026 Channels","sidebarTitle":"Servers \u0026 Channels","href":"/realtime/realtime-servers-and-channels"},{"title":"Connecting a Realtime Client","sidebarTitle":"Connecting a Client","href":"/realtime/connecting-a-client"},{"title":"Realtime Messages","sidebarTitle":"Messages","href":"/realtime/messages"},{"title":"Realtime Access Control","sidebarTitle":"Access Control","href":"/realtime/access-control"},{"title":"Realtime Triggers","sidebarTitle":"Triggers","href":"/realtime/realtime-triggers"},{"title":"Publishing to a Channel from Xano","sidebarTitle":"Publishing from Xano","href":"/realtime/publishing-from-xano"},{"title":"Legacy Realtime vs Realtime","sidebarTitle":"Legacy vs Realtime","href":"/realtime/migrating-from-legacy-realtime"}]}]},{"group":"Test \u0026 Deploy","pages":[{"group":"Test","icon":"flask","pages":[{"title":"Test Suites","href":"/testing-debugging/test-suites"},{"title":"Unit Tests","href":"/testing-debugging/unit-tests"},{"title":"Ephemeral Tenants","icon":"hourglass-half","tag":"NEW","href":"/xano-cli/ephemeral"},{"title":"Publishing","href":"/the-function-stack/building-with-visual-development/publishing"},{"title":"Swagger/OpenAPI Docs","href":"/the-function-stack/building-with-visual-development/apis/swagger-openapi-documentation"}]},{"group":"Deploy","icon":"cloud-arrow-up","tag":"NEW","pages":[{"title":"Deployment Readiness","icon":"clipboard-check","href":"/deployment-readiness"},{"title":"Static Hosting","href":"/xano-features/static-hosting"},{"title":"Sandbox Testing","tag":"NEW","href":"/testing-debugging/sandbox"},{"group":"Connecting a Frontend","pages":[{"title":"Connecting a Frontend","icon":"browser","href":"/connecting-to-a-frontend/overview"},{"title":"Custom Coded Apps","href":"/connecting-to-a-frontend/custom-coded-apps"},{"title":"AI App Builders","href":"/connecting-to-a-frontend/ai-app-builders"},{"title":"No-Code App Builders","href":"/connecting-to-a-frontend/no-code-builders"}]},{"title":"Git Sync","sidebarTitle":"Git Sync","href":"/xano-features/workspace-settings/git-sync"}]},{"group":"Monitor \u0026 Troubleshoot","icon":"gauge-high","tag":"NEW","pages":[{"title":"Performance Insights","href":"/maintenance-monitoring-and-logging/performance-insights"},{"title":"Request History","tag":"UPDATED","href":"/maintenance-monitoring-and-logging/request-history"},{"title":"Statement Explorer","href":"/maintenance-monitoring-and-logging/statement-explorer"},{"title":"Error Logs","tag":"NEW","href":"/maintenance-monitoring-and-logging/error-logs"},{"title":"Audit Logs","href":"/xano-features/workspace-settings/audit-logs"},{"title":"What to Do If Your APIs Aren't Responding","href":"/troubleshooting-and-support/my-apis-arent-responding"},{"title":"What to Do If Your Instance Is Down","href":"/troubleshooting-and-support/my-instance-is-down"},{"title":"Error Reference","href":"/troubleshooting-and-support/error-reference"},{"title":"Reporting Potential Bugs and Issues","href":"/troubleshooting-and-support/reporting-potential-bugs-and-issues"}]}]},{"group":"Team Collaboration","pages":[{"title":"Team Collaboration","icon":"users","href":"/team-collaboration/team-collaboration"},{"title":"Managing Team Members","icon":"user-gear","href":"/team-collaboration/managing-team-members"},{"title":"Realtime Collaboration","icon":"arrows-rotate","href":"/team-collaboration/realtime-collaboration"},{"title":"Branching \u0026 Merging","icon":"code-branch","href":"/team-collaboration/branching-and-merging"},{"title":"Role Based Access Control (RBAC)","icon":"user-shield","href":"/team-collaboration/role-based-access-control-rbac"}]},{"group":"Integrations","pages":[{"title":"Browse Integrations","url":"https://www.xano.com/connect/","icon":"puzzle-piece","href":"/connect"},{"title":"Webhooks","icon":"webhook","href":"/building-backend-features/webhooks"},{"title":"Connecting a Frontend","icon":"browser","href":"/connecting-to-a-frontend/overview"},{"title":"Metadata API","icon":"brackets-curly","href":"/xano-features/metadata-api"},{"title":"Xano MCP Server","icon":"share-nodes","href":"/ai-tools/xano-mcp-server"}]},{"group":"Security","pages":[{"title":"Best Practices","icon":"shield-check","href":"/security/best-practices"},{"title":"Securing Your App Before Launch","sidebarTitle":"Pre-Launch Security","icon":"list-check","href":"/security/pre-launch-security-checklist"},{"title":"Getting Answers to Security Questions","sidebarTitle":"Security Questionnaires","icon":"clipboard-question","href":"/security/getting-answers-to-security-questions"},{"title":"GDPR","url":"https://security.xano.com/certifications/gdpr","icon":"earth-europe","href":"/security/gdpr"},{"title":"HIPAA","url":"https://security.xano.com/certifications/hipaa","icon":"suitcase-medical","href":"/security/hipaa"},{"title":"SOC 2","url":"https://security.xano.com/certifications/soc-2","icon":"certificate","href":"/security/soc2"},{"title":"security.xano.com","url":"https://security.xano.com","icon":"shield-halved","href":"/security/security"}]},{"group":"Tutorials","pages":[{"group":"Ready-to-use Building Blocks","icon":"cubes","expanded":false,"pages":[{"title":"Snippets","icon":"scissors","href":"/xano-features/snippets"},{"title":"Actions","icon":"block-brick","href":"/xano-actions/what-are-actions"},{"title":"Browse Actions","url":"https://xano.com/actions","href":"/xano-actions/browse-actions"},{"title":"Browse Snippets","url":"https://xano.com/snippet","href":"/browse-snippets"}]},{"group":"Build-along Guides","icon":"graduation-cap","expanded":false,"pages":[{"title":"User Auth \u0026 Data","href":"/building-backend-features/user-authentication-and-user-data"},{"title":"Emails","href":"/building-backend-features/emails"},{"title":"Webhooks","icon":"webhook","href":"/building-backend-features/webhooks"},{"title":"Fuzzy Search","href":"/building-backend-features/fuzzy-search"},{"title":"Messaging","href":"/building-backend-features/messaging"},{"title":"Chatbots","href":"/building-backend-features/chatbots"},{"title":"Custom Report Generation","href":"/building-backend-features/custom-report-generation"}]}]},{"group":"Enterprise","pages":[{"title":"Tenant Center","icon":"building","href":"/enterprise/enterprise-features/tenant-center"},{"title":"Compliance Center","icon":"clipboard-check","href":"/enterprise/enterprise-features/compliance-center"},{"title":"Security Policy","icon":"file-shield","href":"/enterprise/enterprise-features/security-policy"},{"title":"Instance Activity","icon":"chart-line","href":"/enterprise/enterprise-features/instance-activity"},{"title":"Deployment","icon":"rocket-launch","href":"/enterprise/enterprise-features/deployment"},{"title":"RBAC (Role-based Access Control)","icon":"user-shield","href":"/enterprise/enterprise-features/rbac-role-based-access-control"},{"title":"Xano Link","icon":"link","href":"/enterprise/enterprise-features/xano-link"},{"title":"Resource Management","icon":"sliders-up","href":"/enterprise/enterprise-features/resource-management"},{"group":"Microservices","icon":"boxes-stacked","pages":[{"title":"Microservices","sidebarTitle":"Instance Level Microservices","href":"/enterprise/enterprise-features/microservices"},{"group":"In the Workspace","icon":"sitemap","tag":"NEW","pages":[{"title":"Microservices in the Workspace","sidebarTitle":"Overview","icon":"sitemap","href":"/enterprise/enterprise-features/microservices/workspace-microservices"},{"title":"Creating a Microservice","icon":"plus","href":"/enterprise/enterprise-features/microservices/workspace-microservices/creating-a-microservice"},{"title":"Private Registries","icon":"key","href":"/enterprise/enterprise-features/microservices/workspace-microservices/private-registries"},{"title":"Deploying and Monitoring","icon":"chart-line","href":"/enterprise/enterprise-features/microservices/workspace-microservices/deploying-and-monitoring"},{"title":"Calling from the Function Stack","icon":"code","href":"/enterprise/enterprise-features/microservices/workspace-microservices/calling-from-the-function-stack"},{"title":"Releases and Tenants","icon":"building","href":"/enterprise/enterprise-features/microservices/workspace-microservices/releases-and-tenants"},{"title":"XanoScript Reference","icon":"file-code","href":"/enterprise/enterprise-features/microservices/workspace-microservices/xanoscript-reference"}]},{"title":"Ollama","sidebarTitle":"Example: Ollama","href":"/enterprise/enterprise-features/microservices/ollama"}]}]},{"group":"Agencies","pages":[{"title":"Xano For Agencies","icon":"handshake","href":"/agencies/xano-for-agencies"},{"title":"Agency Features","icon":"briefcase","href":"/agencies/agency-features"}]},{"group":"Account and Settings","pages":[{"title":"Workspace Settings","icon":"gear","href":"/xano-features/workspace-settings"},{"title":"Instance Settings","sidebarTitle":"Instance Settings","icon":"server","href":"/xano-features/instance-settings"},{"title":"Account Settings","icon":"circle-user","href":"/your-xano-account/account-page"},{"title":"Billing","icon":"credit-card","href":"/your-xano-account/billing"},{"title":"Getting Help","sidebarTitle":"Getting Support in Xano","icon":"life-ring","href":"/troubleshooting-and-support/getting-help"}]},{"group":"Legal","pages":[{"title":"Terms \u0026 Conditions","icon":"scale-balanced","href":"/legal"},{"title":"AI Terms","icon":"file-contract","href":"/legal/ai-terms"},{"title":"Privacy Notice","icon":"lock","href":"/legal/privacy-notice"},{"title":"Cookie Policy","icon":"cookie-bite","href":"/legal/cookie-policy"},{"title":"DMCA Policy","icon":"copyright","href":"/legal/dmca-policy"},{"title":"General Disclaimer","icon":"triangle-exclamation","href":"/legal/general-disclaimer"},{"title":"Subprocessors","icon":"sitemap","href":"/legal/xano-subprocessors"},{"title":"Referral Agreement","icon":"file-signature","href":"/legal/referral-program/agreement"},{"title":"FAQ","icon":"question","href":"/legal/referral-program/faq"}]}]},{"tab":"XanoScript","icon":"code","pages":[{"title":"XanoScript","href":"/xanoscript/introduction"}]},{"tab":"CLI","icon":"terminal","pages":[{"title":"CLI","href":"/xano-cli/get-started"}]},{"tab":"Developer MCP","icon":"robot","pages":[{"title":"Developer MCP","href":"/developer-mcp/get-started"}]},{"tab":"Metadata API","icon":"webhook","pages":[{"title":"Metadata API","href":"/api-reference/audit-logs/search-audit-logs-across-all-workspaces"}]}]},"title":"Middleware - Xano Documentation","buildId":"dpl_5UDDZ9hnigTkoV7QtvQ39eUp84nu","deploymentId":"dpl_5UDDZ9hnigTkoV7QtvQ39eUp84nu","dynamics":["07c022d89b","a74be98ba7"],"chunks":["Frame-CUTvSGqu.js","DynamicMarkdown-BGu84FgU.js","zoom-image-lightbox-ChyC7Hte.js","PlusIcon-DXkY3IBj.js","lightbox-handle-r17bVUz3.js"]}


 Xano
Xano