APIs

Learn more about building APIs using visual development in Xano

Quick Summary

Think of an API like a waiter in a restaurant - you (the user) give your order to the waiter (the API), who takes it to the kitchen and brings back exactly what you asked for. The waiter creates a seamless connection between you and the kitchen, just like an API connects different parts of an application.

An API acts like a messenger between different parts of an application. When your website needs something done (like creating a new user), it sends a request with the necessary data and gets back a response containing the results. Both requests and responses include headers (which provide context) and data (the actual content being sent or received).

What is an API?

APIs allow different applications to communicate and share data with each other. When you use Google Maps inside another app, that's an API at work. When you click a Buy Now button on Amazon, APIs are firing at all cylinders behind the scenes.

APIs don't have to only be based on user action, either. For example, most websites implement some sort of tracking to ensure that the user experience is as smooth as possible. When you visit these websites, there are API calls being made as you navigate through their frontend.

APIs set the rules for how different pieces of software can talk to each other, making it possible for developers to integrate various services without starting from scratch.

An API has a few main components.

1

Headers

Headers are the configuration that rides along with an API request. They contain information like where the request is coming from and what type of data it contains.

2

Method

The method, also known as the verb, is assigned to an API to typically dictate the type of operation the API is designed to complete.

  • GET

    • Retrieve data

  • POST

    • Send data

  • PUT / PATCH

    • Update data

  • DELETE

    • Delete data

Please note that when you build APIs in Xano, you can choose the method to apply, giving you full flexibility in exactly what function that API serves. While it isn't always best practice, a DELETE endpoint could technically do nothing but add new data, if it makes sense for your use case.

3

Query parameters / Request body

Query parameters and the request body are kind of the same thing, but sent in an API request in different ways.

  • Query parameters live as part of the request URL. If the API URL is https://myapi.com/getThings and expects you to send a thingId with your request, you would append it to the URL with ?thingId=99, so your full request URL would be https://myapi.com/getThings?thingId=99. You would typically use query parameters for GET and DELETE endpoints.

  • Request Body is like a set of query parameters, but sent as a JSON object. It's more flexible when sending complex data types, such as lists, nested objects, or files.

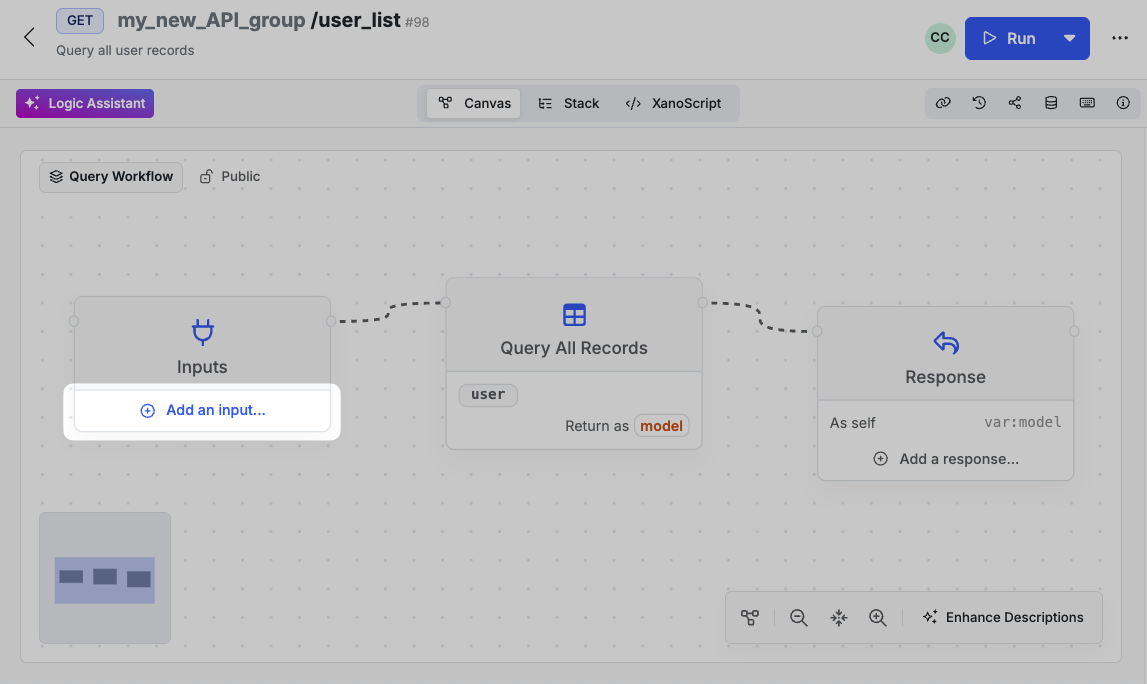
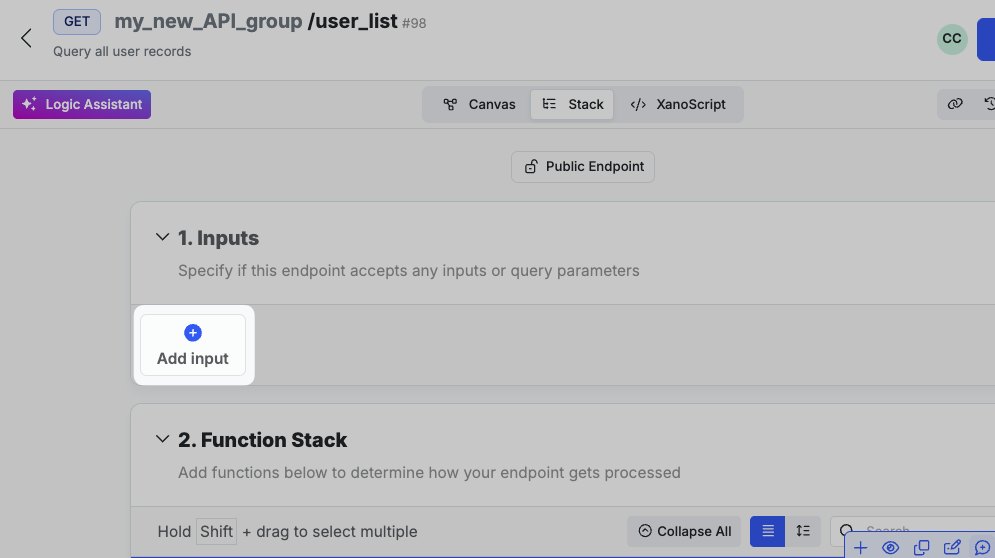
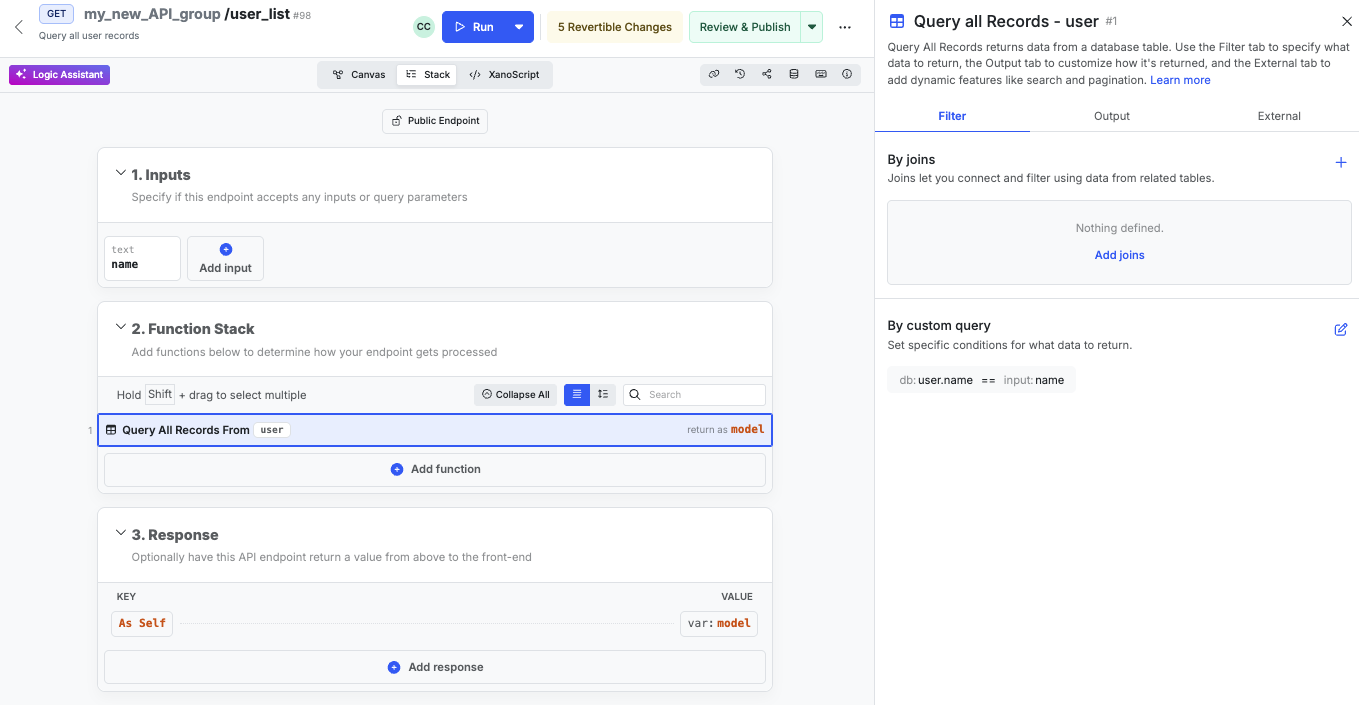
In the Xano visual builder, these are known as inputs. You can add inputs manually, or add a Database Link input to automatically populate and sync all fields from a database table.

4

Response

The response is whatever the API sends back once it has completed the logic it is meant to perform. An API doesn't necessarily need to deliver a response, but it is typical.

Think of your frontend sending an API request when a user logs in. That API request would probably return information about the user logging in, such as their name, location, or other relevant user data.

A response has a few different pieces, similar to what's included in the request, including response headers and a response body.


Auto-generated APIs

When adding a new API endpoint in Xano, you have four options to choose from — some of which will give you prebuilt APIs, ready to go right away!

CRUD Operations

These are database operations for reading, adding, and updating data in your database.

Please note that our default PATCH endpoint is designed to automatically filter out any null values or empty text strings that are typically sent by most frontend platforms. If you don't need these, you can remove the filters filter_null and filter_empty_text from the Patch Record function.

Authentication

These are APIs that handle login, signup, and checking an authenticated user's information.

File Storage

These APIs facilitate file upload to Xano.

Custom

Start with a blank canvas. Build anything.


API Groups & API Group Settings

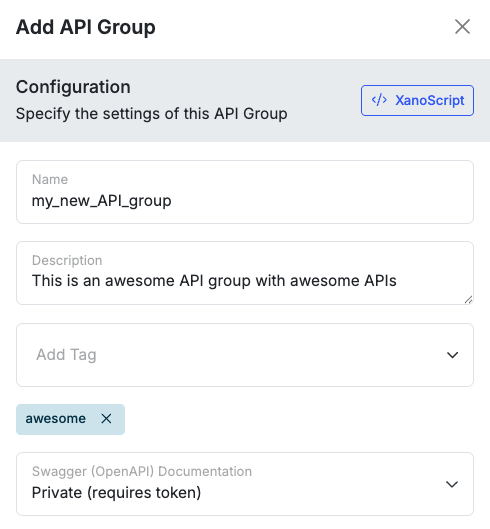
All APIs live inside of API groups. These are just like folders that you can use to organize all of your different APIs.

Each API group can be customized to your liking using the following options.

Setting
Function

Name

The name of the API group. Each name in an API group must be unique, including trailing parameters. This means that if you have an API named /user/{user_id}, you can not also have an API named /user/getUser

Description

An internal description of the API group

Tags

Tags are used to label different things you build in Xano, used to search for related items across the workspace

Swagger

Determines the access level of your auto-generated API documentation Public - Anyone with the link can access Private (requires token) - Anyone with the link appended with an auto-generated token can access Disabled - No API documentation will be made available

📖 Learn more about API auto-documentation

Request History

Choose whether to inherit your workspace's default request history settings, or specify new ones for this API group

📖 Learn more about request history

External Access

Quickly enable or disable public access to these APIs

Additionally, you can change the canonical ID of an API group from the Security section of the settings menu. The canonical ID dictates part of the endpoint URLs used to access those APIs, so proceed with caution before changing this.

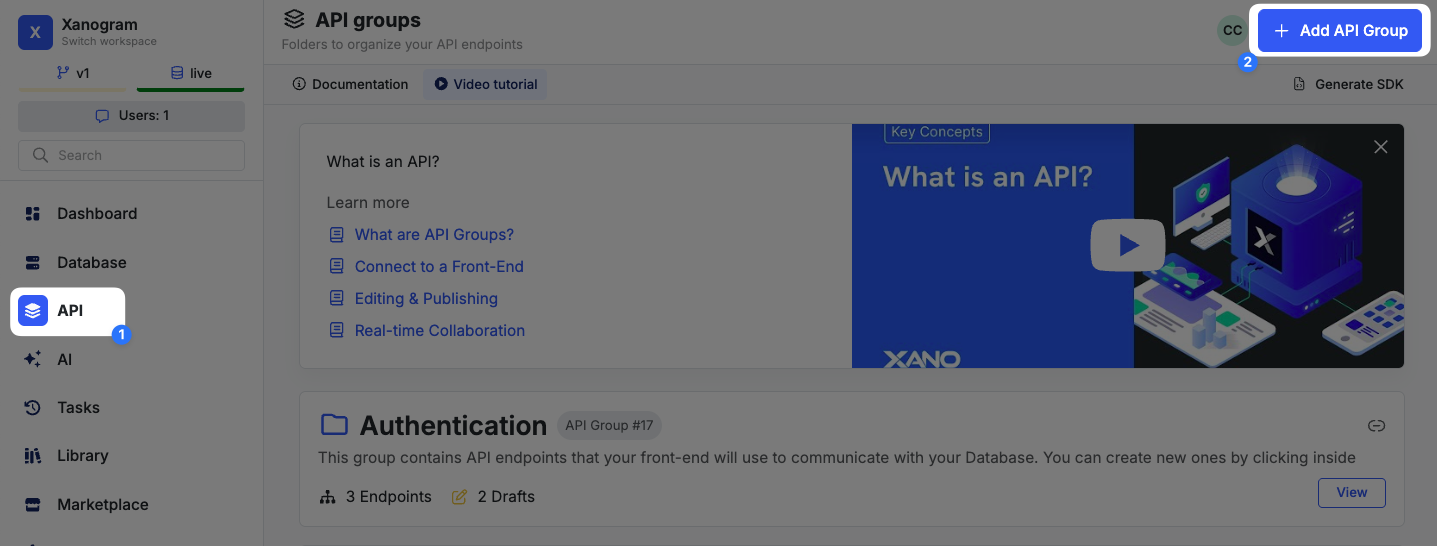
To access your API groups, click in the left-hand navigation menu.

Click on a group to enter it, or click to create a new one.

Some of these settings are only available after the API group is created.

CORS Management for API Groups

CORS, or Cross-Origin Resource Sharing, is like a security guard for web applications. It ensures that resources on a web page only talk to servers they are allowed to. Imagine visiting a friend's house; if your friend's parents don't know you, they might not let you in. Similarly, CORS ensures that only trusted sources can interact with your web application, keeping data safe and secure. This is important because it helps protect users from potentially harmful interactions between different websites.

In Xano, you can change CORS to one of three options:

  • Default - Xano uses wildcard values to allow all origins, methods, and headers. This satisfies the requirements of servers that ask for CORS, and also ensures that all requests are allowed.

  • Custom - You can specify your own CORS rules from here, such as only allowing requests from certain servers.

    • Allow Credentials - When checked, this allows requests to include credentials like cookies, HTTP authentication, or client-side SSL certificates. This is necessary if your frontend needs to send authentication information to your backend.

    • Allow Methods - These are the HTTP methods that your API will accept from other origins.

    • Allow Origins - This section lets you specify which domains can access your API. The "Add Origin" button lets you:

    • Allow Headers - Defines which HTTP headers can be used in requests. The "Add Header" button lets you specify custom headers beyond the standard ones.

    • Max Age - Set to 1 hour by default, this determines how long browsers should cache the CORS preflight response. This helps reduce the number of preflight requests (OPTIONS calls) that browsers make.

What is a preflight request?

Before accessing data from another site, your browser sends a "preflight request" to ask for permission. If approved, it proceeds with the main request. This step ensures your information stays safe during web interactions.


Creating a new API

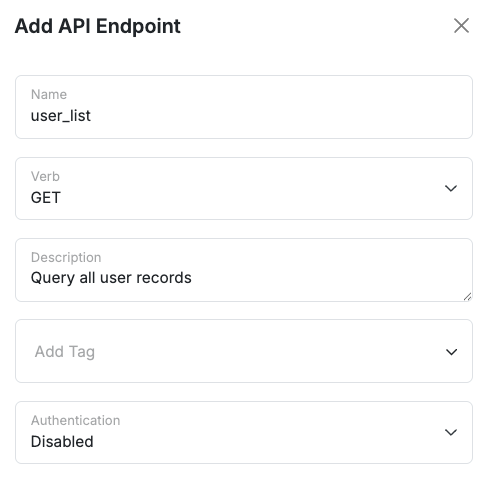
Click to create a new API endpoint.

Choose from one of the four different API types available.

CRUD stands for create, read, update, and delete. These are basic database operations that most applications will need to perform on one or more tables.

Xano can create these for you automatically, based on your database tables.

  1. Choose the table you want to create an action for.

  2. Select the endpoint type you want to create.

  3. Adjust any settings you wish for the new endpoint being created, and click


API Settings

From the Settings panel

Name
Purpose

Name

The name of the API endpoint. This also directly impacts the API URL.

Description

An internal description, just for you.

Verb

The API method

Tags

Use tags to organize objects throughout your Xano workspace and find them later

Request History

  • Inherit Settings

    • Use whatever is set in your workspace branch defaults

  • Other

    • Set specific request history settings for this endpoint

📖 Learn more about request history

External access

When disabled, this endpoint will not respond to requests.

Authentication

Choose whether this endpoint requires a valid authentication token present in the headers to execute

Response type

  • Standard

    • Waits for execution to finish and delivers the response all at once

  • Streaming

    • Used with the Streaming API Response function, stream the response in chunks to a service that supports it

📖 Learn more about streaming APIs

Response caching

Cache the response and redeliver it for future calls 📖 Learn more about response caching

Last updated

Was this helpful?