Developer API (deprecated)

The Developer API is deprecated. Please see the Metadata API (beta) for the newest solution.

The Xano Developer API allows you to interact with your account in an automated fashion.

The primary use case is the ability to authenticate and then retrieve Swagger/OpenAPI documentation for each of your API groups on each of your Xano instances. More functionality will be coming soon.

Since Xano supports a single tenant infrastructure on each of its premium instances, it is important to understand that different authentication is required for different aspects of this API.

Authentication starts with your Developer API Key, which allows you to authenticate your account with the master service. This master service is responsible for managing your account, subscriptions, and instances.

By listing each instance you have access to, you will then be able to re-authenticate with each individual instance to view the Developer API for that instance. Then you will have access to list workspaces and the API groups within each workspace, which then gives you access to the appropriate Swagger documentation for each API group.

Step 1: Generate your Developer API Key

This is available on the Account page. Every account has the ability to have a single Developer API Key. Once this is generated, it is no longer possible to view the key, so it is very important to write this down in a safe place, so it isn't forgotten. If it is forgotten, then you need to revoke the current one and generate a new key.
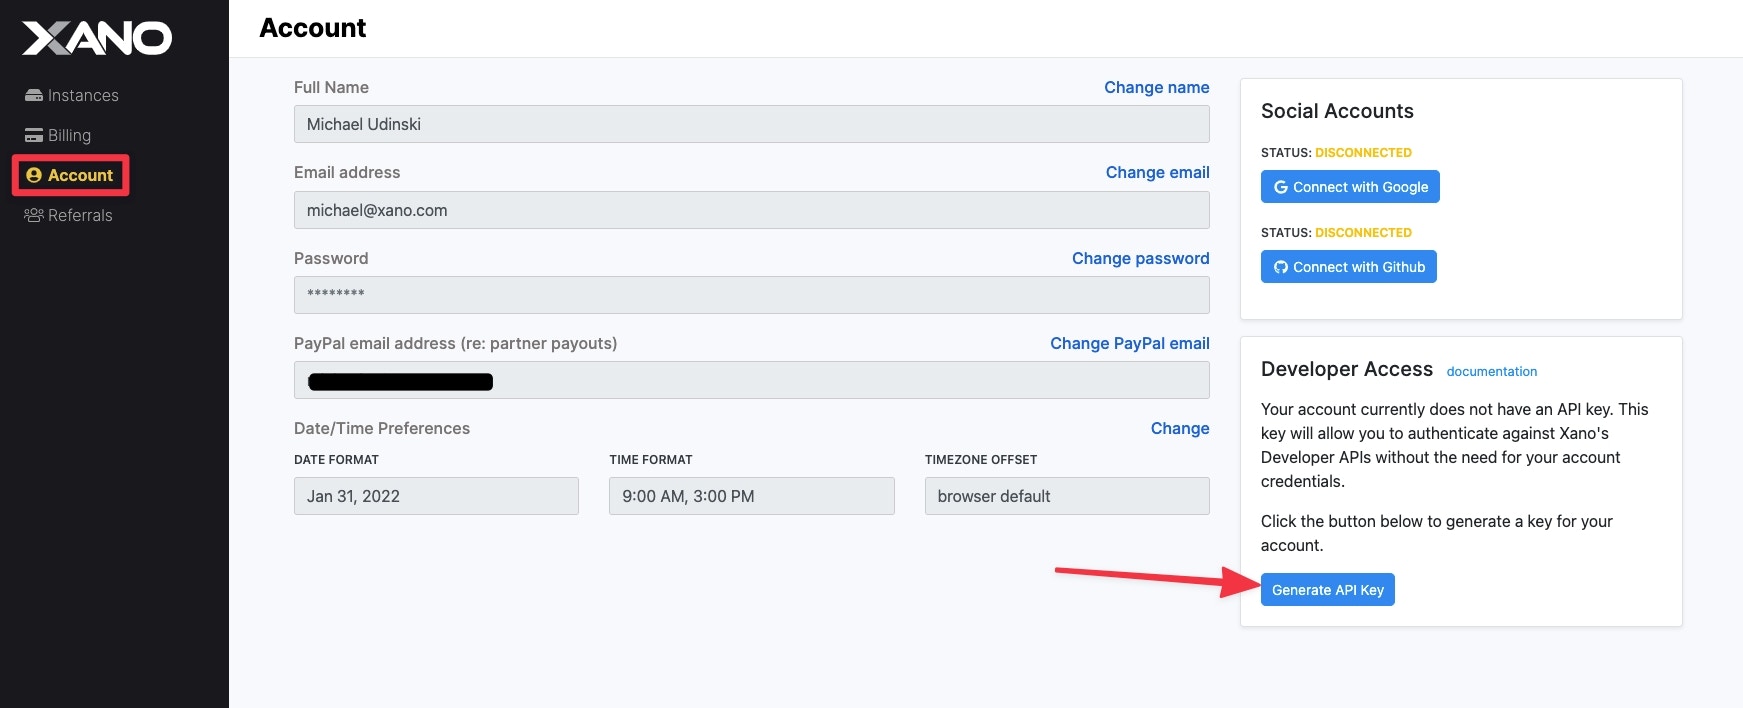
Step 2: Xano Master Service Documentation

Now that you have your API Key, you can start authenticating against the API endpoints for the Xano master service. The API documentation is detailed at https://app.xano.com/api:developer.

Currently, there is only support to list your Xano instances, but more functionality will be fleshed out over the next several releases.

Authentication is handled using the Authorization HTTP header along with the Bearer token specification.

If you are viewing the Swagger documentation, then you can click the "Authorize" button and paste in your Developer API key. Then you can click on the Instances endpoint and click the "Try Out" button to execute the API endpoint.

If you are using the API directly via your front-end or the CURL command line utility, then you would need to include your Developer API key as follows.

In the CURL example below you would replace the text YOUR_DEVELOPER_API_KEY with your actual Developer API Key.

curl -X 'GET' \
  'https://app.xano.com/api:developer/instance' \
  -H 'accept: application/json' \
  -H 'Authorization: Bearer YOUR_DEVELOPER_API_KEY'

The following would be an example response to expect, if your account had access to two instances.

[
  {
    "id": 1,
    "name": "explore-instance",
    "display": "Explore Instance",
    "description": "",
    "host": "",
    "tokenUrl": "https://app.xano.com/api:developer/token/auth?token=DBWJQ2..."
  },
  {
    "id": 2,
    "name": "starter-instance",
    "display": "Starter Instance",
    "description": "",
    "host": "",
    "tokenUrl": "https://app.xano.com/api:developer/token/auth?token=6B67wcN..."
  }
]

Step 3: Fetch the tokenUrl for your instance

The tokenUrl for each instance has an authenticated token parameter to give you access to the Authorization token required to call the API for that specific instance.

In the above example, if we fetch the tokenUrl, then the following example response would be expected.

{
  "authToken": "eyJhbGciOiJBMjU2S1ciLCJlbmMiOiJ...",
  "api": "https://x8d0-doy0-xx99.n0.xano.io/api:developer",
  "swaggerspec": "https://x8d0-doy0-xx99.n0.xano.io/apispec:developer?type=json",
  "origin": "https://x8d0-doy0-xx99.n0.xano.io"
}

The authToken key will be used to authenticate to any endpoints listed within the API or swaggerspec links.

The API key is a link to the Swagger documentation for the Developer APIs for this specific instance.

The swaggerspec key is a link to the json spec for the Swagger documentation in case you want to programmatically parse the endpoints available within the documentation.

The origin key is useful for knowing the desired http origin of any requests sent to the instance. This is normally Xano URL, but can change if a custom domain is enabled.

Step 4: Call the APIs of your Instance

Now that we have the authToken from Step 3, we can call the endpoints available within the API link above.

Any endpoints within this instance that require authentication, must use this authToken and not your API Developer Key. The API Developer Key is only intended for the Xano master service.

curl -X 'GET' \
  'https://x8d0-doy0-xx99.n0.xano.io/api:developer/workspace' \
  -H 'accept: application/json' \
  -H 'Authorization: Bearer eyJhbGciOiJBMjU2S1ciLCJlbmMiOiJ...'

Below is an example response to the workspace endpoint listed above.

[
  {
    "id": 2,
    "name": "Book Marketplace",
    "description": "This is an example workspace.",
    "apigroups": [
      {
        "id": 4,
        "name": "Public API",
        "description": "",
        "api": "https://x8d0-doy0-xx99.n0.xano.io/api:Wk_siXX",
        "swaggerspec": "https://x8d0-doy0-xx99.n0.xano.io/apispec:Wk_siXX"
      },
      {
        "id": 5,
        "name": "Private API",
        "description": "",
        "api": "https://xb17-541e-40b9.dev.xano.io/api:YkBUXX",
        "swaggerspec": "https://xb17-541e-40b9.dev.xano.io/apispec:YkBUXX"
      }
    ]
  }
]

From this response, you can see there is one workspace with two API Groups. Each API Group has its own api and swaggerspec key. The difference here is that these APIs are the ones built by you in your own instance. This also means that these will require their own Authentication.

Last updated